Opening the Node Configuration Panel
Click on any node in the canvas while in editing mode. The configuration panel slides open on the right side of the screen.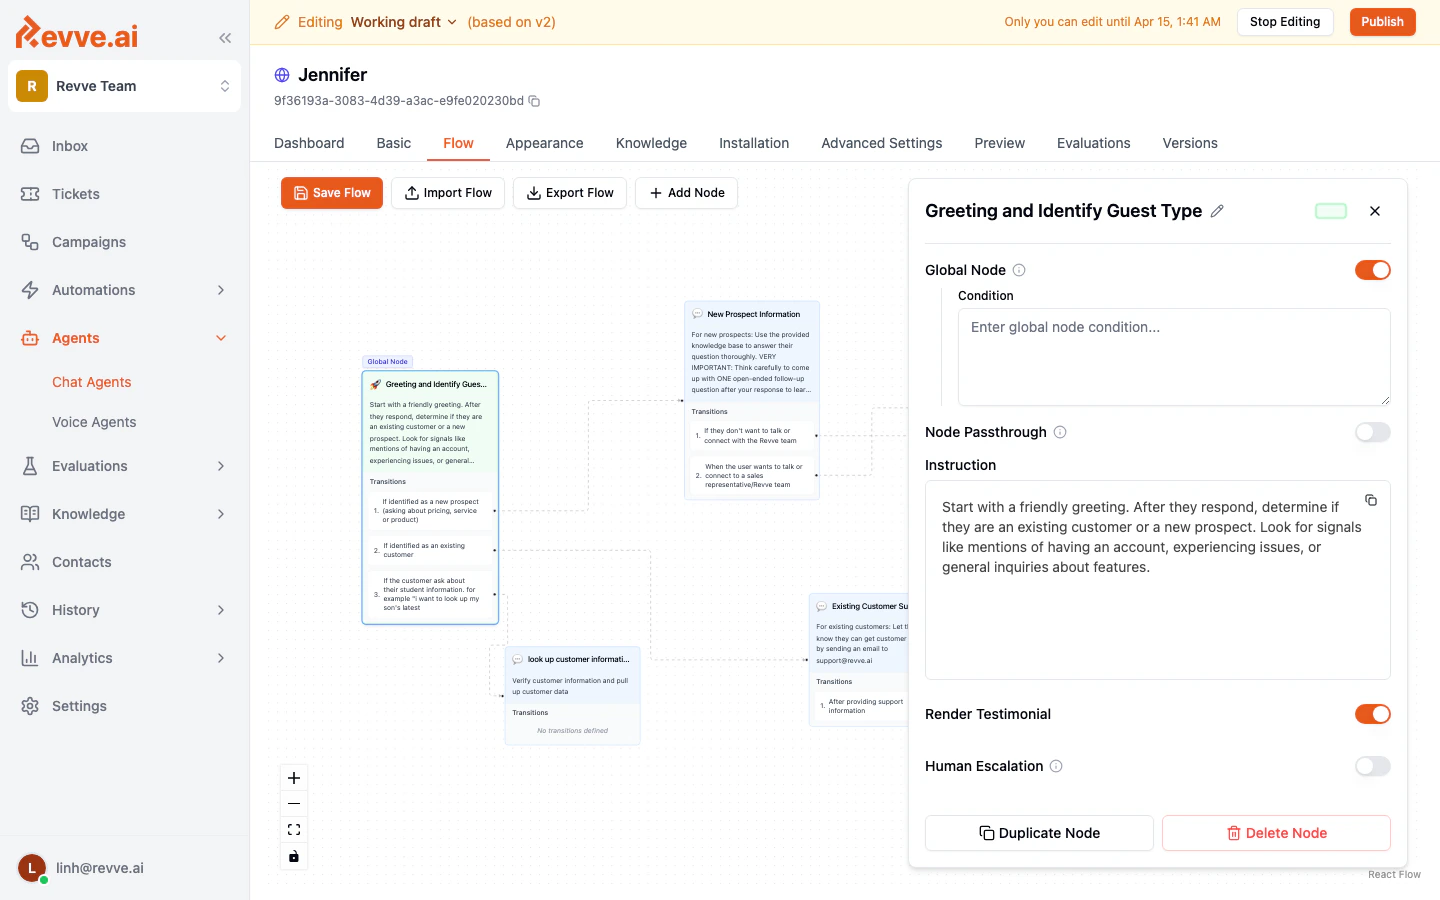
Node Name and Color
At the top of the panel, the node’s name is displayed. Click on the name to edit it inline. Next to the name, a color picker button lets you change the node’s background and border color on the canvas, making it easy to visually group or distinguish different types of nodes.Global Node
The Global Node toggle makes this node accessible from any other node in the flow. When enabled, a Condition field appears where you define when the AI should jump to this node. See Global Nodes and Prompts for details.Node Passthrough
The Node Passthrough toggle controls whether the AI can automatically traverse through this node to the next one in a single message. When a visitor’s input satisfies the current node’s requirements and also matches a transition condition, the AI can skip ahead without waiting for another reply.
This is useful for nodes that simply route the conversation (for example, a quick decision point) where pausing for a visitor response would feel unnatural.
Instruction
The Instruction field is the core of each node. This is where you write the AI prompt that tells the agent what to do when the conversation reaches this stage.- Write in plain language. For example: “Greet the visitor warmly. Ask how you can help them today.”
- You can use Markdown formatting for structure (headings, bullet points, bold text).
- Keep instructions focused on what the agent should accomplish at this specific stage. General rules (tone, safety, etc.) belong in the global prompt.
Contact Collection
Nodes with the Contact Collection type automatically prompt the visitor to provide their contact information. When this feature is active on a node, the configuration panel expands to show a Contact Configuration section where you can customize: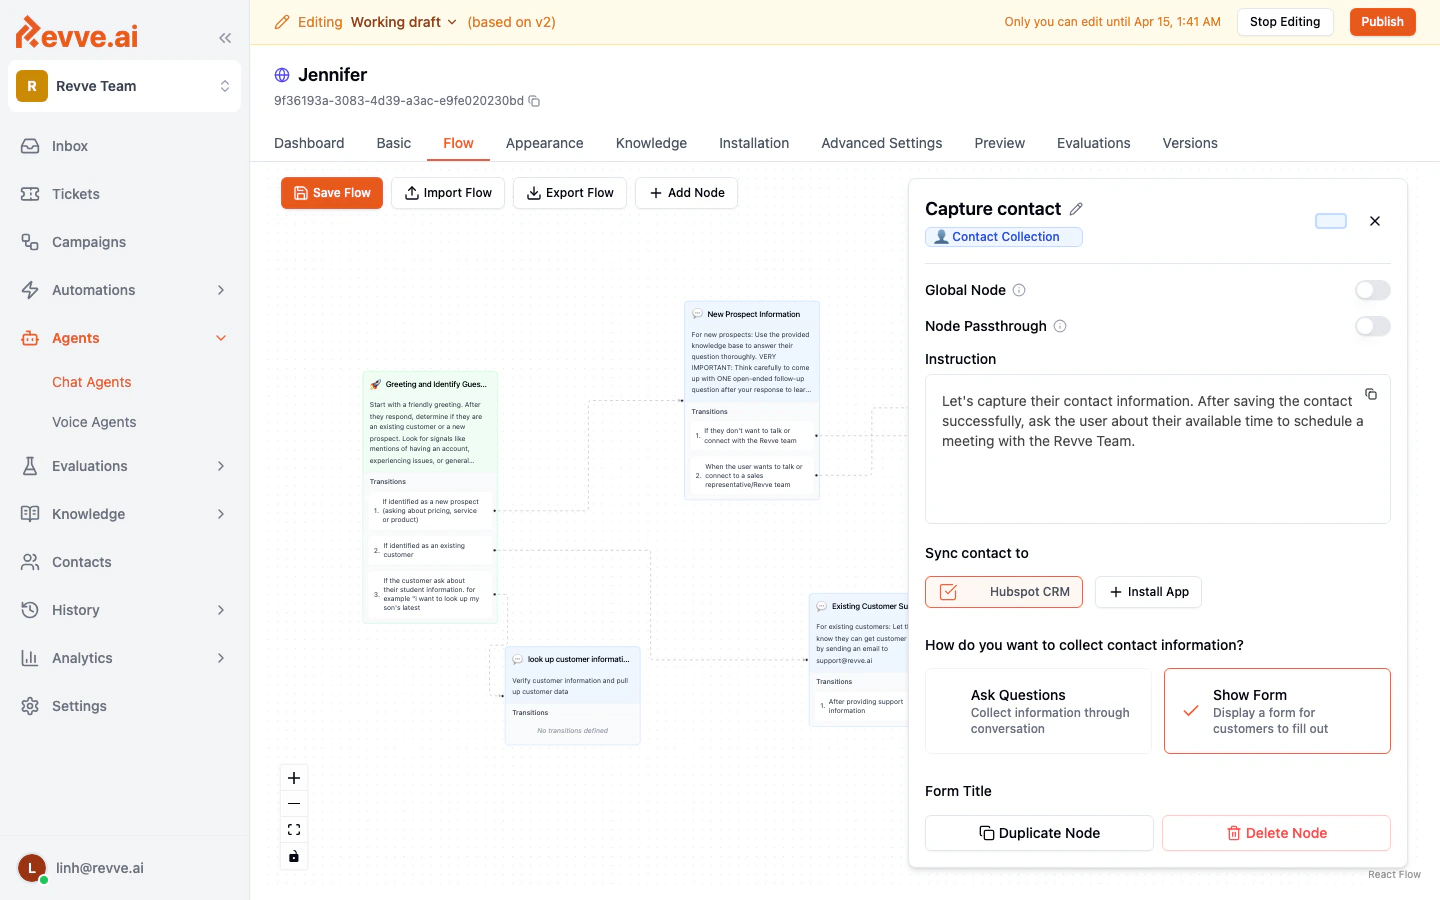
Schedule Meeting
Nodes with the Schedule Meeting type enable calendar-based booking directly within the conversation. When this feature is active, the panel shows a Calendar App selector where you choose which connected calendar integration the agent should use.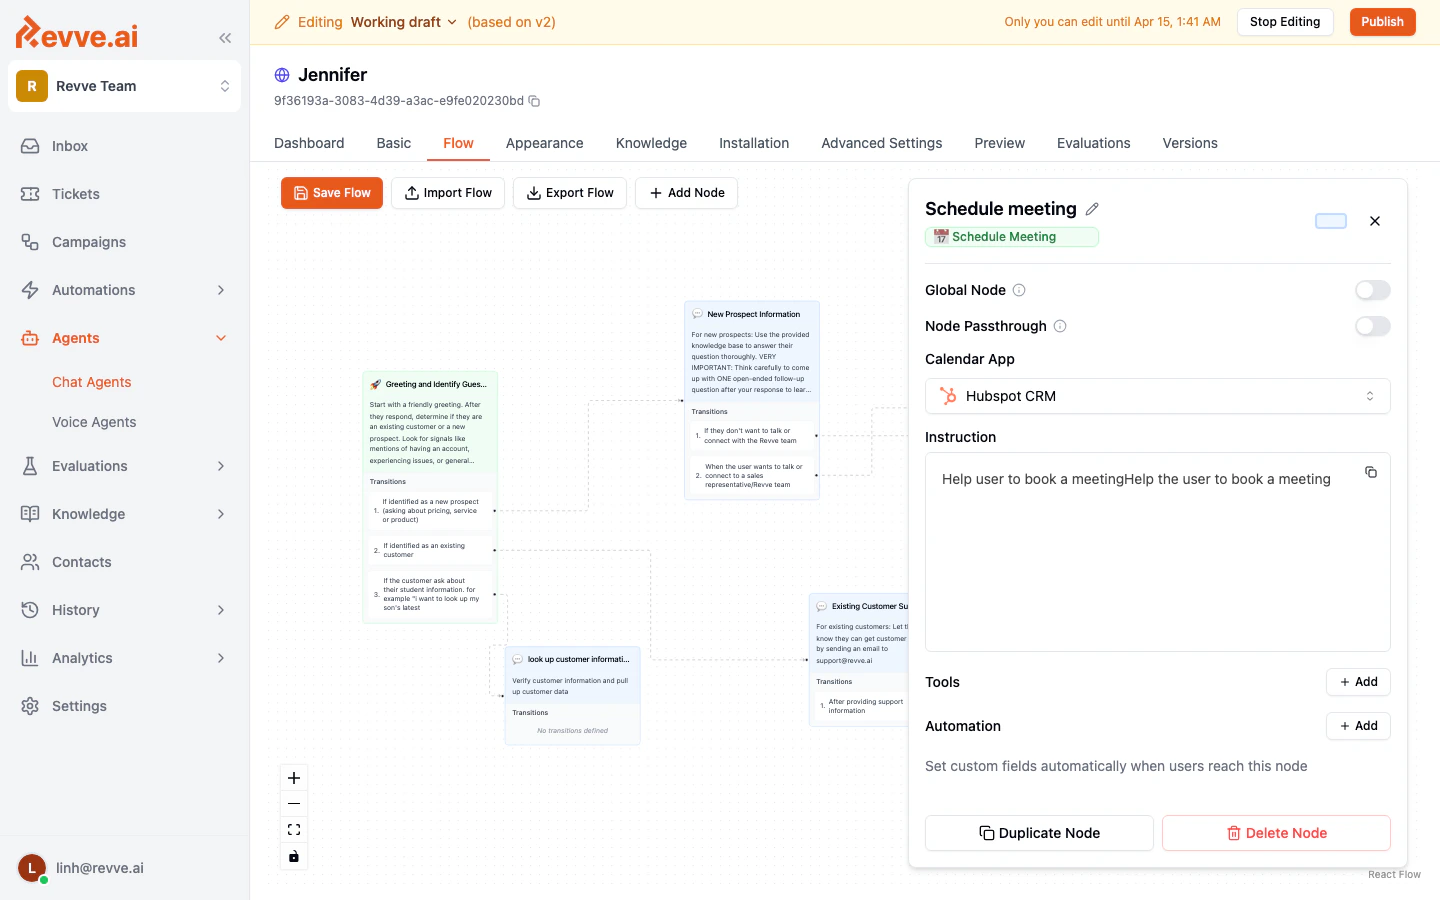
Render Testimonial
The Render Testimonial toggle (available on Normal Conversation nodes) allows the agent to display customer testimonials during the conversation. This can help build trust with new prospects by showing social proof at the right moment. This toggle is only visible on nodes that are not configured for Contact Collection or Schedule Meeting.Human Escalation
The Human Escalation toggle equips the node with the ability to transfer the conversation to a live human agent. When enabled, the AI gains access to a built-in handoff tool and can initiate the transfer when appropriate.
This toggle is only visible on nodes that are not configured for Contact Collection or Schedule Meeting.
Tools
The Tools section lets you assign specific tools to a node. Tools are integrations or capabilities that the AI can invoke during the conversation — for example, looking up customer data, querying an external system, or performing a calculation. Click Add to browse and attach available tools. Only the tools assigned to a node (plus any globally configured tools) are available to the AI when the conversation is at that stage. This gives you fine-grained control over what the agent can do at each step.Automation
The Automation section lets you define actions that happen automatically when the conversation reaches this node. Click Add to create an automation rule. A common use is setting custom contact fields. For example, when a visitor reaches a “Qualified Lead” node, you could automatically set a “Lead Status” field to “Qualified” on their contact record. Automations can also be configured on individual transitions (see Creating and Connecting Nodes).Duplicating and Deleting Nodes
At the bottom of the configuration panel, two buttons are available:Summary of Node Settings
Best Practices
- Enable only what you need on each node. Turning on features you do not need adds complexity without benefit.
- Place Contact Collection early in the flow if capturing visitor information is a priority, but only after the visitor has shown enough interest — collecting details too early can feel intrusive.
- Use Human Escalation on nodes where the AI is most likely to reach its limits, such as complex technical support or sensitive topics.
- Assign tools sparingly. Giving the AI access to too many tools at a single node can slow down responses and increase the chance of the wrong tool being called.
- Test each node’s behavior in the Preview tab after making changes to verify the agent behaves as expected.
Next Steps
- Flow Editor Overview — Return to the editor basics.
- Creating and Connecting Nodes — Review how to build your flow structure.
- Global Nodes and Prompts — Set up cross-cutting behaviors.