

Prerequisites
- A calendar app connected in Apps: Calendly, Cal.com, or Chili Piper. To connect one, go to Apps in the dashboard, click Install on your provider, and complete the sign-in. (You can build the flow without it, but the booking step will show a “Configure” warning until connected.)
- Optional: HubSpot or Salesforce connected, if you want leads synced to your CRM.
Step 1: Create a Conversational Flow agent
Go to Agents > Chat Agents → + New Chat Agent → Build from scratch. Fill in:
We use Conversational Flow because qualification is a funnel — distinct stages with different objectives — and we want the agent unable to skip ahead (no booking before qualifying).
Step 2: Set the Role and Global Objectives
Open the Basic tab (click Start Editing first). These two fields apply across every node of the flow. Role — paste and adjust:Step 3: Build the flow
Open the Flow tab. You’ll create five connected nodes plus one global node: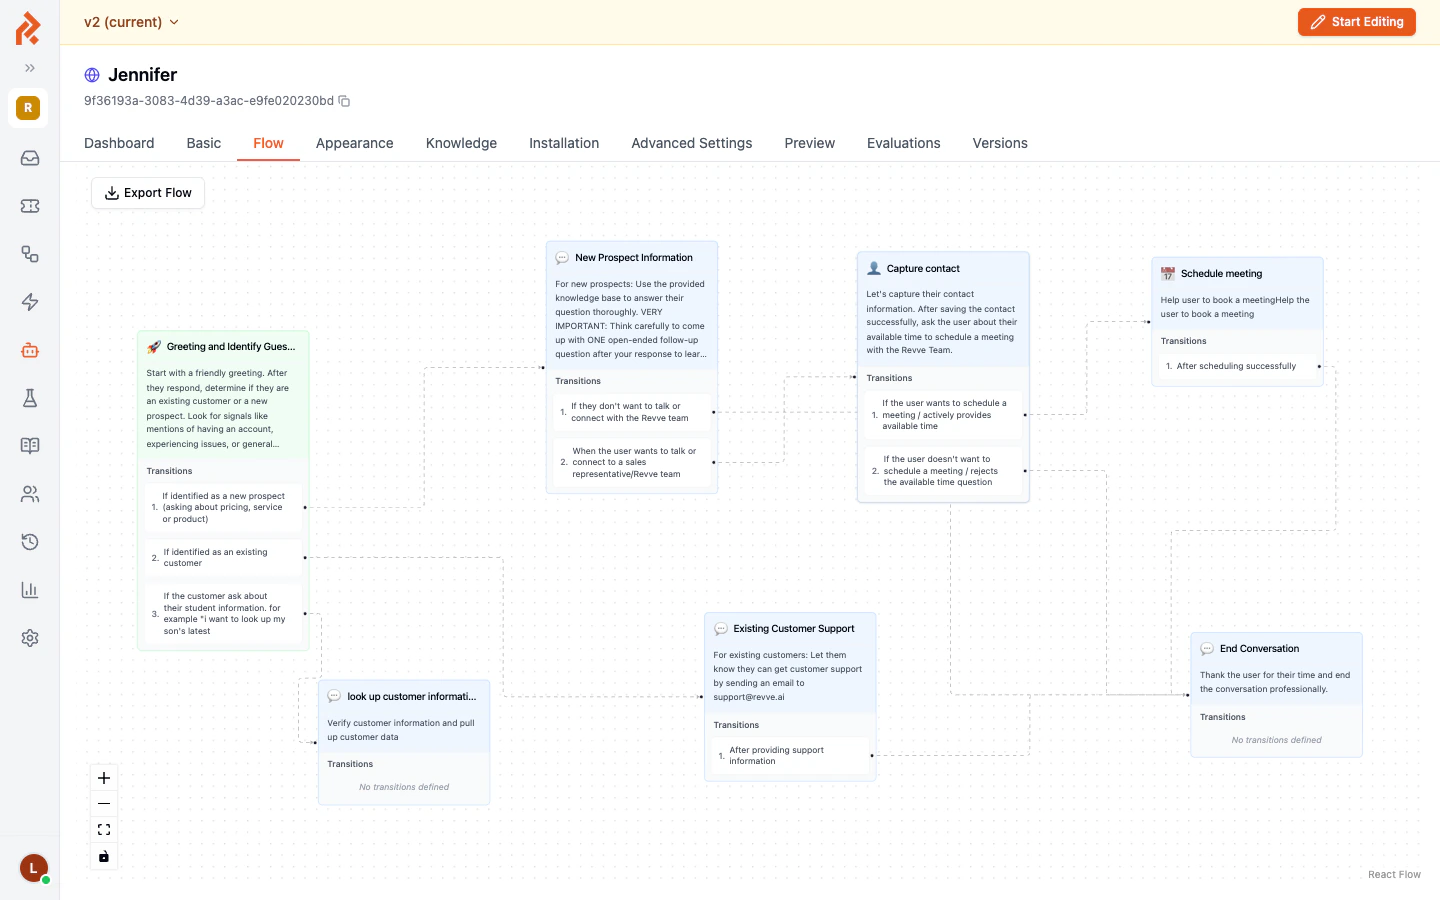
Node 1 — “Greeting” (Normal Conversation)
Instruction:
Visitors who just ask questions stay here — the node keeps answering from your knowledge base until buying interest appears.
Node 2 — “Qualify” (Normal Conversation)
Instruction:Node 3 — “Collect Contact” (Contact Collection)
Create the node with type Contact Collection. In the node panel, the contact collection toggle is already on; configure it: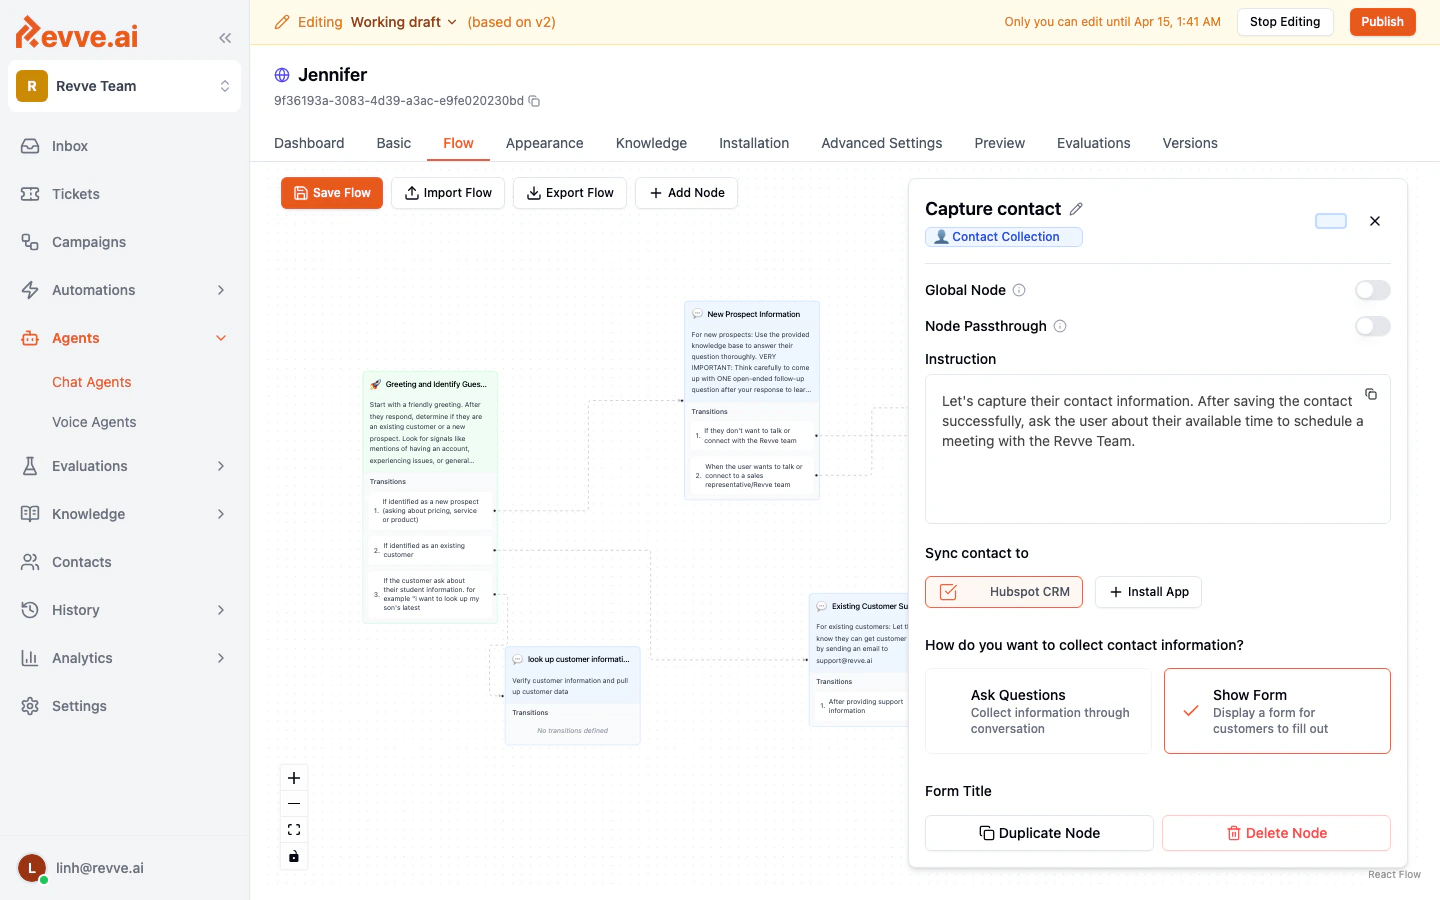
- How do you want to collect contact information? → Ask Questions (conversational — keeps the chat natural; choose Show Form instead if you prefer a structured form in the chat).
- Contact Fields: add Full Name (required), Email (required), Company Name (required), Phone Number (optional).
- Sync contact to: tick your CRM (HubSpot / Salesforce) if connected.
Node 4 — “Book Meeting” (Schedule Meeting)
Create the node with type Schedule Meeting. In the node panel: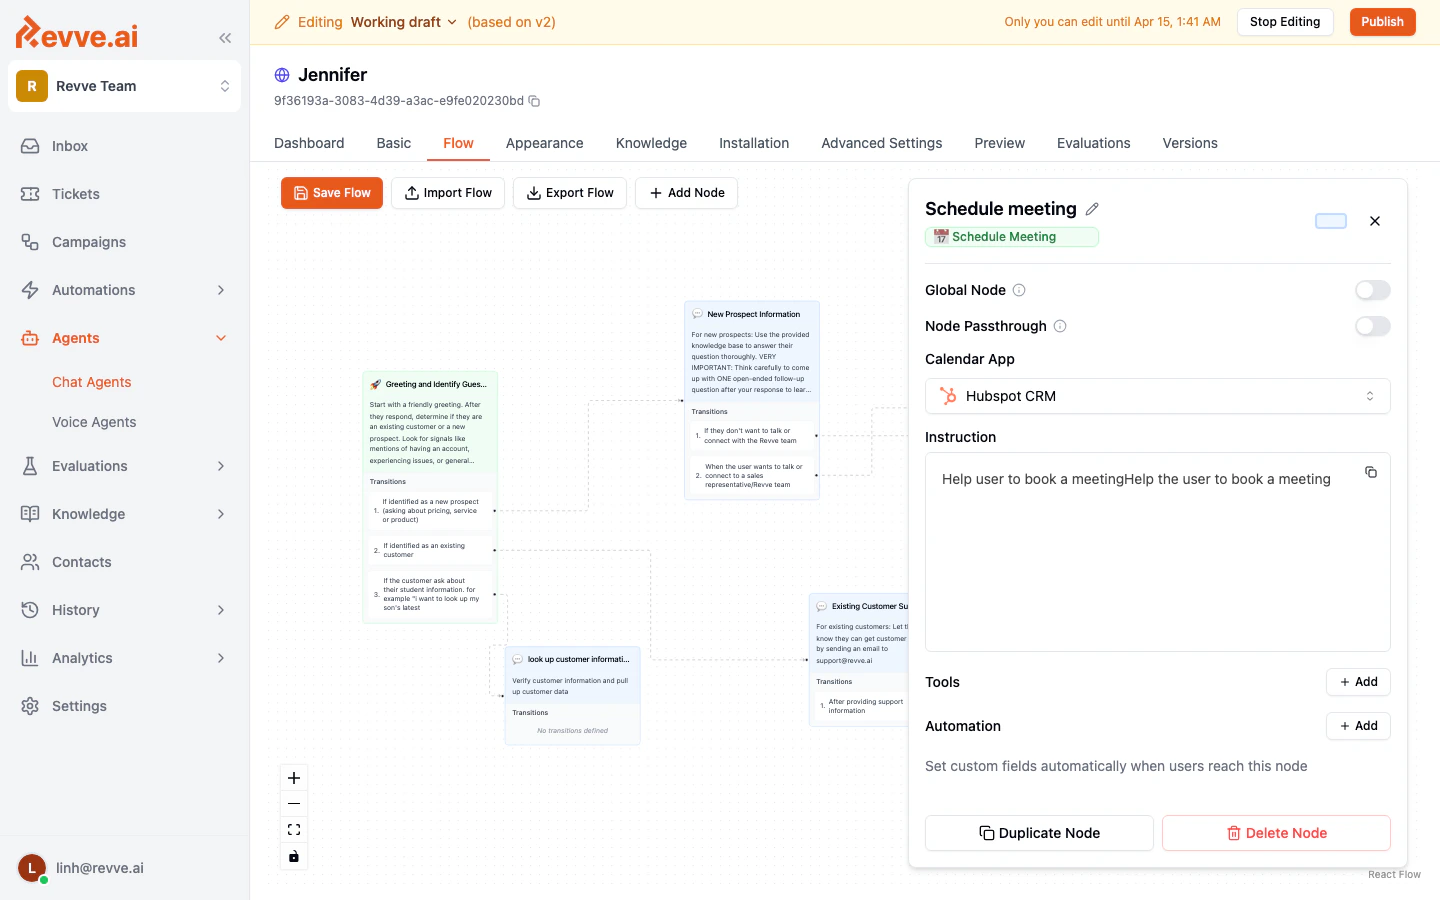
- Calendar App: select your connected provider (Calendly / Cal.com / Chili Piper). The agent gets availability checking and booking automatically — no extra setup. (Chili Piper additionally asks for a Booking Method: Router or Direct Link.)
Node 5 — “Wrap Up” and “Polite Close” (Normal Conversation)
Two simple closing nodes, no outgoing transitions. “Wrap Up” instruction:Global node — “Talk to a Human”
Visitors should reach a human from anywhere in the flow. Create one more Normal Conversation node:- Toggle Global Node on, and set its Condition:
The visitor explicitly asks to talk to a human, an agent, or a real person - Toggle Human Escalation on — this gives the node the ability to transfer the conversation to your team.
Step 4: Test it
Open the Preview tab and run each path end to end:
Fix issues at the node level: wrong routing → sharpen the transition Condition wording; wrong behavior inside a stage → sharpen that node’s Instruction.
Step 5: Publish and install
- Click Publish and confirm (see Publishing & Versioning).
- Install the widget on your site — embed snippet and WordPress instructions in Website Installation.
Step 6: Watch the leads come in
- Contacts — every captured lead with name, email, and company (synced to your CRM if you enabled it).
- Inbox — full conversations; escalations arrive assigned to your team.
- Your calendar — booked meetings appear in your provider as usual.
- History > Chat History — review conversations to refine qualification criteria over time.
Variations
- Voice version: the same funnel works on the phone — build a Voice Agent with the Conversational Flow engine and reuse these node instructions.
- Instant follow-up call: pair this agent with a Campaign that calls captured leads within minutes — enroll them via the campaigns API using the contact created here.
- Stricter funnels: add a node between Qualify and Collect Contact that asks a budget question, with transitions splitting high/low budget into different booking calendars.