No external setup needed. The website channel requires no external account setup. You can configure and deploy your chat widget entirely from the Revve dashboard.
Bubble messages are the small text prompts that appear near the chat widget button to grab your visitors’ attention and encourage them to start a conversation. You can set a default bubble message, configure URL-specific messages, and customize the content displayed inside the chat window. To access these settings, navigate to Agents > Chat Agents, select your website Chat Agent, click the Appearance tab, and then select Bubble Message, Configure by URLs, or Content from the left sidebar.

Bubble Message Settings

The Bubble Message section lets you configure the default behavior of the message bubble that appears next to the chat button. Bubble Message Settings showing default message, tooltip, persistence, and auto-dismiss options
SettingDescription
Default Bubble MessageThe text that appears in the bubble next to the chat button. Leave empty to show no bubble message. Example: “Hi there! How can I help you today?”
Chat Button TooltipThe text displayed when visitors hover over the chat button. Default is “Ask a question…”
Always show message bubble on refresh pageWhen enabled, the bubble message appears every time the page loads. When disabled, the bubble will only show again after 60 minutes, preventing repeat visitors from seeing it too frequently.
Auto turn off alert after (seconds)Set the number of seconds before the bubble message automatically disappears. Set to 0 to disable auto-dismiss — the bubble will stay visible until the visitor closes it.

Tips

  • Keep bubble messages short and action-oriented — for example, “Need help? Ask me anything!” works better than a long paragraph.
  • Use the auto-dismiss timer (e.g., 10-15 seconds) to avoid the bubble feeling persistent or intrusive.
  • Disable “Always show message bubble on refresh page” for returning visitors who have already engaged with the widget.

Configure by URLs

This section allows you to create page-specific configurations for your chat widget. You can set different bubble messages, conversation starters, and behaviors based on which page the visitor is viewing. Configure by URLs showing URL pattern table and contextual prompt toggle

Generate Contextual Prompt

When enabled, the widget automatically generates greeting messages based on the current page’s content. This only works for pages that have been indexed in your Chat Agent’s knowledge base.

URL Configuration Table

Click Add URL to create a new URL-specific configuration. Each entry supports the following fields:
ColumnDescription
URL PatternA regex pattern to match specific pages. For example, /pricing matches your pricing page, and /blog/.* matches all blog posts.
Bubble MessageA custom bubble message to display on pages that match this URL pattern. Overrides the default bubble message.
Chat ButtonCustomize the chat button appearance or visibility for matching pages.
DelaySet a delay (in seconds) before the bubble message appears on matching pages.
Conversation StartersDefine custom conversation starter buttons that appear inside the chat widget for visitors on matching pages.
ActionsEdit or delete the URL configuration.

Tips

  • Use URL-specific messages to tailor the experience: show “Have questions about pricing?” on your pricing page and “Need help getting started?” on your documentation pages.
  • The URL pattern field supports regex, so you can use patterns like /products/.* to match all product pages at once.
  • Enable “Generate Contextual Prompt” to automatically create relevant greetings based on page content — this is especially useful for sites with many pages where creating individual URL configurations would be impractical.
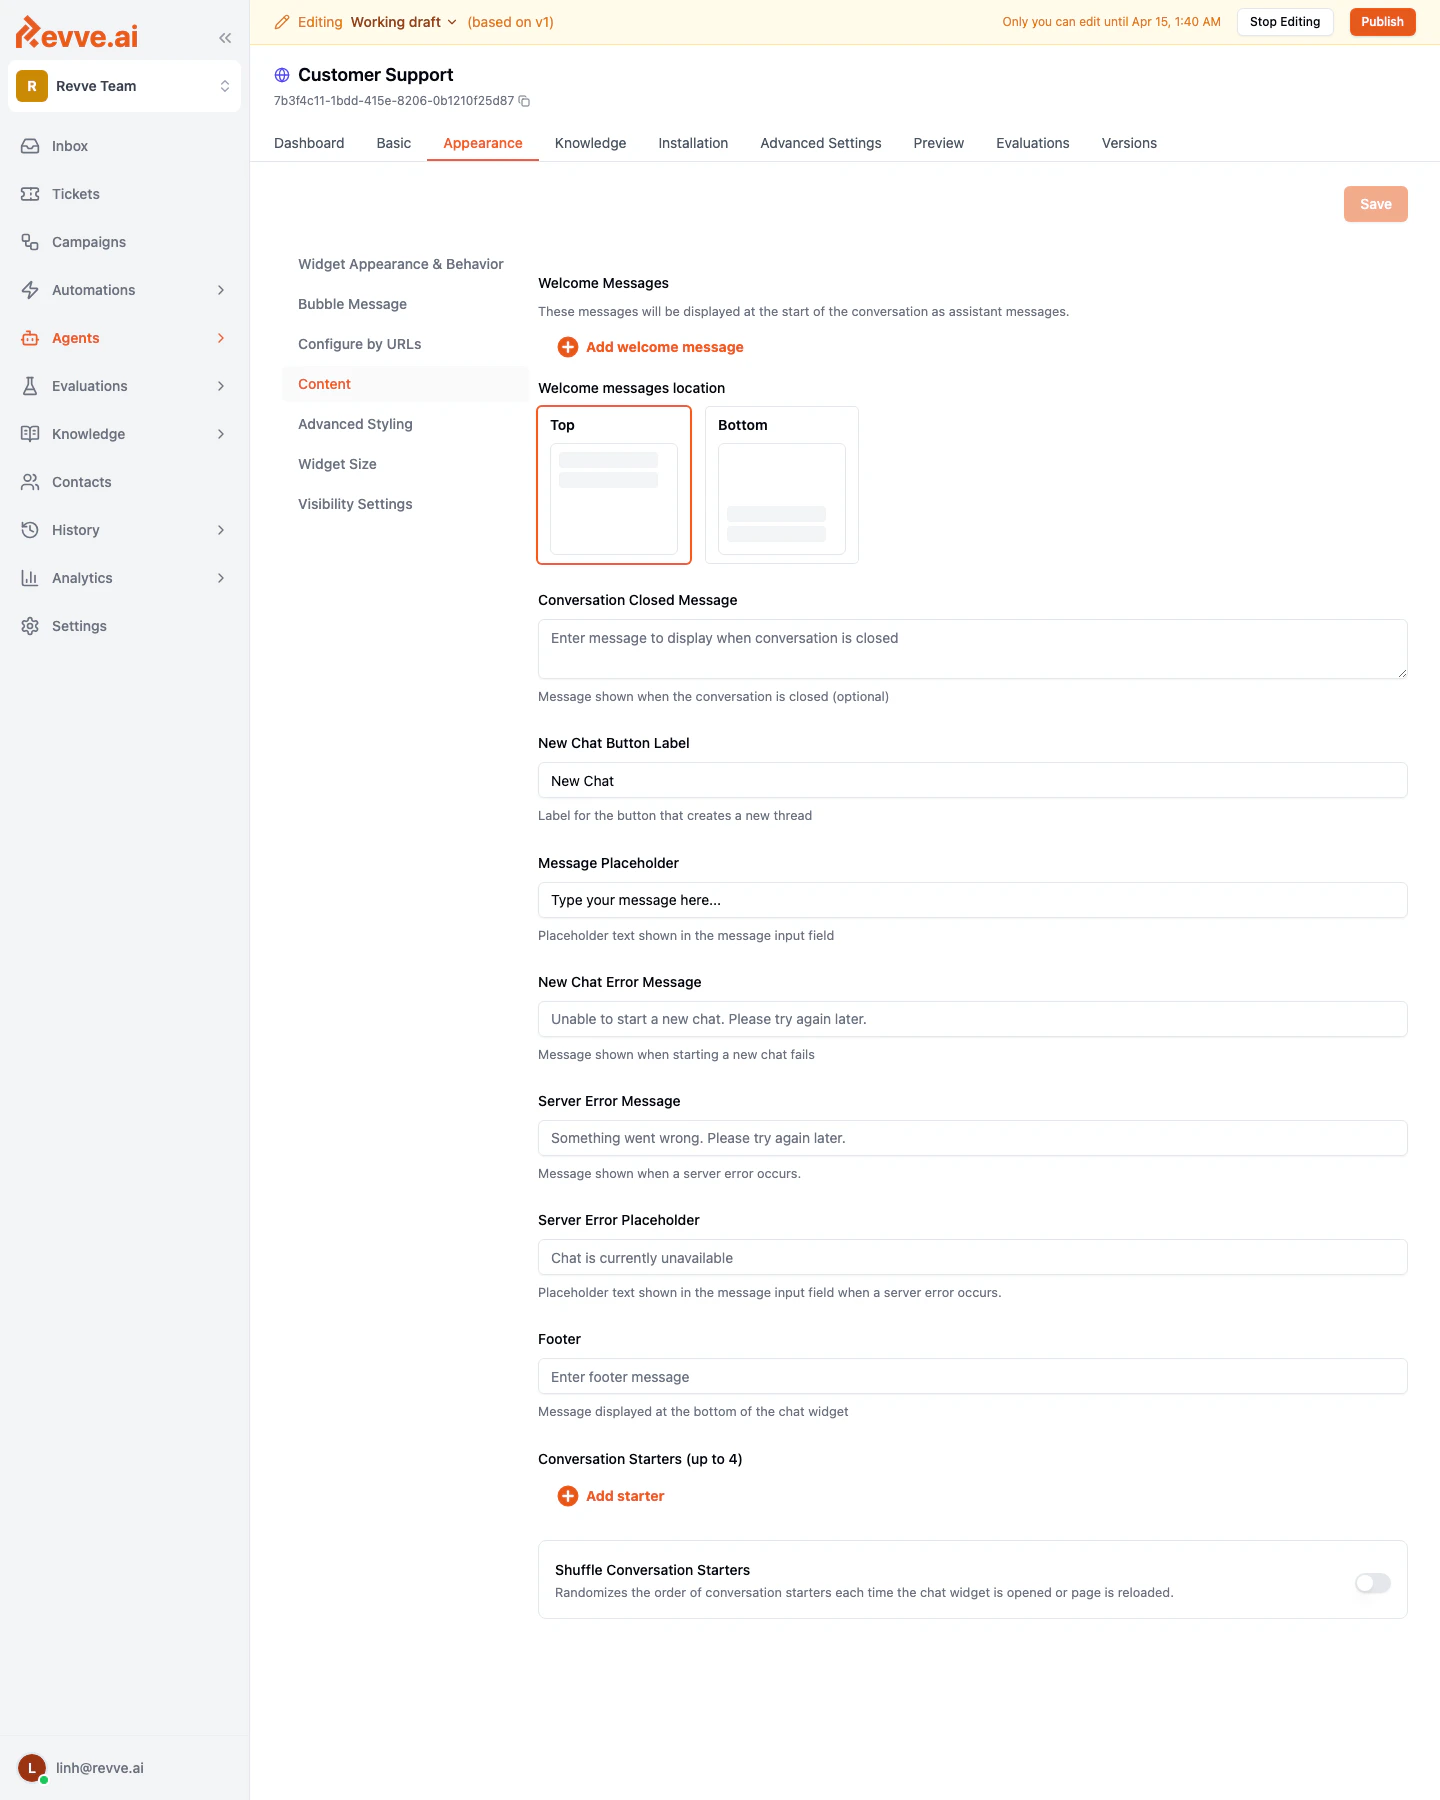
Content Settings

The Content section lets you configure messages and labels displayed inside the chat window itself. Content settings showing welcome messages, location toggle, closed message, and button label
SettingDescription
Welcome MessagesMessages displayed at the start of a conversation as assistant messages. Click Add welcome message to create one or more greeting messages that appear when a visitor opens the chat.
Welcome Messages LocationChoose where welcome messages appear in the chat window: Top (at the beginning of the conversation) or Bottom (near the input field).
Conversation Closed MessageAn optional message shown when the conversation is closed. For example: “This conversation has been closed. Start a new chat to continue.”
New Chat Button LabelCustomize the label of the button that starts a new conversation.

Tips

  • Use welcome messages to set expectations. For example: “Hi! I’m your AI assistant. I can help with product questions, account issues, and more.”
  • Adding multiple welcome messages creates a more natural introduction. The first message could introduce the agent, and the second could suggest topics.
  • The “Top” location for welcome messages is the most common choice, as it provides context before the visitor types their first message.

Next Steps