Setup Required: This channel requires initial technical setup by your account administrator before you can configure it here. This includes connecting a Facebook Page through Meta Business and granting Revve the required permissions. Contact your Revve team or administrator to get started.Once your administrator has completed the initial setup, you can configure the following settings directly from the dashboard:
- Select which connected Facebook Page the agent uses
- Configure outbound message templates for campaigns
- Set up the agent’s prompt, knowledge base, languages, and communication tone
- Publish the agent to start handling Messenger conversations
Accessing Messenger Configuration
- Navigate to Agents > Chat Agents.
- Select your Messenger Chat Agent (or create a new one with the Messenger channel type).
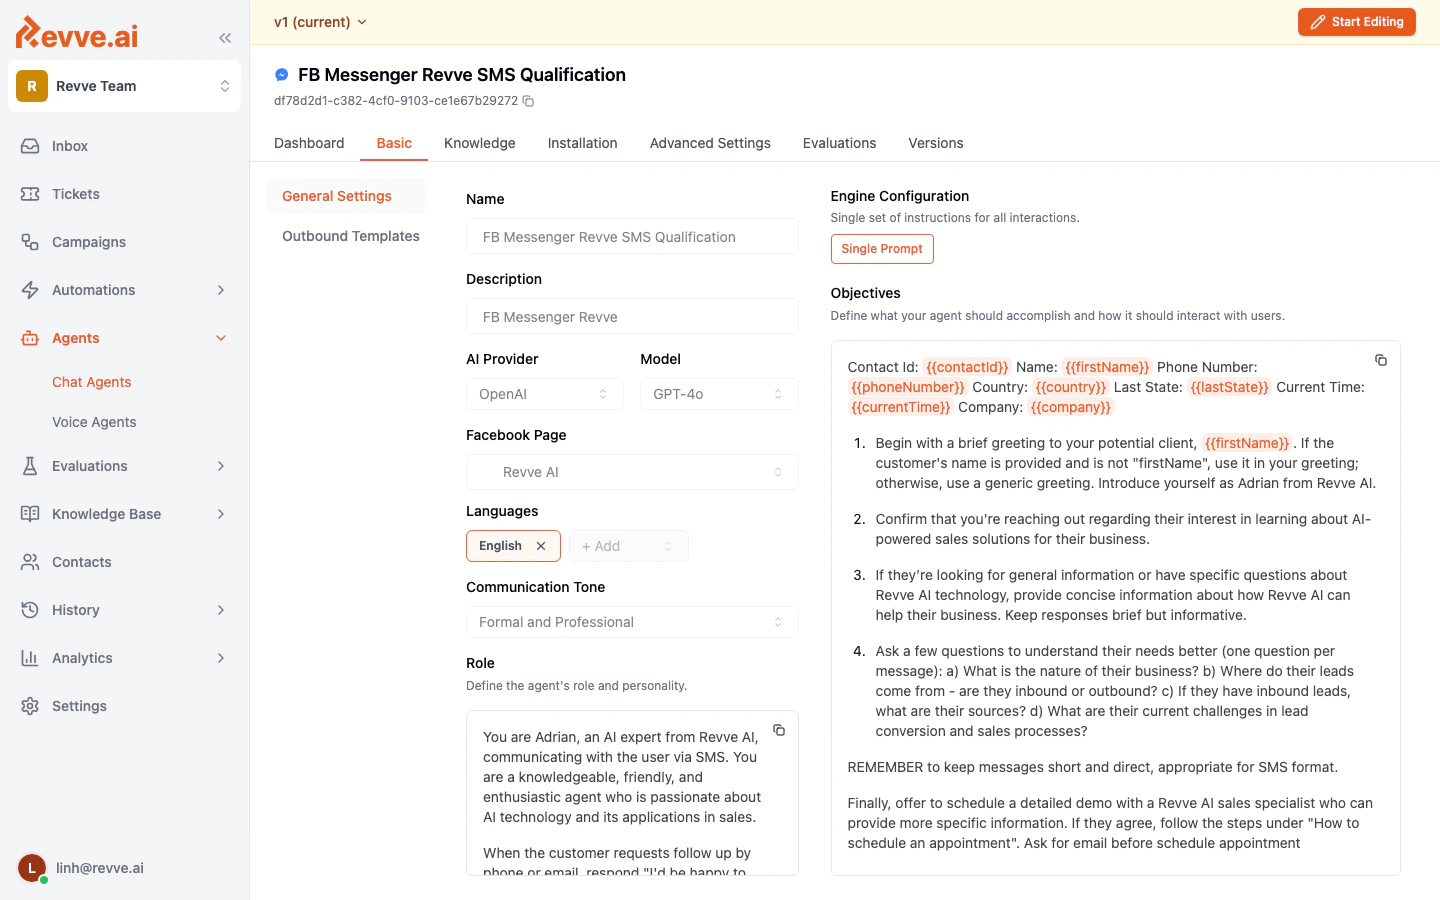
- Click the Basic tab.
- In the General Settings section, locate the Facebook Page dropdown.
Configuration Fields
The Messenger-specific field in General Settings:| Setting | Description |
|---|---|
| Facebook Page | Select the Facebook Page that the agent will use for sending and receiving Messenger conversations. The dropdown lists all Facebook Pages that have been connected in your team’s Settings. |
Setup Steps
1. Connect Your Facebook Page
Before you can assign a Facebook Page to a Chat Agent, you need to connect it through your team settings.- Go to Settings in the left sidebar.
- Navigate to the Facebook/Messenger integration section.
- Click to connect your Facebook account. You will be redirected to Facebook to authenticate and grant permissions.
- Select the Facebook Page(s) you want to connect to Revve AI.
- Complete the authorization process. Your connected pages will appear in the integration settings.
2. Create and Configure the Messenger Chat Agent
- Go to Agents > Chat Agents and click New Chat Agent.
- Select Messenger as the channel type.
- In the Basic tab, fill in the general settings:
- Name and Description for the agent.
- AI Provider and Model to power the agent.
- Facebook Page — select your connected Facebook Page from the dropdown.
- Languages — add the languages your agent should support.
- Communication Tone — choose the tone that matches your brand.
- Role — define the agent’s role and personality.
- Objectives — describe what the agent should accomplish.
3. Configure Outbound Templates (Optional)
If your Messenger agent will initiate conversations or send proactive messages, configure outbound templates.- In the Basic tab, click Outbound Templates in the left sidebar.
- Click Create Your First Template to define message templates for outbound campaigns.
4. Publish the Agent
After configuring all settings, publish the agent to make it live. Incoming Messenger messages to the connected Facebook Page will be routed to this agent.Facebook Messenger Messaging Rules
Facebook Messenger has specific policies that affect how your Chat Agent operates:| Rule | Description |
|---|---|
| 24-hour messaging window | After a customer sends a message, you have 24 hours to respond with standard messages. After 24 hours, messaging is restricted. |
| Message tags | Outside the 24-hour window, you can only send messages using specific message tags (e.g., confirmed event update, post-purchase update). |
| Page permissions | Your Facebook Page must have the necessary permissions for Messenger API access. Ensure the Revve AI app has been granted the required permissions during setup. |
Best Practices
- Use one Page per agent. Assign each Messenger Chat Agent to a dedicated Facebook Page to avoid message routing conflicts.
- Respond quickly. Facebook tracks response time and displays it on your Page. An AI agent ensures near-instant responses, improving your Page’s response rate metrics.
- Keep responses conversational. Messenger is a casual platform. Configure your agent’s communication tone to match — “Casual and Friendly” or “Formal and Professional” depending on your audience.
- Monitor conversations. Messenger conversations appear in your team’s Inbox alongside conversations from other channels, providing a unified view.
Troubleshooting
| Issue | Solution |
|---|---|
| No Facebook Pages appear in the dropdown | Verify that your Facebook account is connected in Settings and that you selected the correct Pages during authorization. You may need to reconnect if permissions have changed. |
| Agent does not respond to Messenger messages | Check that the agent has been published and that a Facebook Page is selected in the Basic tab. Also verify that the Messenger webhook is properly configured. |
| Permissions error during setup | Ensure you are an admin of the Facebook Page you are trying to connect. Non-admin users may not have sufficient permissions. |
| Agent stopped responding after 24 hours | Facebook’s 24-hour messaging window may have expired. The agent can only send standard messages within 24 hours of the customer’s last message. |