

How to Export
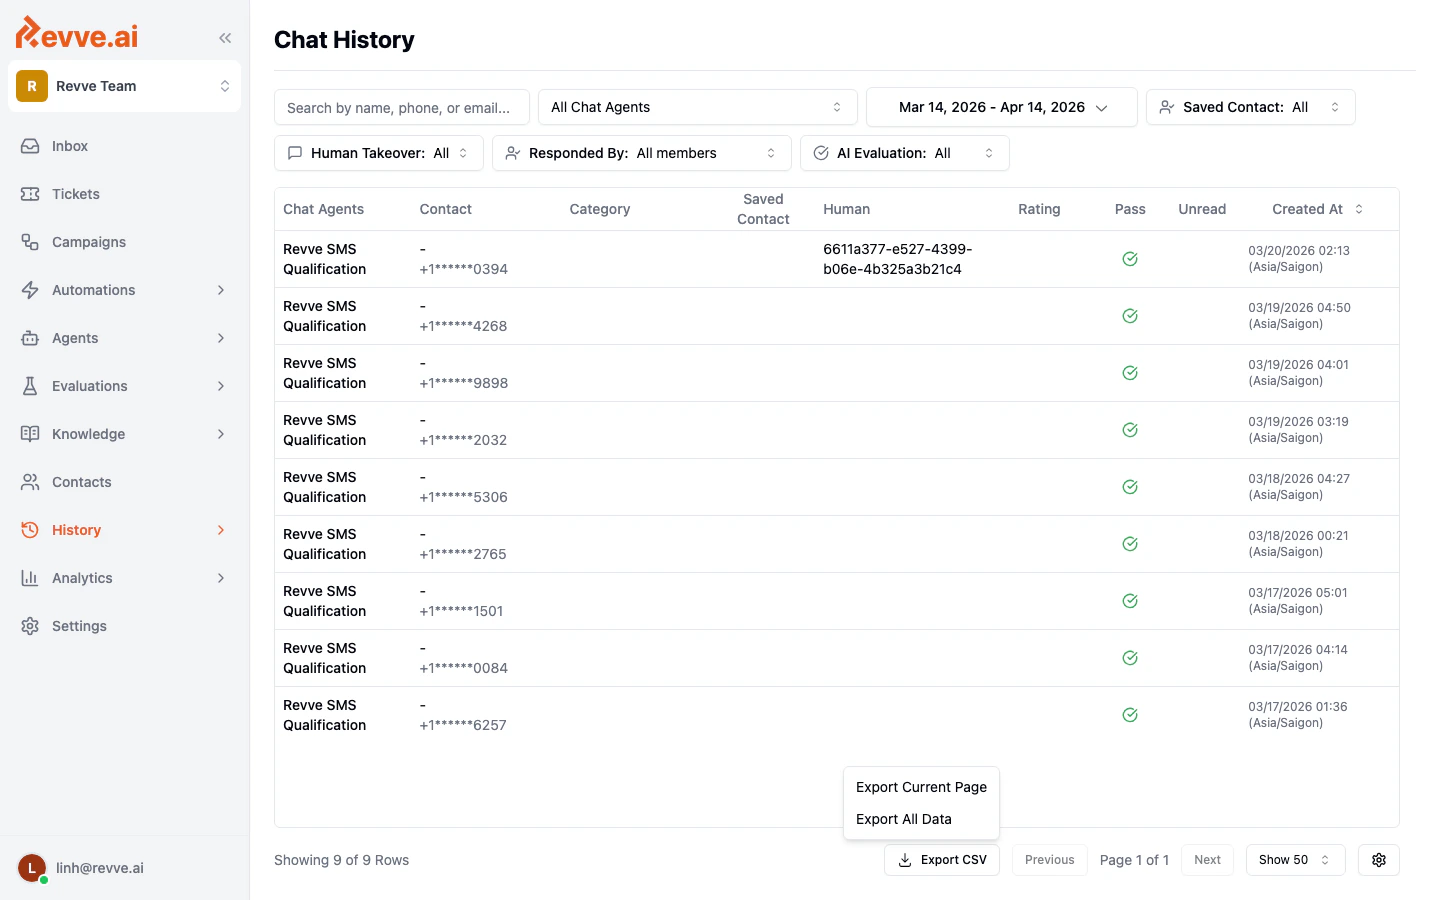
- Navigate to History > Chat History in the left sidebar.
- Apply any filters you need (date range, Chat Agent, evaluation status, etc.). The export will respect your current filters.
- Click the Export CSV button at the bottom of the table.
- Choose one of two options from the dropdown menu:
How the Export Works
Exports are processed in the background. After you click an export option:- You will see a confirmation message: “Export queued! You will receive an email when ready.”
- The system prepares your CSV file and sends it to the email address associated with your account.
- Check your inbox (and spam folder if needed) for an email from Revve containing your download link.
What Data Is Included
The exported CSV includes key fields for each conversation:Using Exports for Reporting
Here are some practical ways to use your exported data:- Weekly performance summaries — Export the past week’s conversations filtered by a specific Chat Agent, then calculate metrics like total conversations, escalation rate, and average rating in a spreadsheet.
- Quality audits — Export conversations that failed AI evaluation to review common failure patterns and improve your agent’s prompt or knowledge base.
- Contact analysis — Export conversations where contacts were saved to analyze lead quality and conversion trends.
- Team performance — Filter by “Responded By” to export conversations handled by specific team members and compare response patterns.
Tips
- Always set your date range and filters before exporting to avoid downloading more data than you need.
- The Export All Data option is ideal for monthly or quarterly reports where you want a comprehensive dataset.
- The Export Current Page option is useful for quick spot-checks or when you only need a small sample.
- If you regularly need the same type of export, bookmark the Chat History page with your filters applied — the filter settings are preserved in the URL.