

How contacts are created
There is deliberately no New Contact button. Contacts flow in from your channels, so the list reflects real interactions rather than hand-entered records:- Chat agents — when a web chat, SMS, email, WhatsApp, or Zalo agent collects contact information mid-conversation, it saves or updates the contact automatically.
- Campaign enrollment — importing a CSV of recipients or calling the contact-enrollments API creates the contacts being enrolled. Both paths are documented in Creating a Campaign.
- Calls — every inbound and outbound call upserts the contact by phone number.
The Contacts list
The Contacts page lists every contact on your team. Use the search box (“Search by email, phone, or name…”) to find a specific record, then click any row to open its detail panel.- Columns — Name, Email, Phone, Company, and Created At (sortable). Your team’s custom fields appear as additional columns, hidden by default; turn them on with the column visibility toggle. Column choices persist per browser and are encoded in the URL, so a filtered view can be shared as a link.
- Pagination — 50 rows per page by default, adjustable from 5 to 50. The footer shows “Showing X of Y contacts”.
- Empty state — a search with no matches shows “No results.”
Contact deletion is restricted: it requires the admin role plus a team-level flag, so most teams won’t see a delete button. If you need contacts removed, contact your Revve administrator.
The contact detail panel
Clicking a row opens a right sidebar titled Contact details, with three tabs.General
The Basic information card holds the identifying fields:
Below it, System Info shows Created and Last Updated timestamps, and Custom Properties shows one editable row per custom field your team has defined — File-type fields support upload directly from here.
Engagements
A unified timeline of every interaction with this contact across channels — Phone Call, Web Chat, SMS, email, WhatsApp, and Zalo — each entry linking through to the call detail or conversation. This is the fastest way to answer “what has this person already been told?” before a follow-up. If the contact has no interactions yet, the tab shows “No engagement history found”.History
The change history for the contact’s fields — who or what changed which value, and when. Useful for auditing automatic updates made by agents and automations.Custom contact fields
Custom fields let you model your own data — customer IDs, plan tiers, uploaded documents — on every contact. Manage them under Settings → Contact Fields, which has three tabs: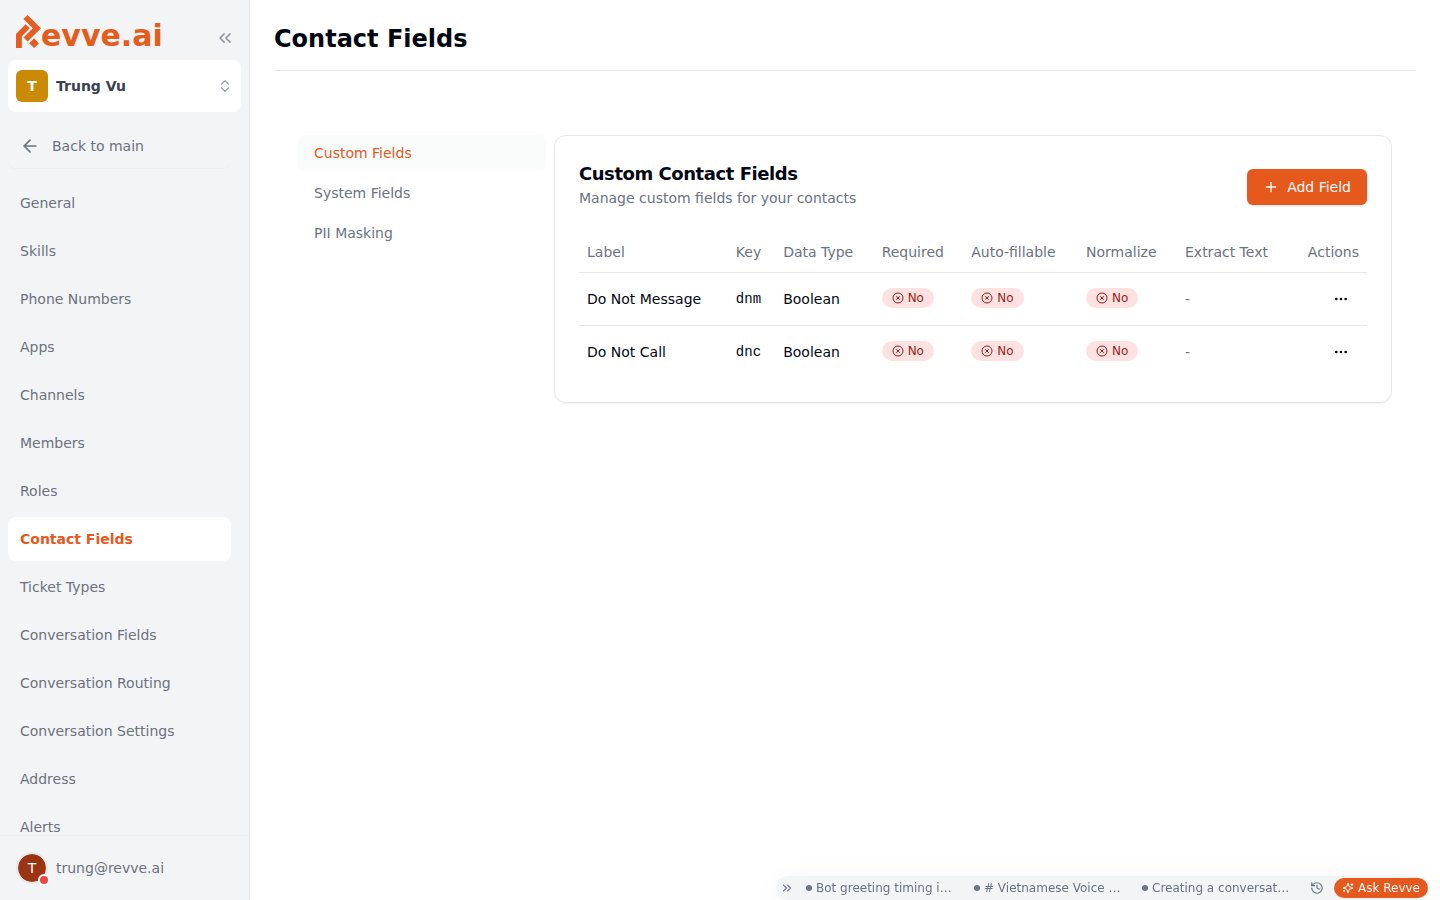
- Custom Fields — the “Custom Contact Fields” card (“Manage custom fields for your contacts”) lists your fields in a table (Label, Key, Data Type, Required, Auto-fillable, Normalize, Extract Text, Actions) with an Add Field button.
- System Fields — a read-only reference of the built-in supported fields and statistics fields, useful when deciding whether you actually need a custom field.
- PII Masking — choose which fields are masked for users without the View PII permission.
Adding a field
Clicking Add Field opens a dialog:Where custom fields surface
One field definition shows up in five places:- Extra columns on the Contacts table (behind the column visibility toggle).
- Custom Properties on the contact detail panel.
- Column mapping during campaign enrollment.
- Update Contact Field actions in automations.
- Agent prompt placeholders — reference a field in an agent’s prompt as
{{customer_id}}and it resolves to that contact’s value.
Related concepts that live elsewhere
Two things people look for on the contact record are intentionally not there:- Do Not Call — the block list is team-wide, not per-contact, and lives at Settings → General → Block List. See Do Not Call List.
- Leads — lightweight captured emails (for example from landing pages) are a separate behind-the-scenes concept. They sync to your CRM and fire the Lead Created automation event, but have no dashboard page of their own. See Automation Rules Overview for the event.
What’s Next
- Creating a Campaign — enroll contacts via CSV import or the API.
- Working with Tickets — the follow-up work items created from your contacts’ conversations.