

What you need: a Revve account and the URL of your website. That’s it.
Step 1: Create an agent from your website
From the left sidebar, go to Agents > Chat Agents and click + New Chat Agent in the top-right corner. Choose Auto-Create from Website, enter your website URL, and click Create Chatbot.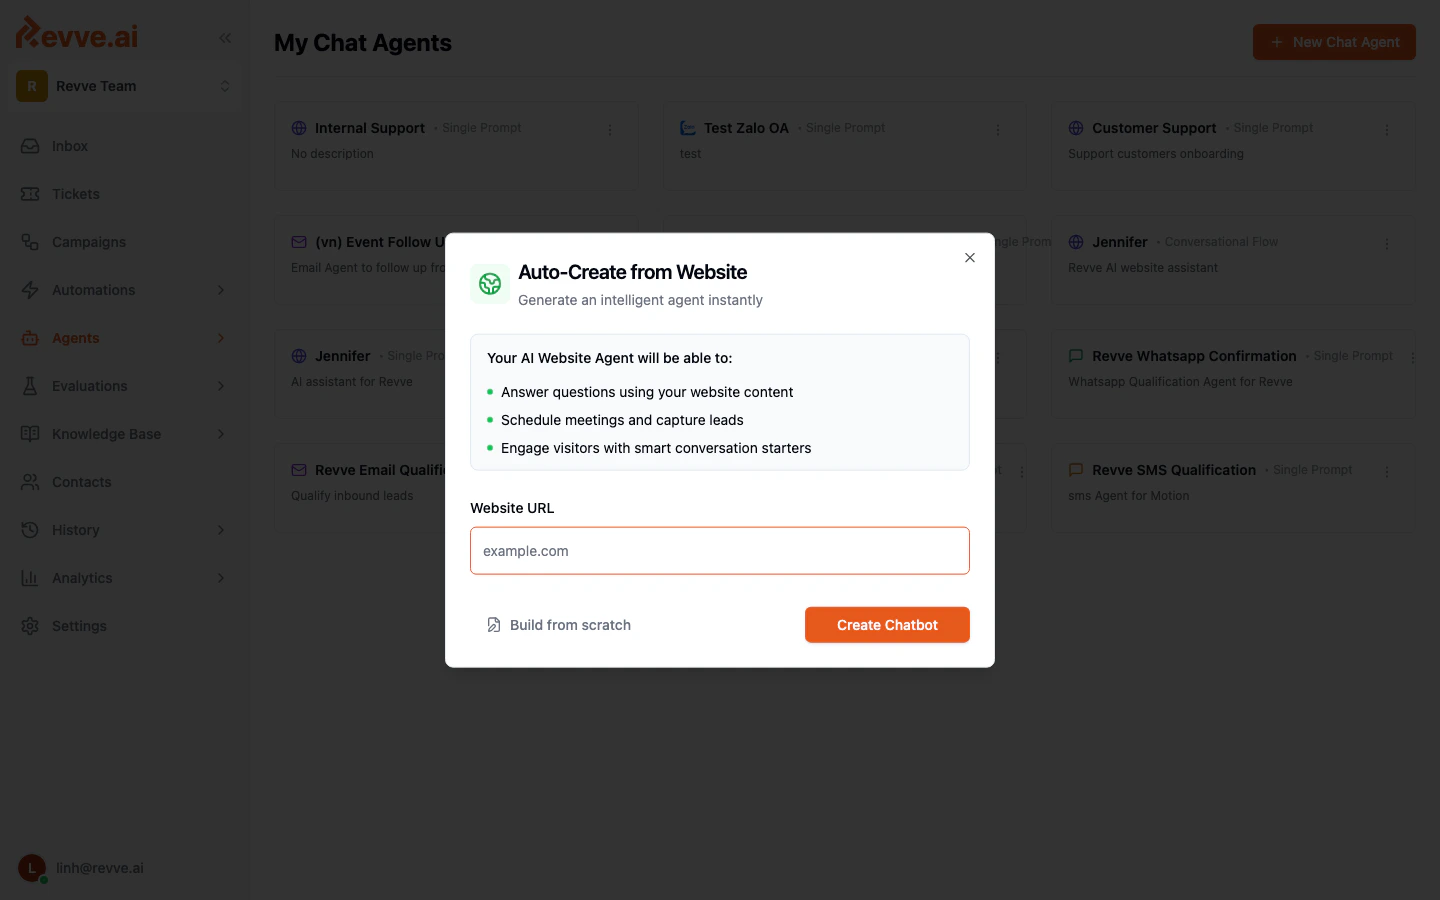
- Crawls your website and extracts its content.
- Writes the agent’s instructions based on what your business does.
- Builds a knowledge base from your web pages, so answers come from your content.
- Generates conversation starters relevant to your visitors.
Step 2: Talk to your agent
Open the Preview tab. You get a live, fully working copy of your chat widget — same knowledge, same behavior as the real thing.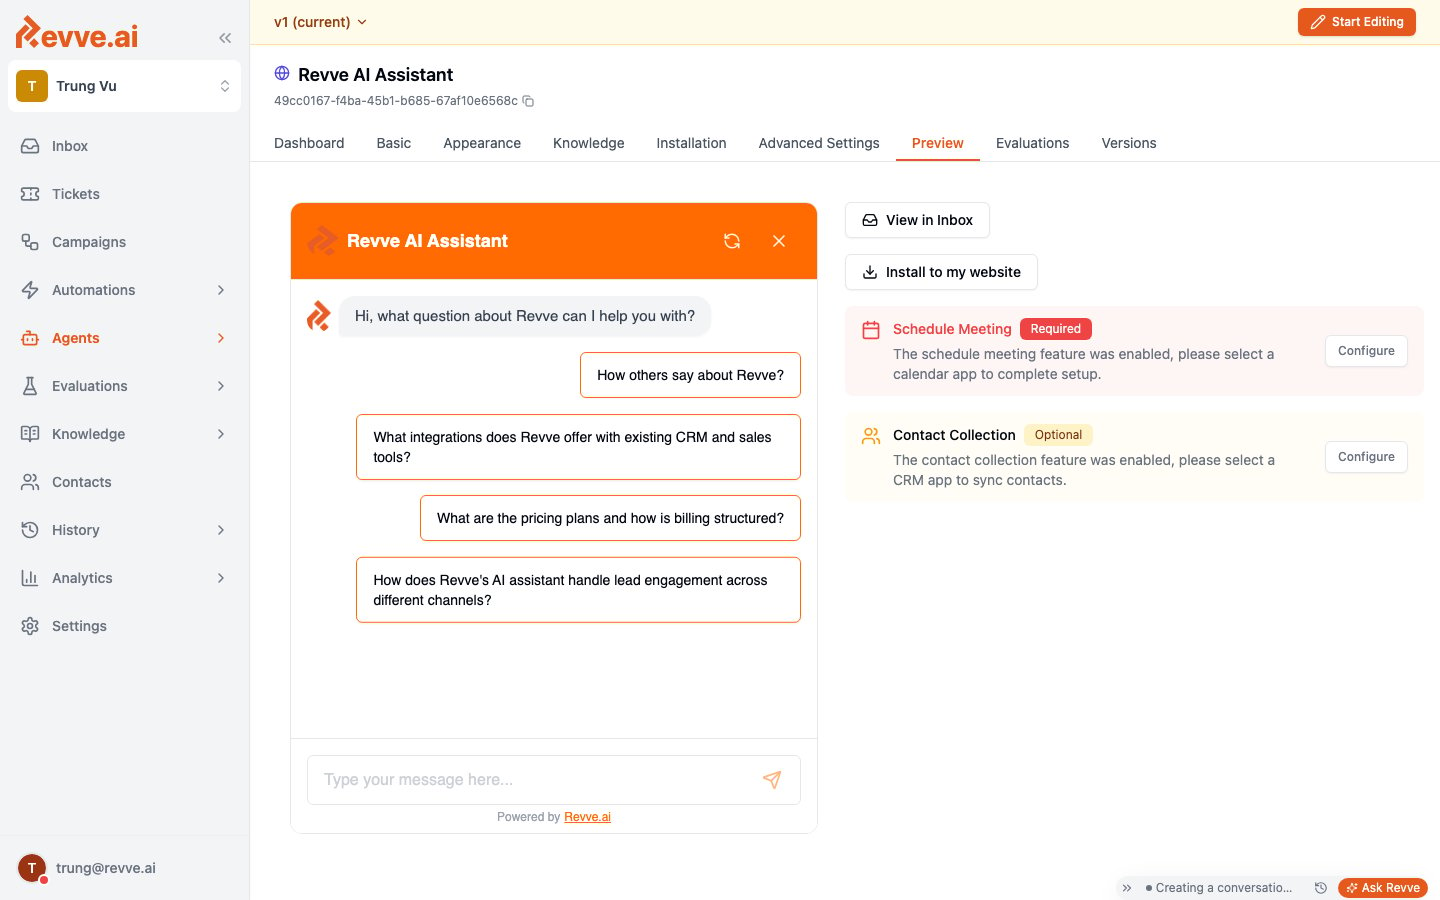
- A question your website answers — it should respond from your content.
- A question your website doesn’t answer — it should decline gracefully rather than invent something.
- Click one of the generated conversation starters and see where it leads.
Step 3: Adjust the basics (optional)
If an answer felt off, click Start Editing, open the Basic tab, and tune two fields:- Role — who the agent is (“You’re the assistant for Acme, a B2B invoicing platform…”).
- Objectives — what it should do and what it must never do (“Answer product questions. Never quote custom pricing — offer a demo instead.”).
Step 4: Publish
Changes live in a draft until you publish. Click Publish in the top bar (or open the Versions tab), add an optional note, and confirm. Your agent is now live on Revve’s side — the last step is putting it on your site.Step 5: Install the widget on your website
Open the Installation tab and copy the embed snippet (the Preview tab’s Install to my website button takes you there too). Paste it into your site’s HTML just before the closing</body> tag, then publish your site:
Step 6: Watch the first conversation arrive
Visit your website, open the chat bubble, and send a message as a visitor would. Then go to Inbox in the Revve sidebar: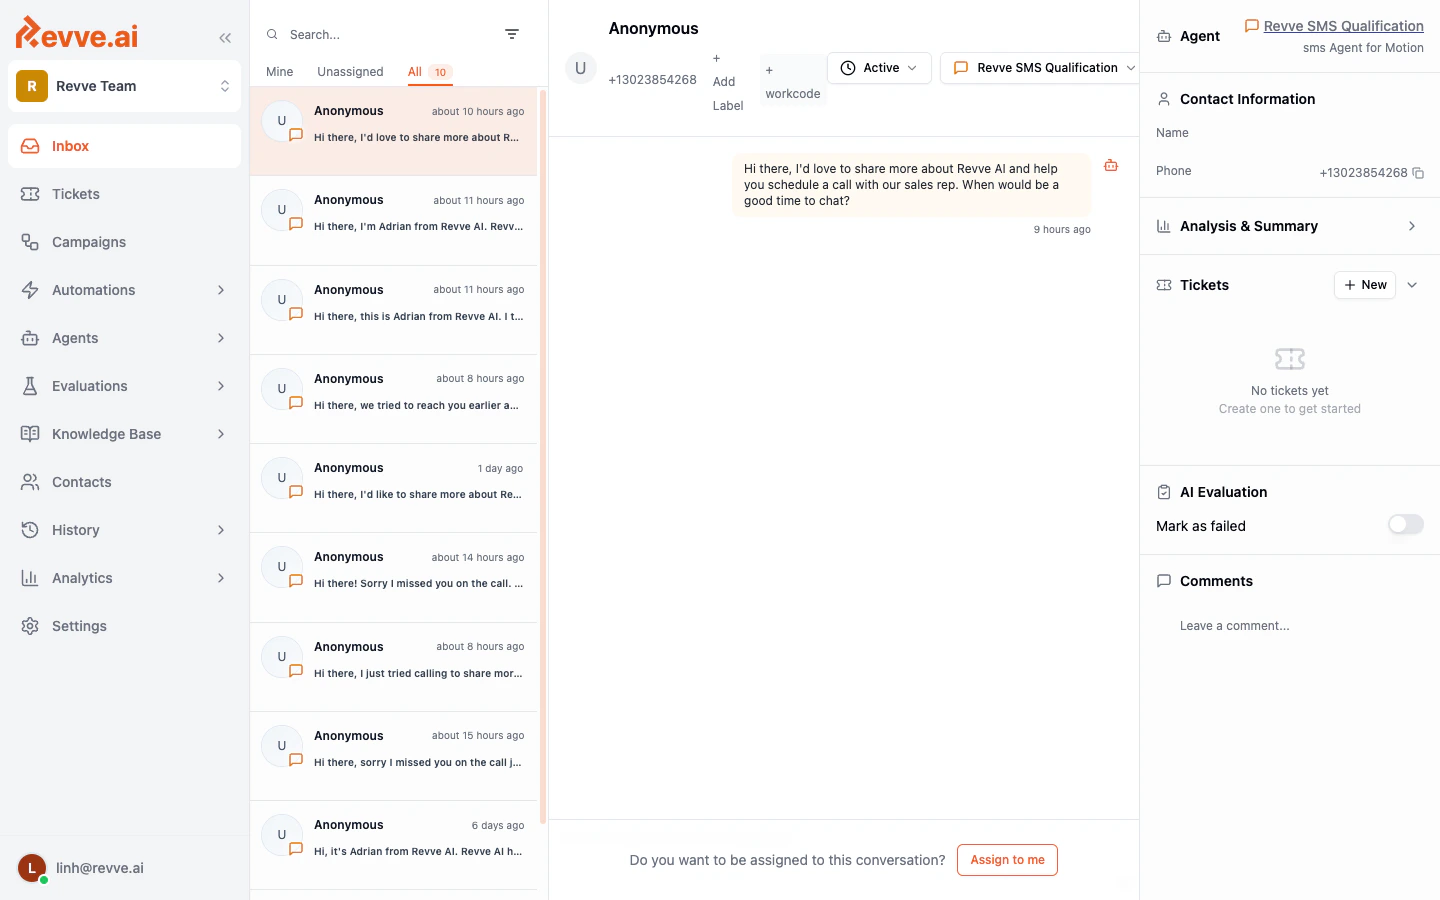
Where to go next
Add more knowledge
Upload documents, crawl more pages, and add FAQs to improve answer quality.
Style the widget
Match the widget’s colors, position, and avatar to your brand.
Build a lead qualification agent
A step-by-step recipe: qualify visitors, capture contact details, and book meetings automatically.
Create a voice agent
Put an AI agent on a real phone number for inbound and outbound calls.