

Where to find it
Apps live under Settings → Apps in the sidebar. The entire Settings section requires the Manage Settings permission, so only users whose role grants it can install, reconfigure, or remove apps. If you don’t see Settings in your sidebar, ask an admin — see Roles & Permissions.Reading the Apps page
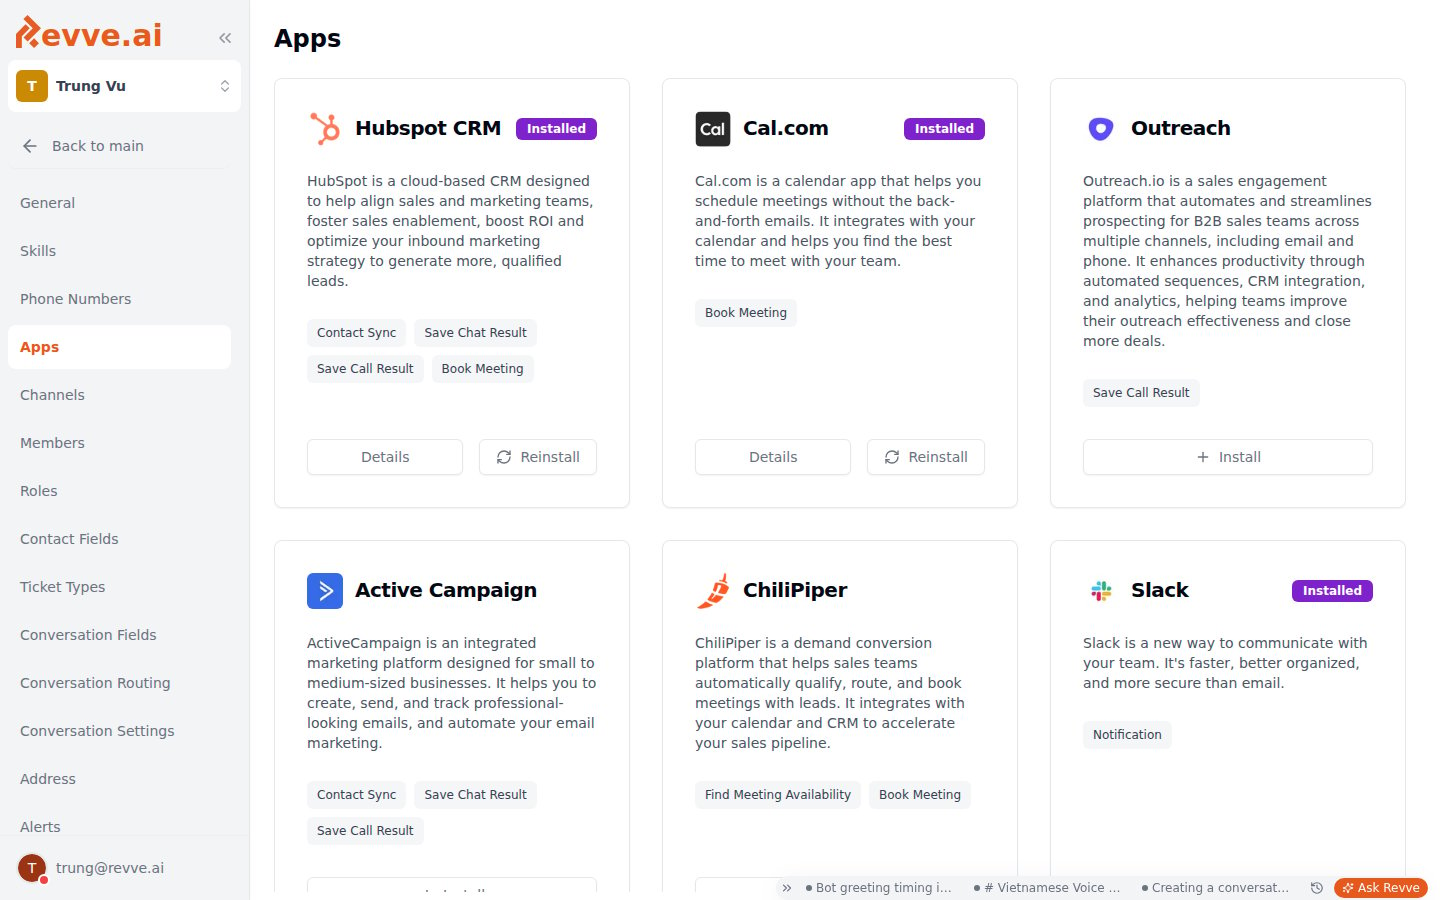
- What it is — the app’s icon, name, and a short description.
- What it can do — feature pills naming the capabilities the app provides, such as Book Meeting. These pills are what matter functionally: they determine where the app surfaces elsewhere in Revve.
- Where it stands — a purple Installed badge if your team has connected it, or an amber Coming Soon badge if it isn’t available yet.
The catalog is maintained by Revve and grows over time. Apps available today include scheduling platforms (Calendly, Cal.com, ChiliPiper), CRMs (HubSpot, Salesforce, Outreach, ActiveCampaign), and Slack.
How installing works
Clicking Install starts a flow that differs by app, depending on how the provider handles authentication:- OAuth redirect (Calendly) — you’ll be redirected to log in, approve permissions, and return to Revve automatically. See Connecting Calendly.
- API-key form (Cal.com) — you paste an API key generated in the provider’s settings.
- Configuration form (ChiliPiper) — you enter account details such as tenant, subdomain, and router details.
How installed apps power agents
Installing an app is what makes its capability appear in agent configuration. The clearest example is scheduling: any installed app with the Book Meeting capability appears in the Calendar App selectors across chat agent Schedule Meeting settings, Schedule Meeting flow nodes, and voice agent calendar tools. Those selectors also include an Install new app shortcut that opens the Apps page in a new tab — so if the calendar you need isn’t listed while building an agent, you’re one click from installing it without abandoning your work.There is no Google Calendar integration. To book against a Google Calendar, connect it through one of the scheduling apps (Calendly, Cal.com, or ChiliPiper) and install that app in Revve.
Managing and removing apps
Everything after install happens on the app’s Details page:- Profile-based apps (Calendly, Cal.com) — remove individual profiles from the Details page; a confirmation dialog guards against accidental removal. Removing one profile leaves the others connected.
- OAuth apps — in addition to removing them in Revve, you can revoke the access token from the provider’s own settings, which cuts off access immediately on the provider side.
What’s Next
- Connecting Calendly — the OAuth install flow, step by step.
- Scheduling & Booking — how calendar apps wire into chat and voice agents, including Cal.com and ChiliPiper.