When to Use the Conversational Flow
The Conversational Flow engine is ideal when your Chat Agent needs to:- Follow a structured conversation path (for example, greet, qualify, collect contact info, schedule a meeting).
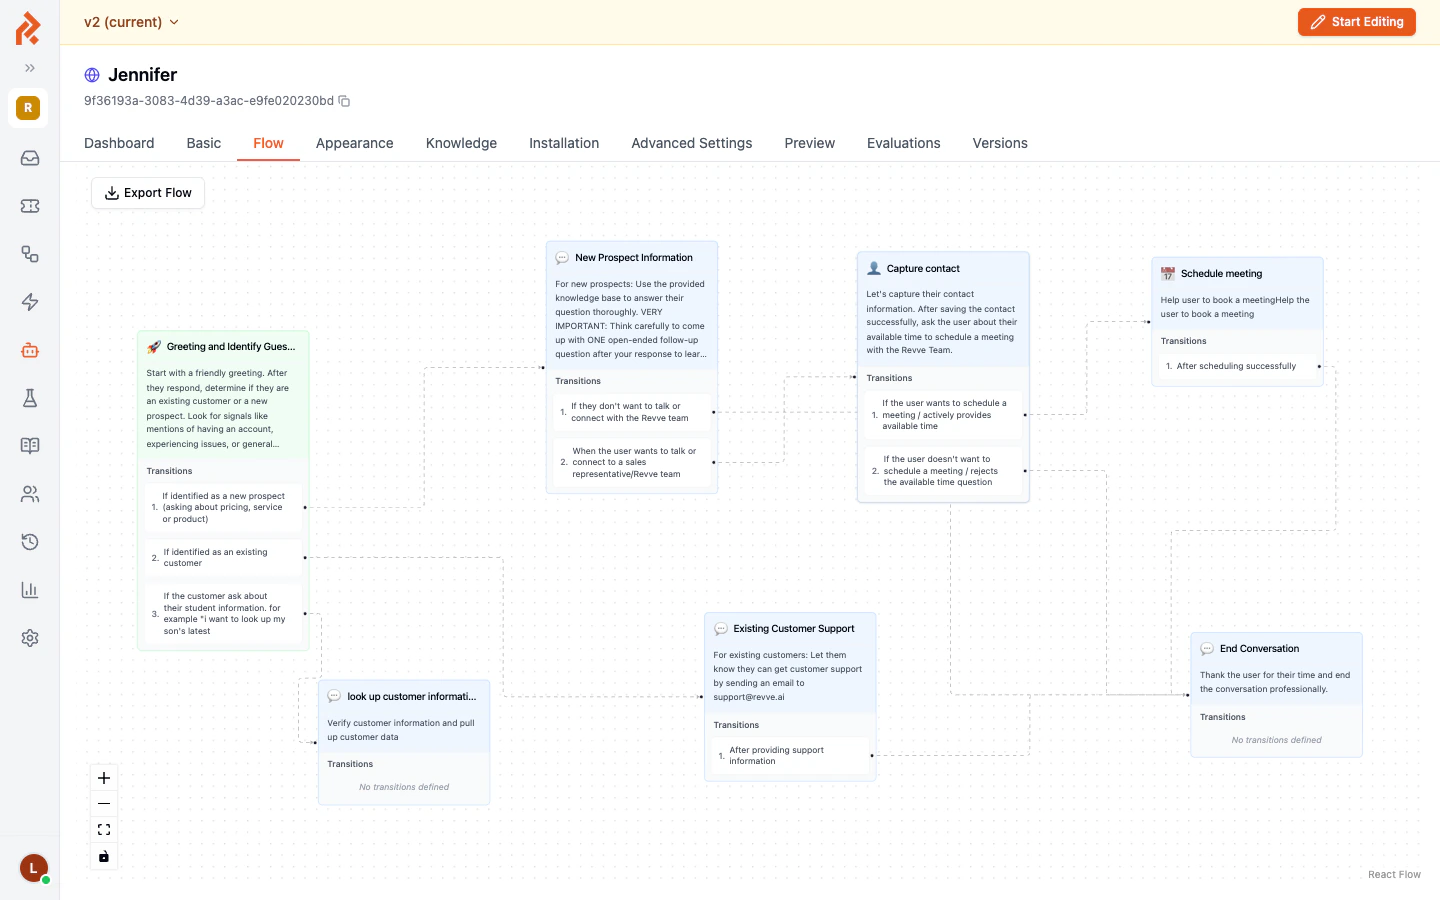
- Behave differently depending on the visitor’s responses (new prospect vs. existing customer).
- Collect specific information at defined stages before moving on.
- Hand off to a human agent or book a meeting at the right moment.
How to Access the Flow Editor
- Navigate to Agents > Chat Agents in the left sidebar.
- Click on the Chat Agent that uses the Conversational Flow engine type. You can identify it by the label “Conversational Flow” shown beneath the agent name in the list.
- Select the Flow tab in the top navigation bar of the agent detail page.
Anatomy of the Flow Editor
The editor canvas is built around two core concepts:Canvas Controls
At the bottom-left corner of the canvas you will find zoom and navigation controls:Toolbar (Editing Mode)
When you click Start Editing to acquire the edit lock, a toolbar appears above the canvas:Version Control and Editing Lock
The flow editor uses a collaborative editing model:- Versions — Each published state of your flow is saved as a version (for example, “v2 (current)”). You can view older versions in read-only mode from the Versions tab.
- Edit Lock — Only one team member can edit a flow at a time. Click Start Editing to acquire the lock. When you are finished, click Stop Editing to release it so others can make changes.
- Publish — After saving your flow, click Publish to make the new version live.
Tips
- Use Fit View frequently to get a bird’s-eye view of your entire flow, especially after adding new nodes.
- Always Save Flow before leaving the page. The editor will warn you if you try to navigate away with unsaved changes.
- Export your flow before making major changes so you can restore it if needed.
- Release the edit lock when you are done so other team members are not blocked.
Next Steps
- Creating and Connecting Nodes — Learn how to add nodes and define transitions.
- Global Nodes and Prompts — Understand nodes that can be reached from anywhere in the flow.
- Flow Node Features — Explore per-node settings like contact collection, meeting scheduling, and more.