Adding a New Node
- Make sure you are in editing mode (click Start Editing if the button is visible).
- Click the Add Node button in the toolbar above the canvas.
- Fill in the fields in the Create New Node dialog:
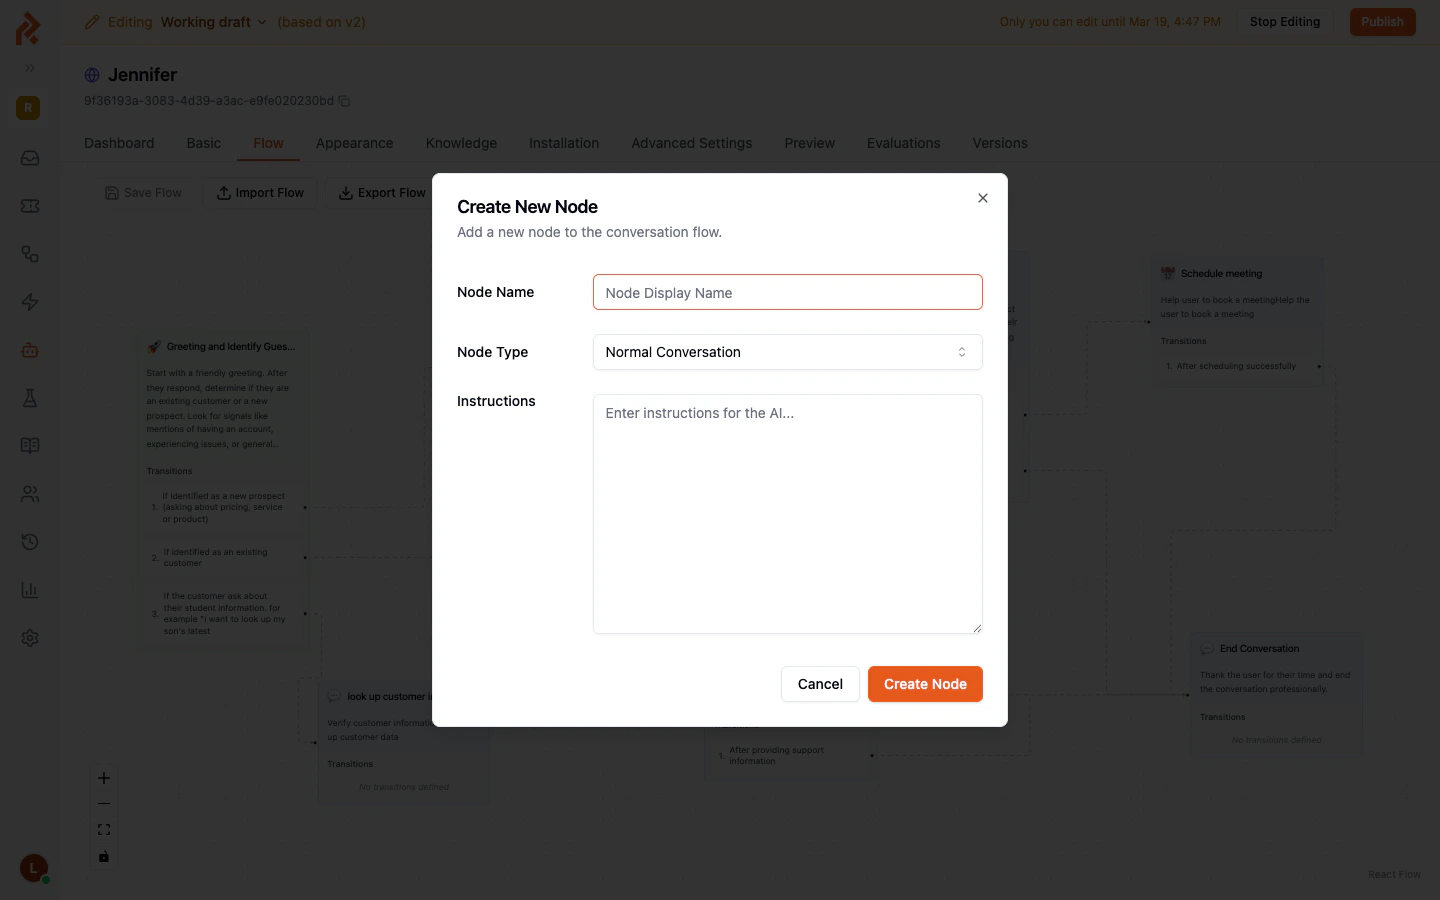
Node Types
- Click Create Node. The new node appears on the canvas and you can drag it to the desired position.
Understanding Transitions
Transitions are the arrows that connect one node to another. Each transition carries a condition — a plain-language rule that tells the AI when to move the conversation along that path. For example, a “Greeting” node might have two transitions:- “If the visitor is a new prospect asking about pricing” — leads to the “New Prospect Information” node.
- “If the visitor is an existing customer” — leads to the “Existing Customer Support” node.
Creating a Transition
There are two ways to add a transition:Option A — From the Node Card
Each node card on the canvas displays its existing transitions in the Transitions section at the bottom. In editing mode, you will see an Add transition button there. Clicking it creates a new, unconnected transition that you can configure later.Option B — Drag a Connection
- Hover over a node until you see a small handle (a dot) at the edge of the node.
- Click and drag from that handle to another node on the canvas.
- Release the mouse over the target node. A new transition is created and the Edit Transition panel opens on the right so you can set the condition.
Editing a Transition
Click on any transition arrow in the canvas, or click on a numbered transition item inside a node card. The Edit Transition panel opens on the right side of the screen.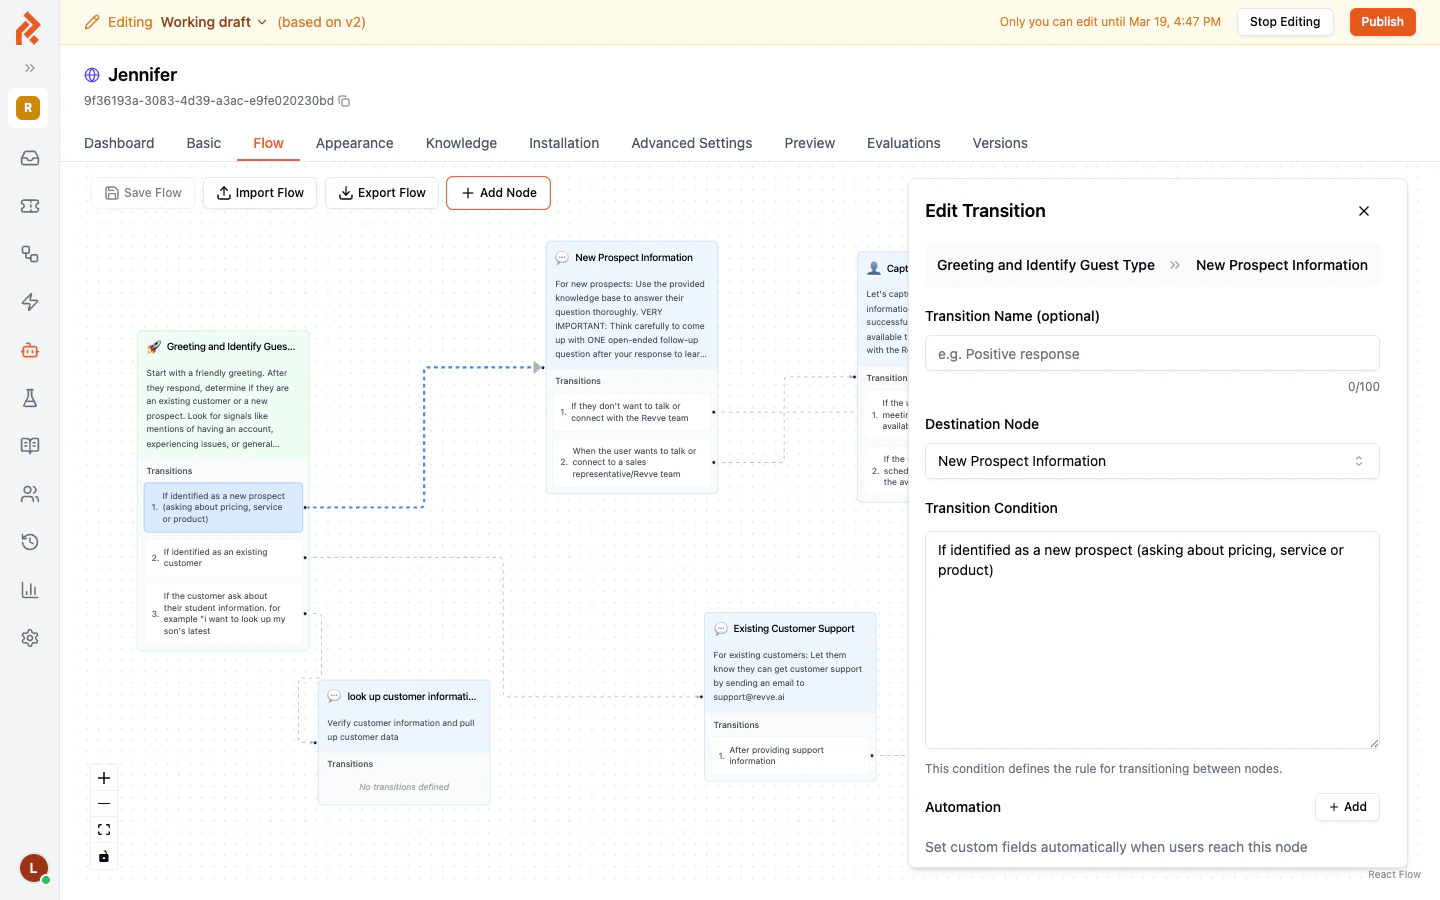
At the bottom of the panel you will find:
Rearranging Nodes
Drag any node to reposition it on the canvas. The transition arrows automatically adjust to follow the new layout. Node positions are saved when you click Save Flow.Deleting a Node
- Click on the node to open its configuration panel on the right.
- Scroll to the bottom and click Delete Node.
- Confirm the deletion when prompted.
Best Practices
- Keep conditions specific and non-overlapping. If two transitions from the same node have vague or similar conditions, the AI may choose the wrong path. Use clear, distinct criteria for each transition.
- Always have a fallback path. Consider adding a transition for cases where the visitor’s intent does not match any specific condition (for example, “If the visitor’s request does not match any other category”).
- Name your nodes descriptively. Short, clear names like “Qualify Lead” or “Book Demo” make the flow easy to read at a glance.
- Test after major changes. Use the Preview tab to walk through your flow as a visitor would, verifying that each transition fires at the right time.
- Save frequently. Click Save Flow after adding or modifying nodes and transitions to avoid losing work.
Next Steps
- Global Nodes and Prompts — Learn about nodes that can be reached from any point in the conversation.
- Flow Node Features — Explore per-node capabilities like contact collection and meeting scheduling.