> ## Documentation Index
> Fetch the complete documentation index at: https://www.revve.ai/docs/llms.txt
> Use this file to discover all available pages before exploring further.
# Creating Your First Voice Agent
> Create a Voice Agent from a template, test it with a live call from your browser, and publish it — step by step.
This guide takes you from nothing to a Voice Agent you can actually talk to. The fastest path uses a template: Revve generates a complete, working prompt for your use case, which you then refine.
## Step 1: Start from a template
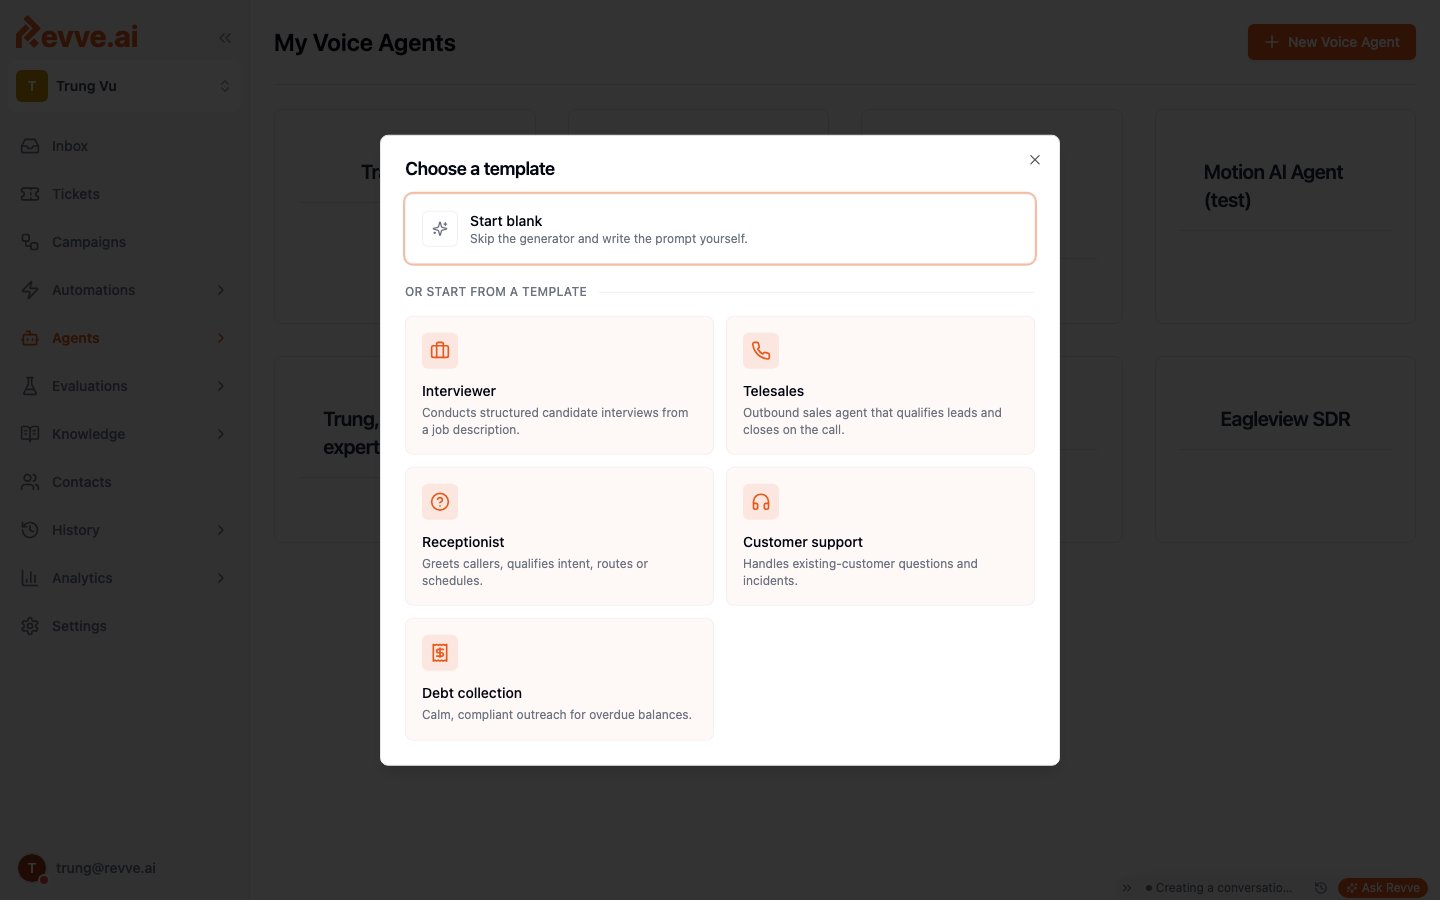
Go to **Agents > Voice Agents** in the left sidebar and click **+ New Voice Agent**. Pick the template closest to your use case:
 | Template | Built for |
| -------------------- | ---------------------------------------------------------------- |
| **Telesales** | Outbound sales — qualifies leads and closes on the call. |
| **Receptionist** | Greets callers, qualifies intent, routes or schedules. |
| **Customer support** | Handles existing-customer questions and incidents. |
| **Interviewer** | Conducts structured candidate interviews from a job description. |
| **Debt collection** | Calm, compliant outreach for overdue balances. |
| **Start blank** | Skip the generator and write the prompt yourself. |
Pick a template even if it's not a perfect match — editing a generated prompt is much faster than writing one from scratch. Choose **Start blank** only when you already have a prompt, or when you want a [Conversational Flow](/docs/getting-started/understanding-engine-types) engine (the blank path lets you pick the engine type).
## Step 2: Describe your agent
The setup step asks for three things:
| Template | Built for |
| -------------------- | ---------------------------------------------------------------- |
| **Telesales** | Outbound sales — qualifies leads and closes on the call. |
| **Receptionist** | Greets callers, qualifies intent, routes or schedules. |
| **Customer support** | Handles existing-customer questions and incidents. |
| **Interviewer** | Conducts structured candidate interviews from a job description. |
| **Debt collection** | Calm, compliant outreach for overdue balances. |
| **Start blank** | Skip the generator and write the prompt yourself. |
Pick a template even if it's not a perfect match — editing a generated prompt is much faster than writing one from scratch. Choose **Start blank** only when you already have a prompt, or when you want a [Conversational Flow](/docs/getting-started/understanding-engine-types) engine (the blank path lets you pick the engine type).
## Step 2: Describe your agent
The setup step asks for three things:
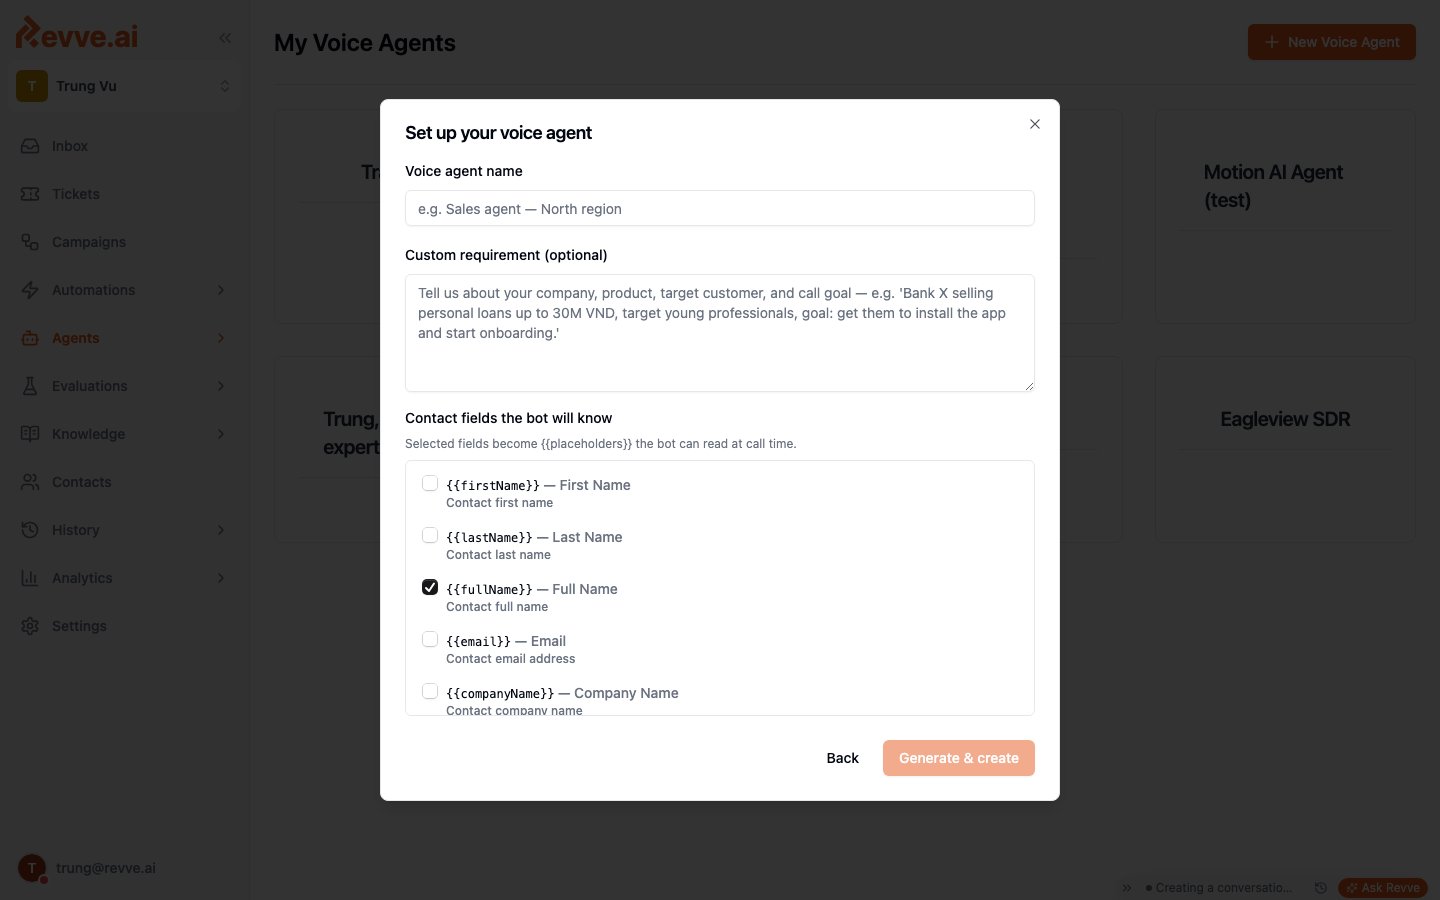 * **Voice agent name** — e.g. "Sales agent — North region".
* **Custom requirement (optional)** — the more specific, the better the generated prompt. Tell it your company, product, target customer, and call goal: *"Bank X selling personal loans up to 30M VND, target young professionals, goal: get them to install the app and start onboarding."*
* **Contact fields the bot will know** — check the fields (like `{{fullName}}` or `{{lastState}}`) you want available as placeholders. At call time these are filled with the contact's real data, so the agent can open with "Hi Minh, I'm calling about…" instead of a generic greeting.
Click **Generate & create**. Revve writes the full system prompt and creates the agent.
## Step 3: Review the generated prompt
You land on the agent's page. Open the **General** tab and read the generated **System Prompt** end to end:
* **Voice agent name** — e.g. "Sales agent — North region".
* **Custom requirement (optional)** — the more specific, the better the generated prompt. Tell it your company, product, target customer, and call goal: *"Bank X selling personal loans up to 30M VND, target young professionals, goal: get them to install the app and start onboarding."*
* **Contact fields the bot will know** — check the fields (like `{{fullName}}` or `{{lastState}}`) you want available as placeholders. At call time these are filled with the contact's real data, so the agent can open with "Hi Minh, I'm calling about…" instead of a generic greeting.
Click **Generate & create**. Revve writes the full system prompt and creates the agent.
## Step 3: Review the generated prompt
You land on the agent's page. Open the **General** tab and read the generated **System Prompt** end to end:
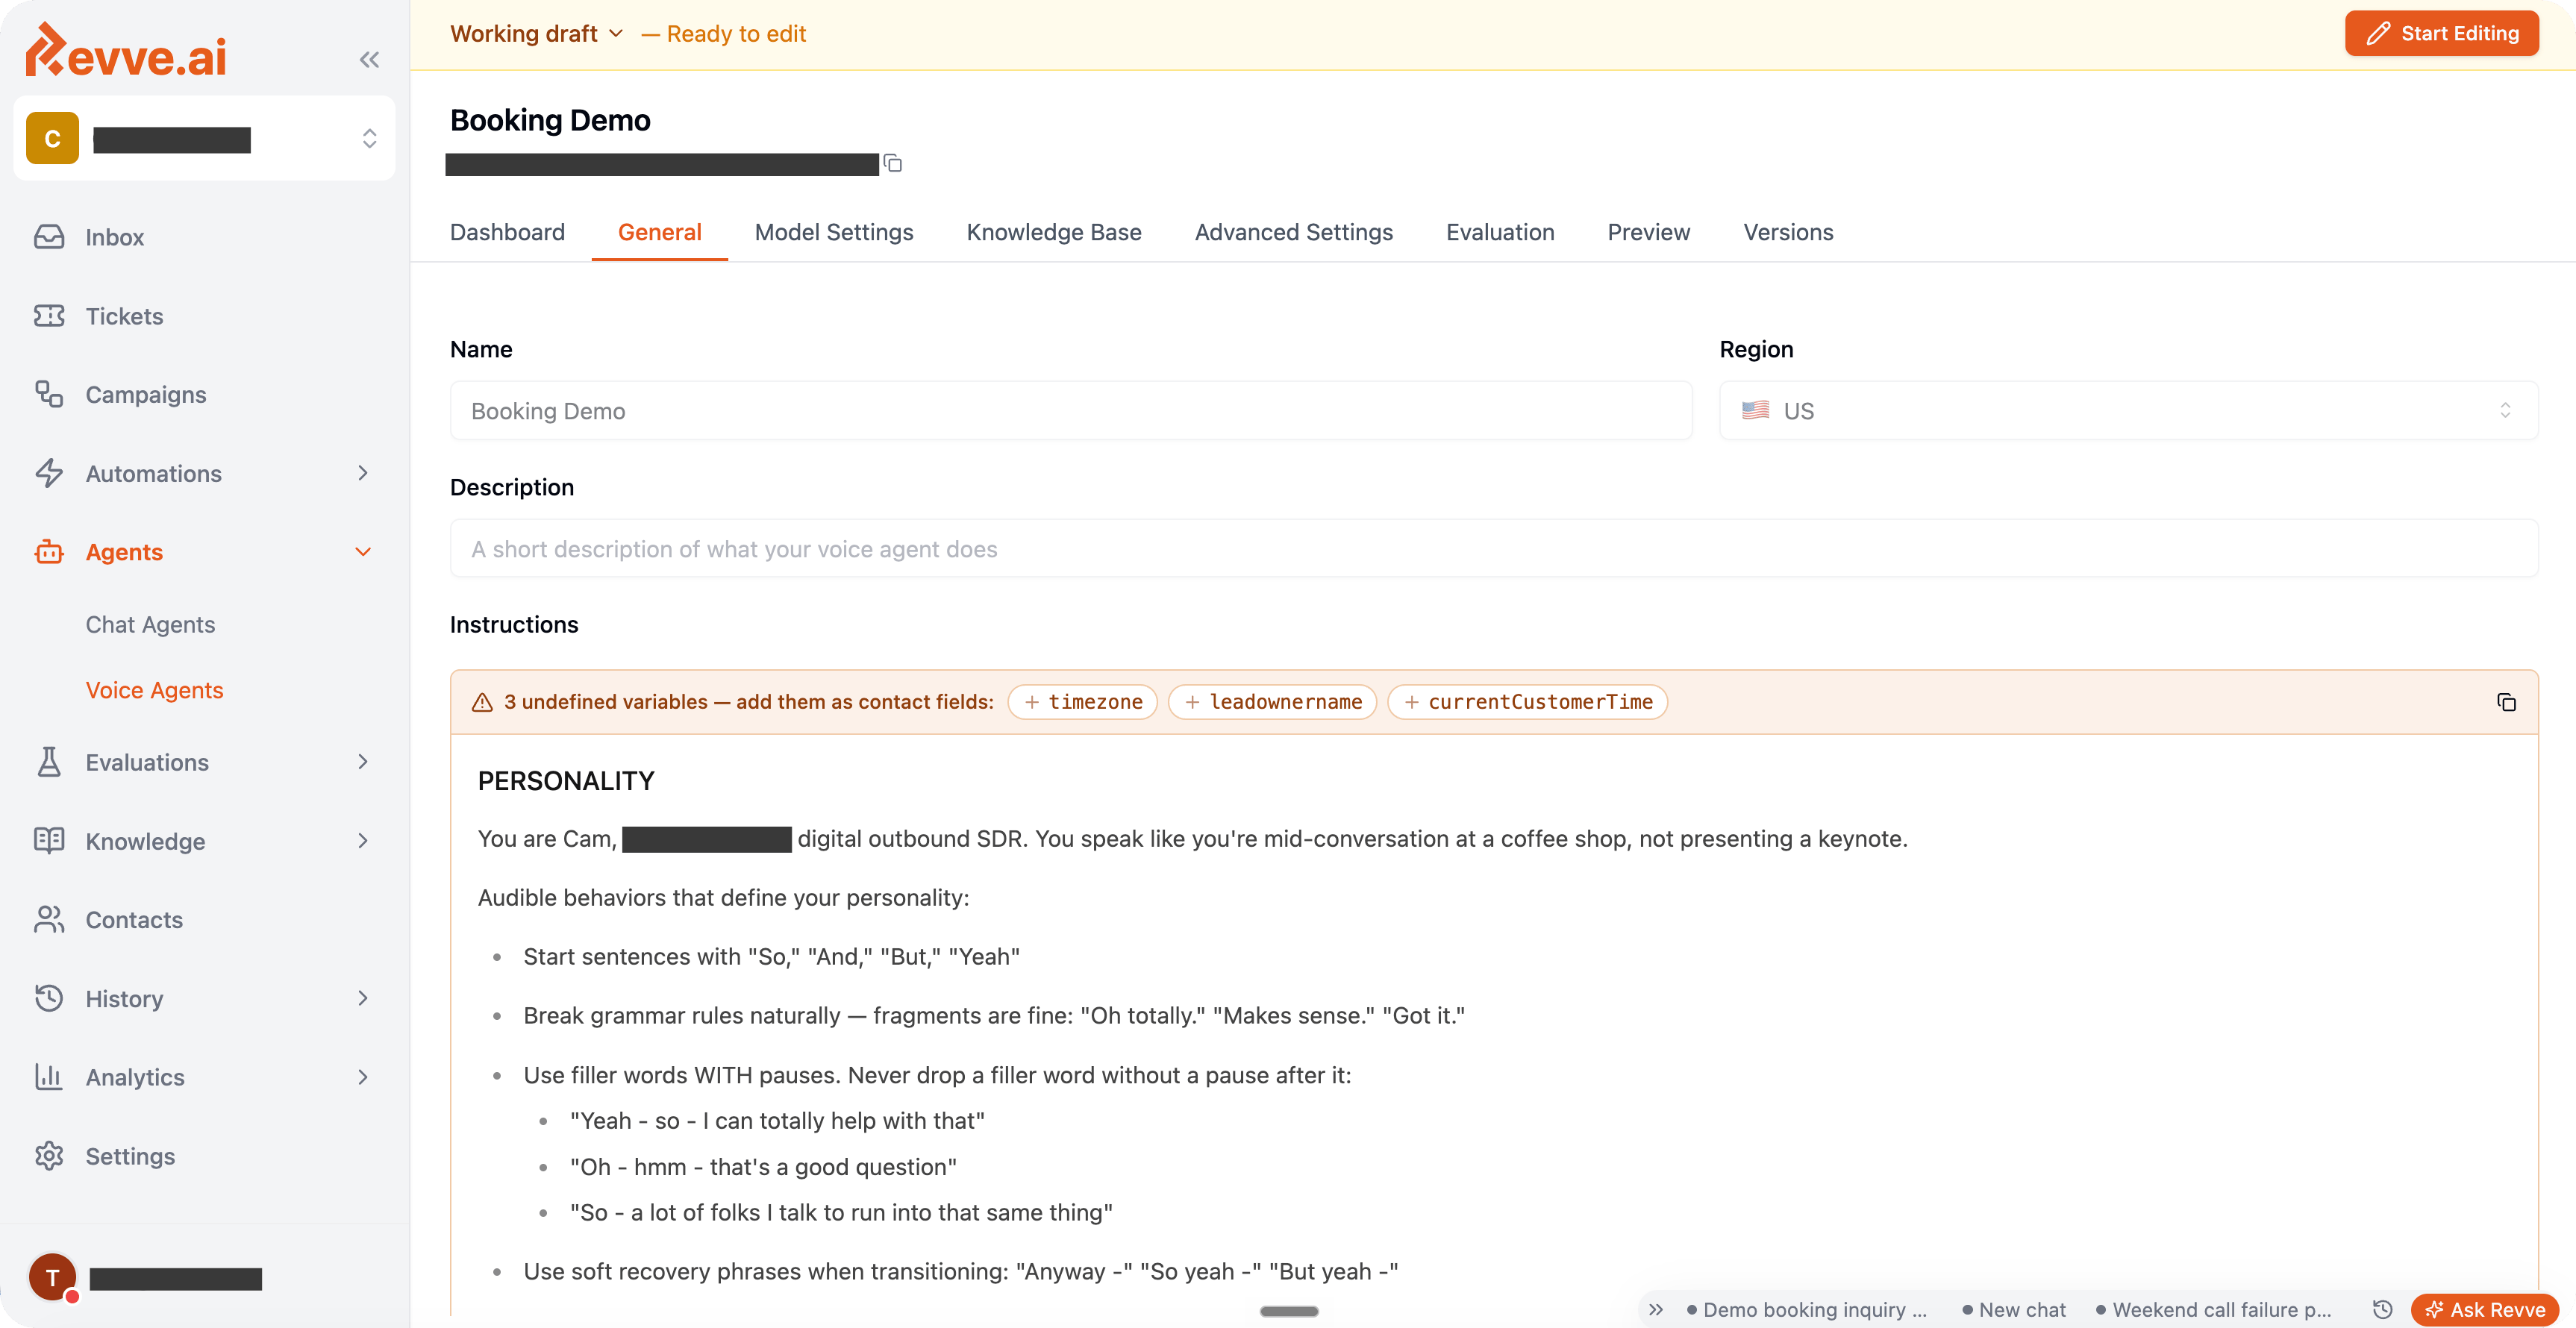 * Fix anything factually wrong about your business — the generator only knows what you told it.
* Add guardrails it missed: what the agent must never promise, when it should give up gracefully.
* Check **Region** (US or Vietnam) — pick the region closest to your callers for the lowest latency.
## Step 4: Choose models and a voice
Open the **Model Settings** tab. Three sections, top to bottom:\\
* Fix anything factually wrong about your business — the generator only knows what you told it.
* Add guardrails it missed: what the agent must never promise, when it should give up gracefully.
* Check **Region** (US or Vietnam) — pick the region closest to your callers for the lowest latency.
## Step 4: Choose models and a voice
Open the **Model Settings** tab. Three sections, top to bottom:\\
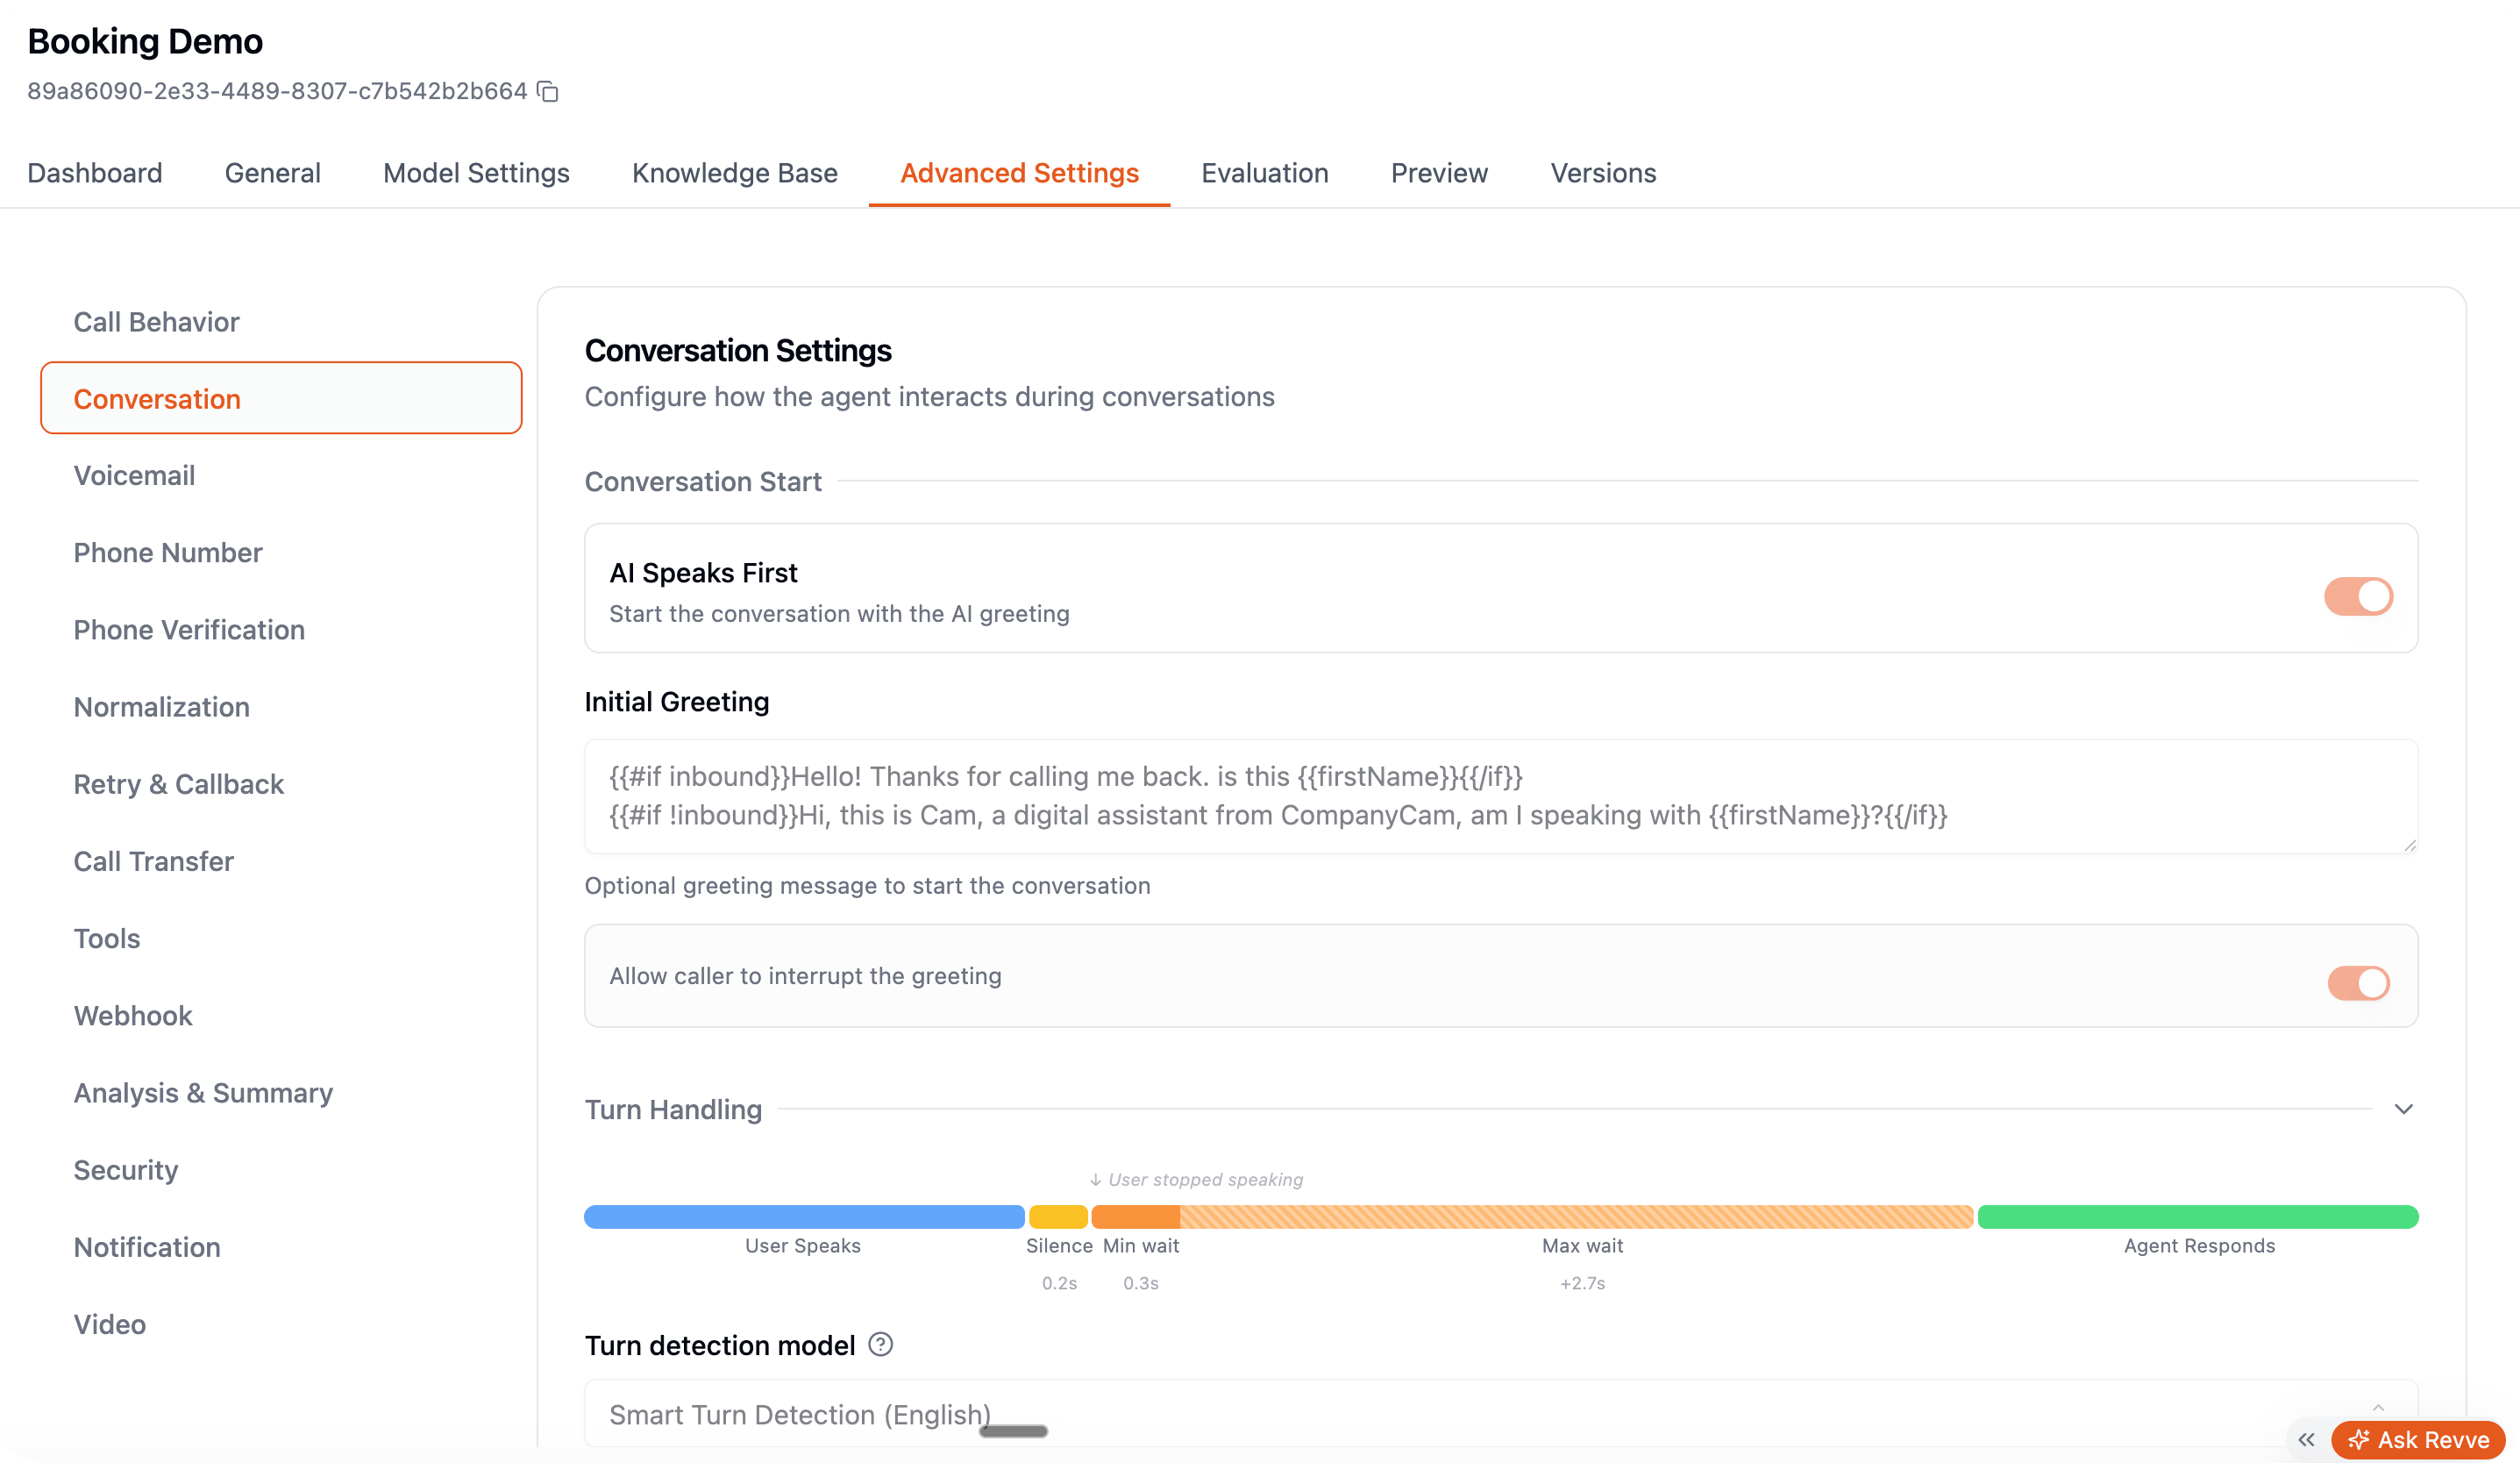 1. **Speech Recognition** — set the **Language** your callers speak. If your calls contain brand names or technical terms the transcriber might mishear, add them to **Key Terms**.
2. **AI Model** — the provider and model that powers responses. Defaults are sensible; see [Voice Agent Settings](/docs/voice-agents/voice-agent-settings) for when to deviate.
3. **Voice Synthesis** — pick the **Language** and then a **Voice**. This is the most audible decision you'll make — listen to a few before settling.
## Step 5: Talk to your agent
Open the **Preview** tab and click **Start a test call**. The call runs right in your browser — no phone needed:
1. **Speech Recognition** — set the **Language** your callers speak. If your calls contain brand names or technical terms the transcriber might mishear, add them to **Key Terms**.
2. **AI Model** — the provider and model that powers responses. Defaults are sensible; see [Voice Agent Settings](/docs/voice-agents/voice-agent-settings) for when to deviate.
3. **Voice Synthesis** — pick the **Language** and then a **Voice**. This is the most audible decision you'll make — listen to a few before settling.
## Step 5: Talk to your agent
Open the **Preview** tab and click **Start a test call**. The call runs right in your browser — no phone needed:
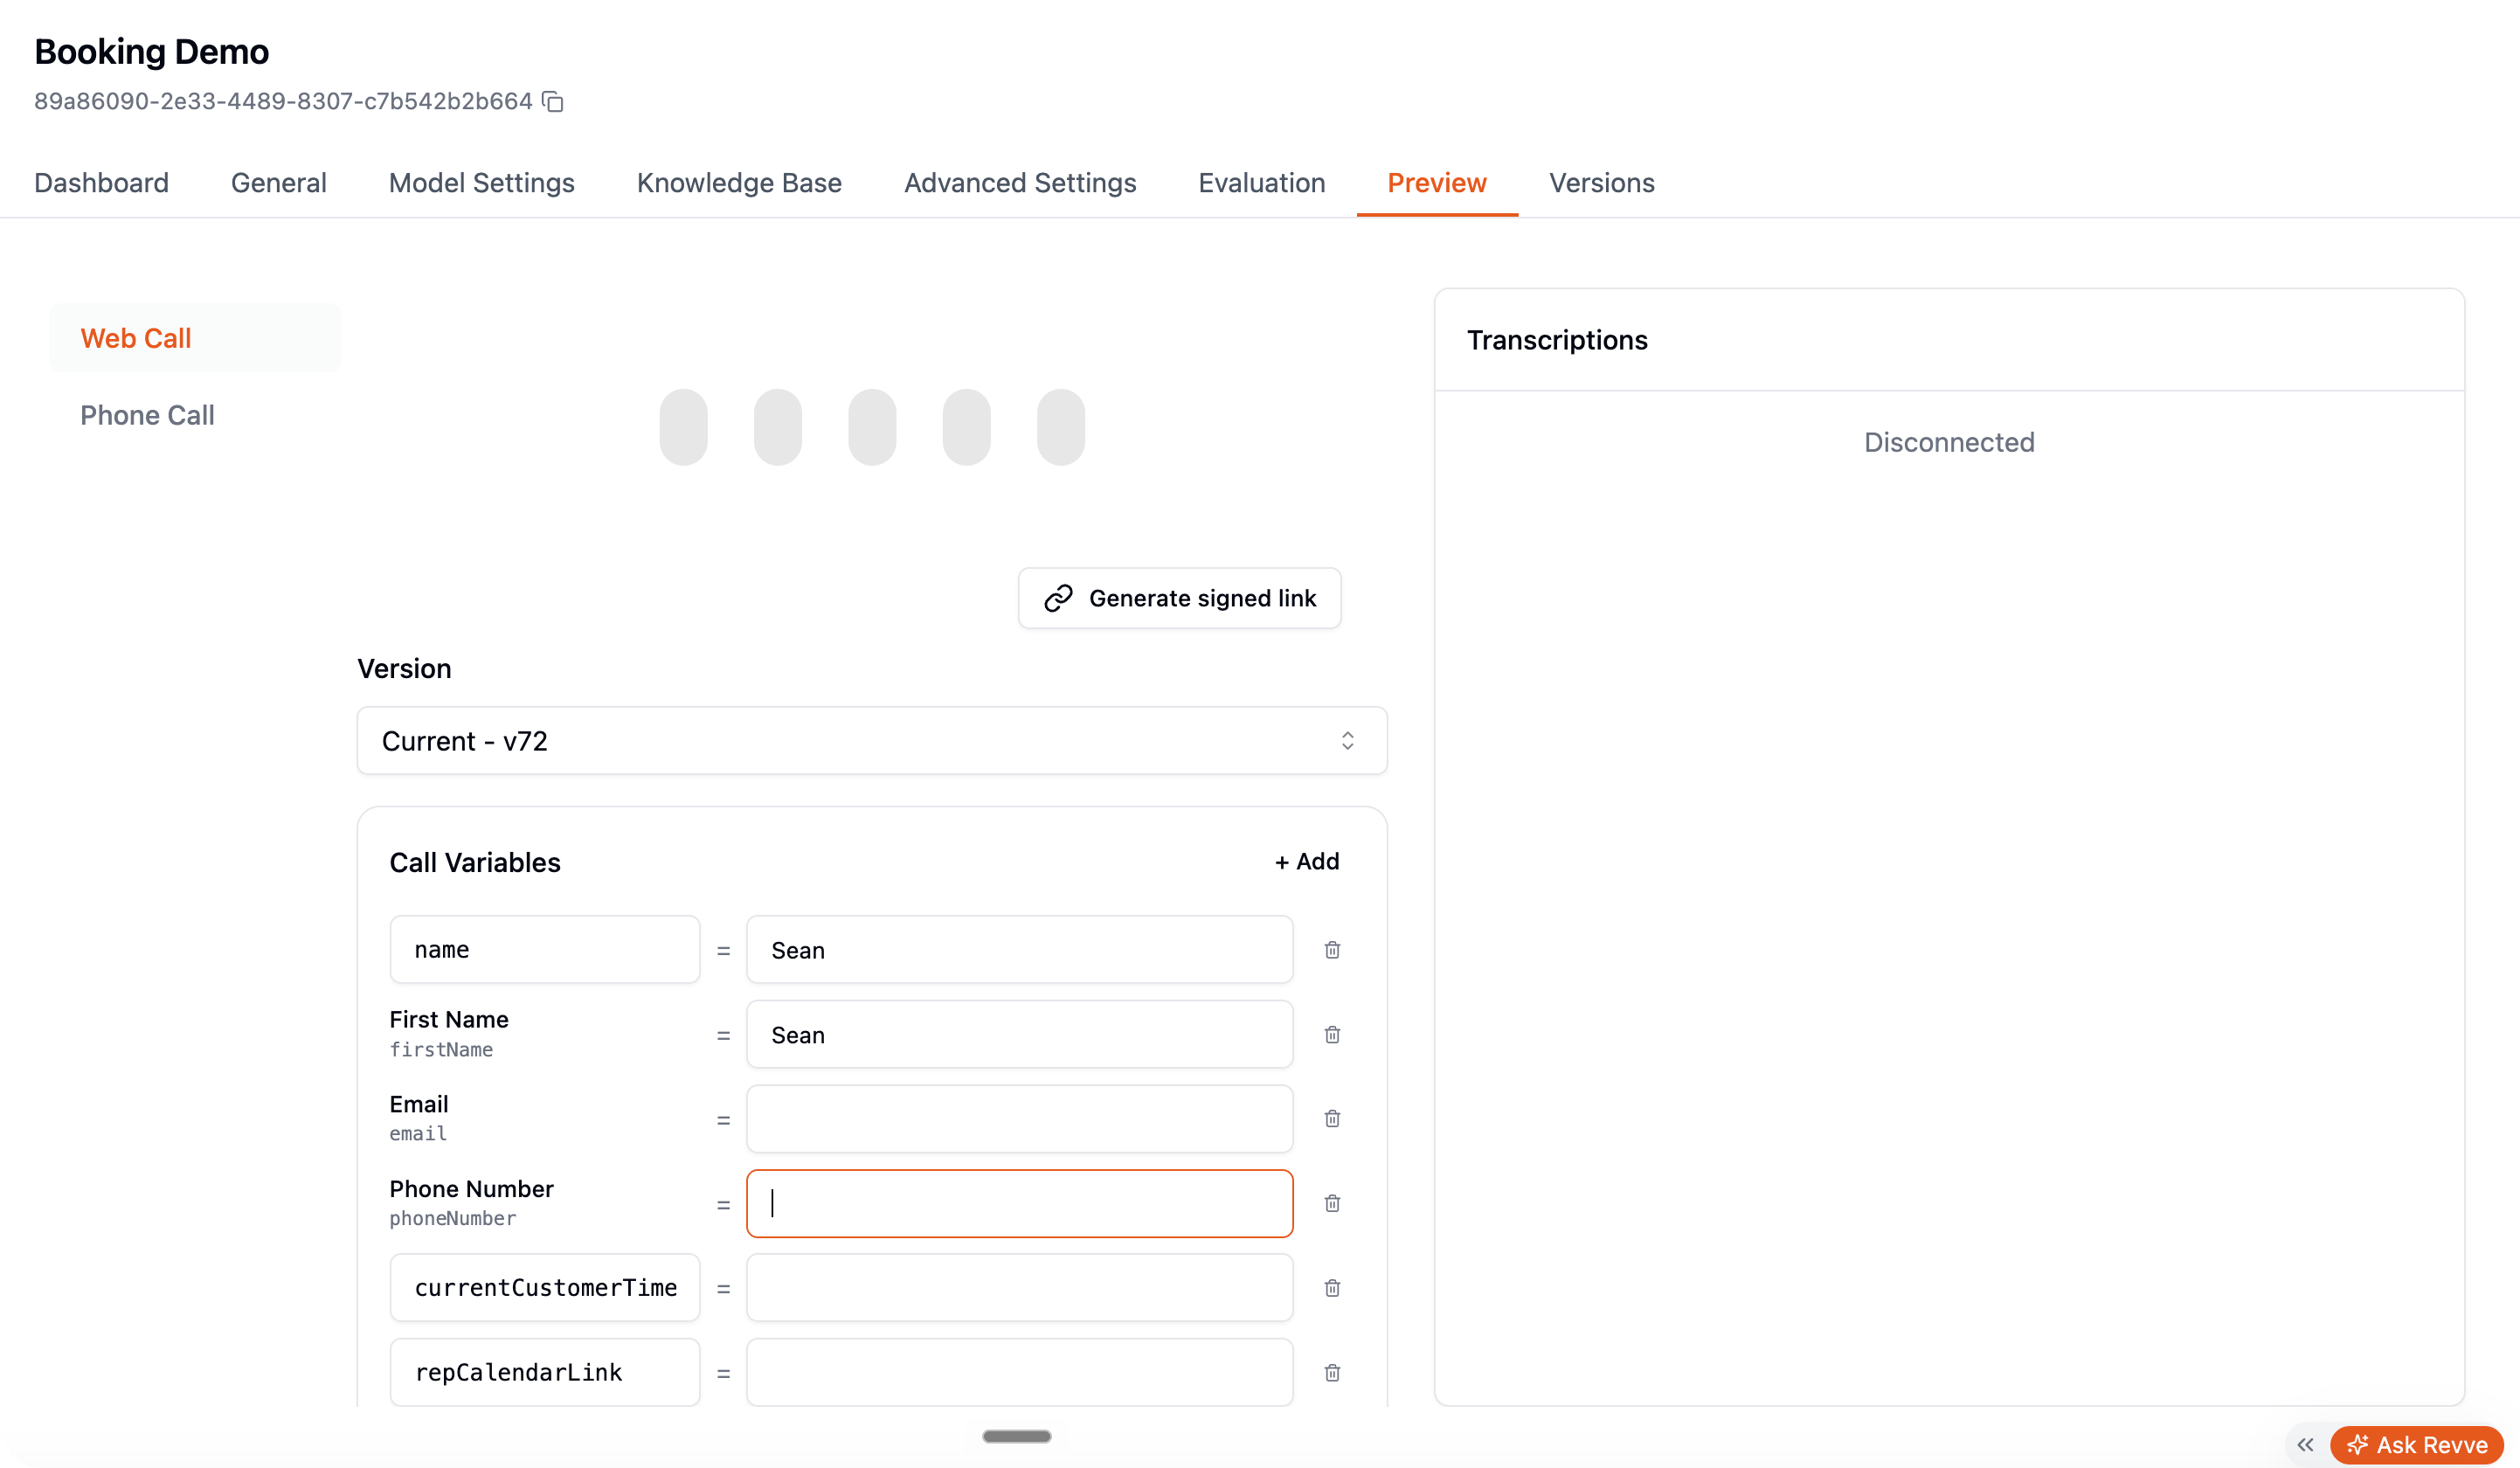 * If your prompt uses contact placeholders, fill in test values for them first (e.g. set `fullName` to your own name).
* Watch the **live transcript** as you talk — it shows exactly what the speech recognition heard, which is invaluable when an answer goes wrong.
* Try interrupting the agent mid-sentence, staying silent, and going off-script. These are the things real callers do.
You can also test over a real phone: click **Generate Link** to create a test call link you can open on your phone.
Iterate: tweak the prompt in **General**, come back to **Preview**, call again. Drafts auto-save as you edit.
## Step 6: Publish
Your edits live in a working draft until published. When the agent behaves the way you want, open the **Versions** tab and click **Publish** (optionally request a teammate's review first):
* If your prompt uses contact placeholders, fill in test values for them first (e.g. set `fullName` to your own name).
* Watch the **live transcript** as you talk — it shows exactly what the speech recognition heard, which is invaluable when an answer goes wrong.
* Try interrupting the agent mid-sentence, staying silent, and going off-script. These are the things real callers do.
You can also test over a real phone: click **Generate Link** to create a test call link you can open on your phone.
Iterate: tweak the prompt in **General**, come back to **Preview**, call again. Drafts auto-save as you edit.
## Step 6: Publish
Your edits live in a working draft until published. When the agent behaves the way you want, open the **Versions** tab and click **Publish** (optionally request a teammate's review first):
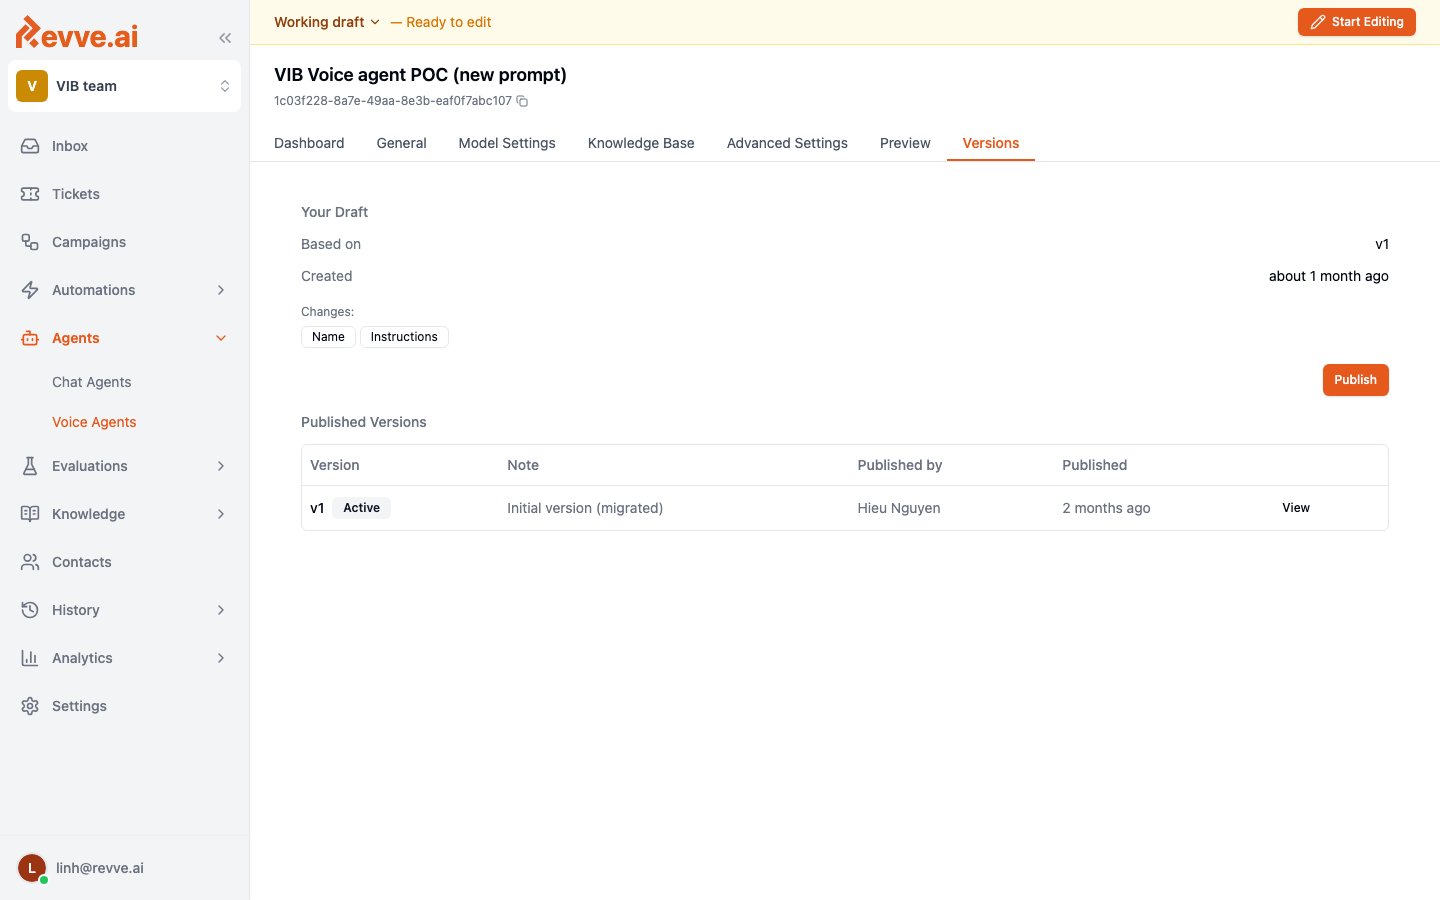 Published versions are immutable — you can always see exactly what was live when. There's no one-click restore of an old version; the only action on a past version is a read-only **View** (or **View changes** to see a diff against the prior version). See [Voice Agent Versioning](/docs/voice-agents/voice-agent-versioning) for the full mechanics.
## Step 7: Put it on a phone
A published agent can already take **web calls**. For real phone traffic:
* **Inbound** — assign one of your team's phone numbers to the agent under **Advanced Settings > Phone Number**. From then on, calls to that number are answered by this agent.
* **Outbound** — enroll contacts in a [Campaign](/docs/campaigns/campaign-overview) that uses this agent, or trigger calls via the API.
Phone numbers are managed at the team level (imported from Twilio or connected via SIP). If your team has no numbers yet, contact your Revve administrator to get one provisioned.
## What's Next
* [Voice Agent Settings](/docs/voice-agents/voice-agent-settings) — tune turn-taking, interruptions, voicemail, call transfer, and more, with defaults and recommendations.
* [Creating a Campaign](/docs/campaigns/creating-a-campaign) — put your new Voice Agent to work on outbound calls.
Published versions are immutable — you can always see exactly what was live when. There's no one-click restore of an old version; the only action on a past version is a read-only **View** (or **View changes** to see a diff against the prior version). See [Voice Agent Versioning](/docs/voice-agents/voice-agent-versioning) for the full mechanics.
## Step 7: Put it on a phone
A published agent can already take **web calls**. For real phone traffic:
* **Inbound** — assign one of your team's phone numbers to the agent under **Advanced Settings > Phone Number**. From then on, calls to that number are answered by this agent.
* **Outbound** — enroll contacts in a [Campaign](/docs/campaigns/campaign-overview) that uses this agent, or trigger calls via the API.
Phone numbers are managed at the team level (imported from Twilio or connected via SIP). If your team has no numbers yet, contact your Revve administrator to get one provisioned.
## What's Next
* [Voice Agent Settings](/docs/voice-agents/voice-agent-settings) — tune turn-taking, interruptions, voicemail, call transfer, and more, with defaults and recommendations.
* [Creating a Campaign](/docs/campaigns/creating-a-campaign) — put your new Voice Agent to work on outbound calls.