> ## Documentation Index
> Fetch the complete documentation index at: https://www.revve.ai/docs/llms.txt
> Use this file to discover all available pages before exploring further.
# Adding Web Pages and Documents
> Upload files, add web page URLs, and set up automated crawlers to keep your agent's knowledge current.
Your agent needs content to answer questions. This guide covers how to add web pages and documents to your knowledge base, and how to use website crawlers to automatically keep everything up to date.
## Adding Content from the Global Knowledge Base
Navigate to **Knowledge Base > Web Pages & Docs** in the left sidebar to access your team's central content library. From here, you can add individual web pages or upload documents.
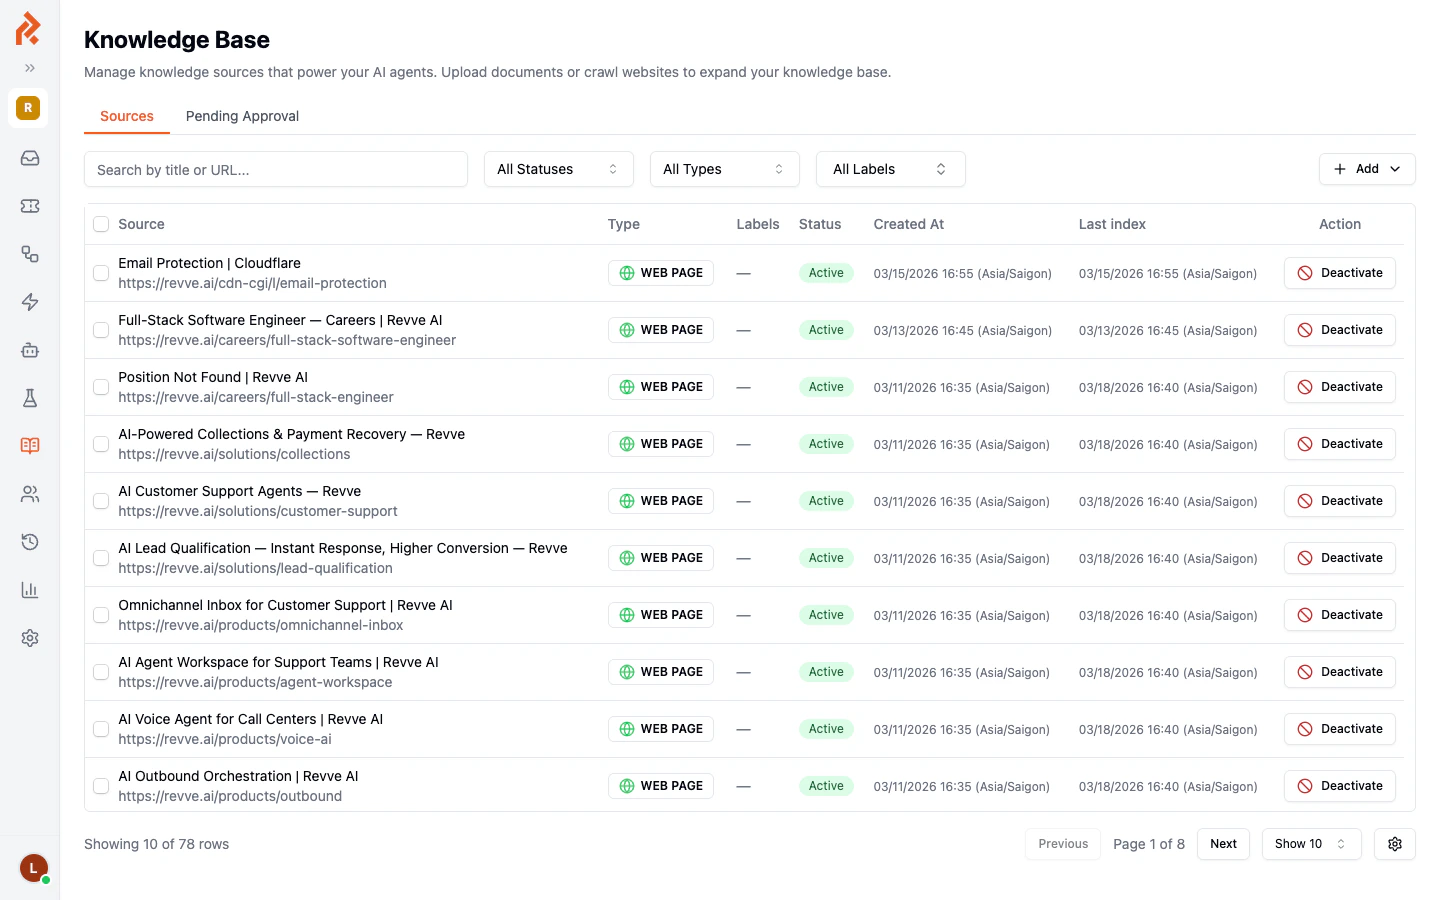 ### Adding a Web Page
1. Click the **Add** button in the top-right area of the Knowledge Base page.
2. Select **Add Web Page** from the dropdown menu.
3. Enter the full URL of the page you want to add (for example, `https://yourcompany.com/pricing`).
4. Click **Save**. Revve will fetch the page content and index it for your agent.
### Uploading a Document
1. Click the **Add** button.
2. Select **Upload Document** from the dropdown menu.
3. Choose a file from your computer.
4. Click **Upload**. The document will be processed and added to your knowledge base.
### Adding a Web Page
1. Click the **Add** button in the top-right area of the Knowledge Base page.
2. Select **Add Web Page** from the dropdown menu.
3. Enter the full URL of the page you want to add (for example, `https://yourcompany.com/pricing`).
4. Click **Save**. Revve will fetch the page content and index it for your agent.
### Uploading a Document
1. Click the **Add** button.
2. Select **Upload Document** from the dropdown menu.
3. Choose a file from your computer.
4. Click **Upload**. The document will be processed and added to your knowledge base.
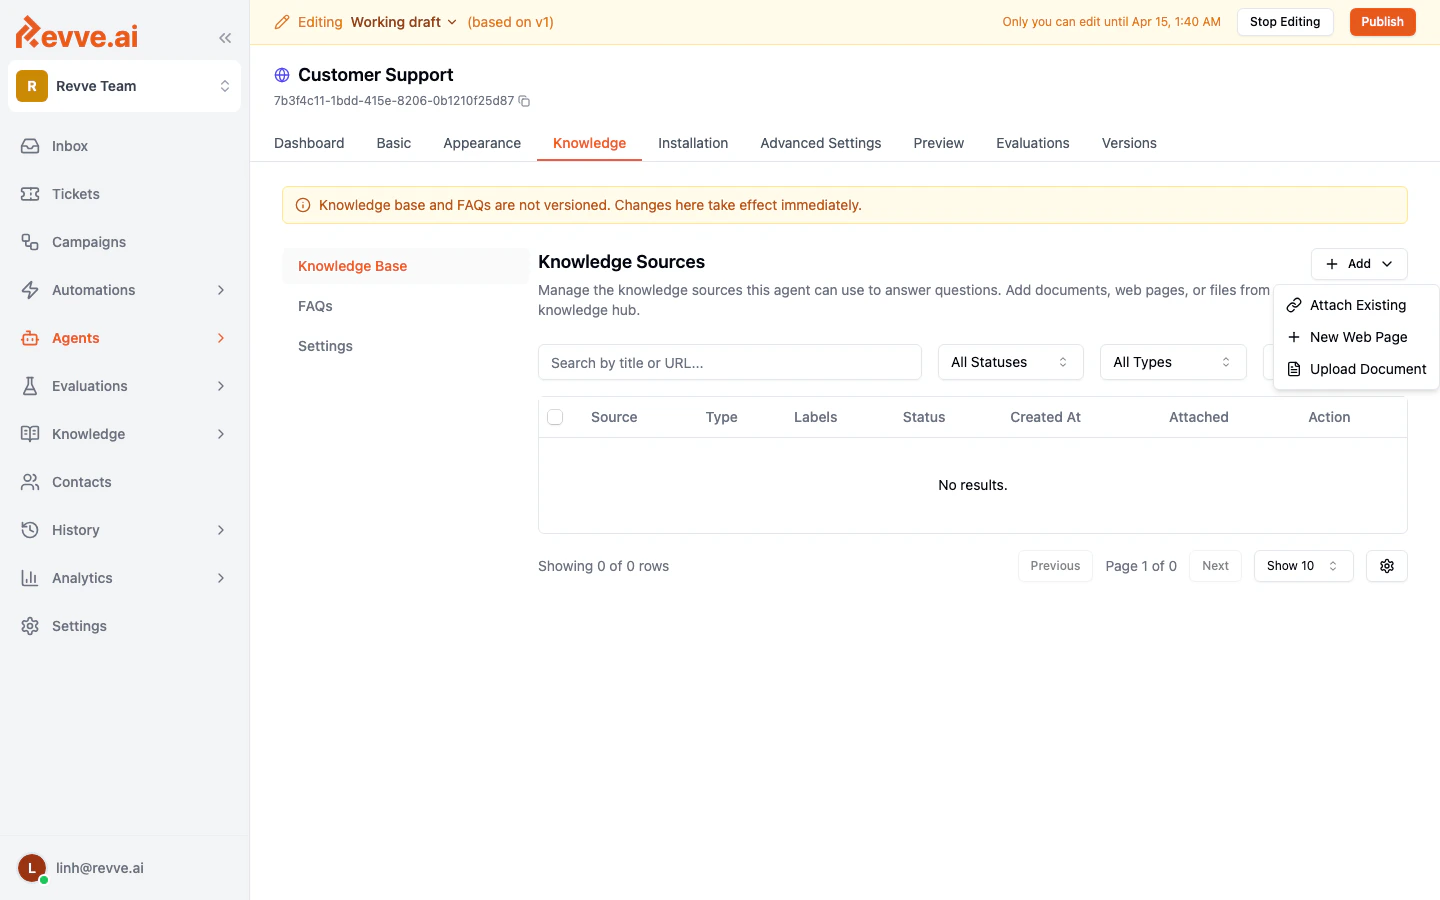 **Supported file formats:**
| Format | Description |
| ------ | -------------------------------------------- |
| PDF | Product guides, datasheets, policy documents |
| DOCX | Word documents, internal procedures |
| TXT | Plain text files, notes, scripts |
## Adding Content from a Chat Agent
You can also add knowledge sources directly from within a specific chat agent:
1. Open your chat agent and go to the **Knowledge** tab.
2. Click **Start Editing** to enable changes.
3. Click the **Add** button to add a web page or upload a document.
Sources added from within a chat agent are automatically attached to that agent. Sources added from the global Knowledge Base need to be attached to each agent individually.
**Supported file formats:**
| Format | Description |
| ------ | -------------------------------------------- |
| PDF | Product guides, datasheets, policy documents |
| DOCX | Word documents, internal procedures |
| TXT | Plain text files, notes, scripts |
## Adding Content from a Chat Agent
You can also add knowledge sources directly from within a specific chat agent:
1. Open your chat agent and go to the **Knowledge** tab.
2. Click **Start Editing** to enable changes.
3. Click the **Add** button to add a web page or upload a document.
Sources added from within a chat agent are automatically attached to that agent. Sources added from the global Knowledge Base need to be attached to each agent individually.
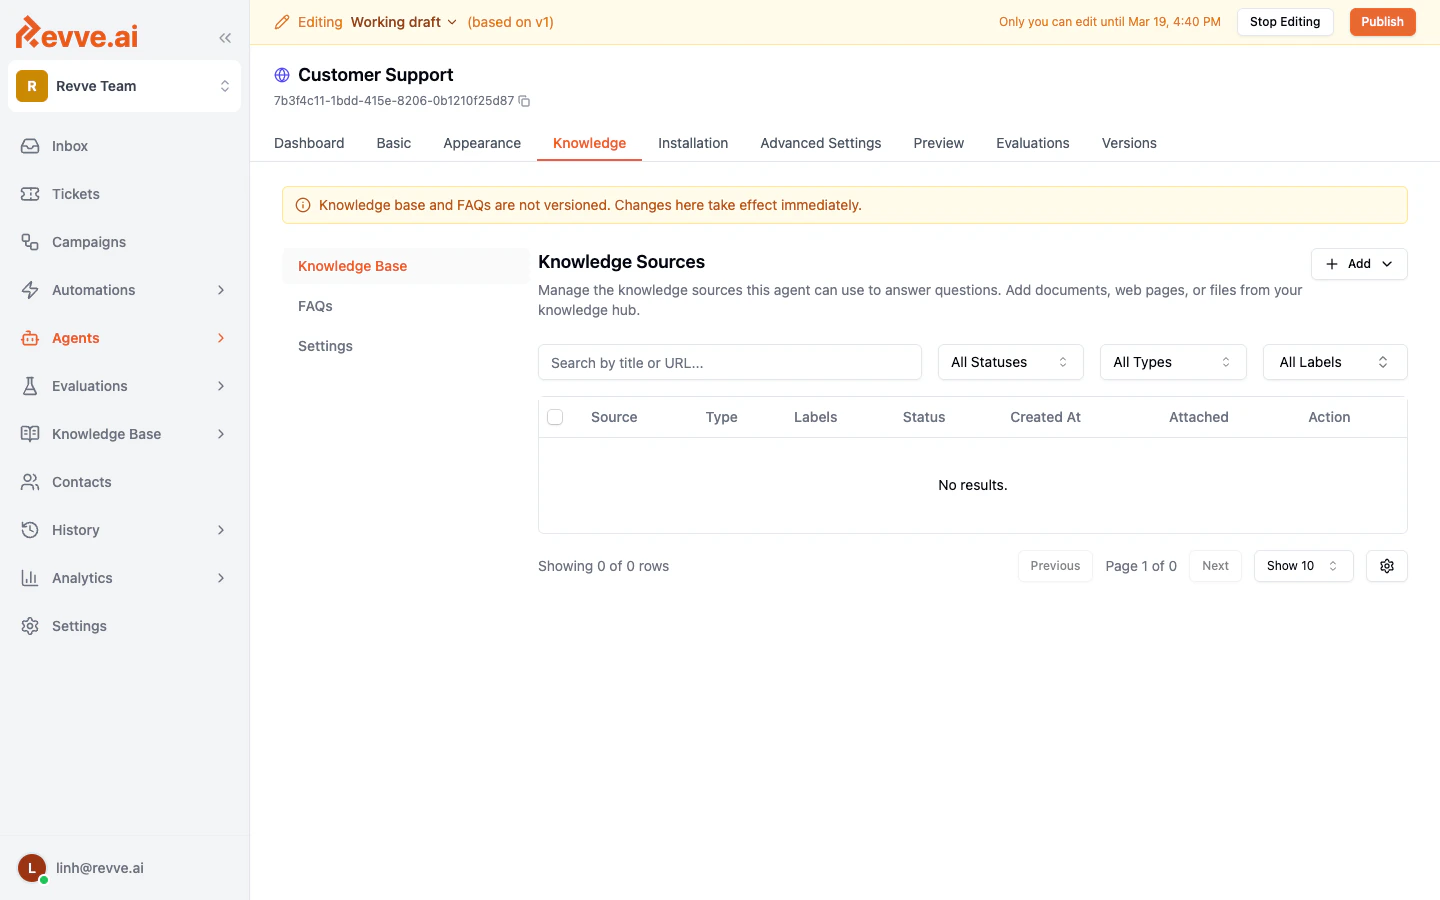 **Note:** The banner at the top reminds you that "Knowledge base and FAQs are not versioned. Changes here take effect immediately." This means any content you add or remove is live right away -- there is no need to publish a new version.
## Managing Knowledge Sources
Each source in your knowledge base has the following attributes:
| Column | Description |
| -------------- | -------------------------------------------------------------------------------------------------- |
| **Source** | The title and URL (for web pages) or filename (for documents). |
| **Type** | Either `WEB PAGE` or `DOCUMENT`. |
| **Labels** | Optional tags for organizing your sources. |
| **Status** | `Active` means the source is available to agents. You can deactivate a source without deleting it. |
| **Created At** | When the source was first added. |
| **Last Index** | When the content was last fetched and processed. |
### Filtering and Searching
Use the filters at the top of the sources table to narrow your view:
* **Search bar** -- Search by title or URL.
* **All Statuses** -- Filter by Active or Inactive status.
* **All Types** -- Filter by Web Page or Document.
* **All Labels** -- Filter by label tags.
### Activating and Deactivating Sources
Click the **Deactivate** button next to any source to temporarily remove it from your agent's knowledge without deleting it. You can reactivate it later to make it available again.
### Pending Approval
If you have enabled the "Require approval before indexing" option on a crawler, newly discovered pages will appear under the **Pending Approval** tab. You can review and approve them before they become available to your agents.
## Website Crawlers
For websites with many pages, manually adding each URL is impractical. Website crawlers automatically discover and index pages across an entire domain.
### Viewing Crawlers
Navigate to **Knowledge Base > Website Crawlers** in the left sidebar to see all configured crawlers.
**Note:** The banner at the top reminds you that "Knowledge base and FAQs are not versioned. Changes here take effect immediately." This means any content you add or remove is live right away -- there is no need to publish a new version.
## Managing Knowledge Sources
Each source in your knowledge base has the following attributes:
| Column | Description |
| -------------- | -------------------------------------------------------------------------------------------------- |
| **Source** | The title and URL (for web pages) or filename (for documents). |
| **Type** | Either `WEB PAGE` or `DOCUMENT`. |
| **Labels** | Optional tags for organizing your sources. |
| **Status** | `Active` means the source is available to agents. You can deactivate a source without deleting it. |
| **Created At** | When the source was first added. |
| **Last Index** | When the content was last fetched and processed. |
### Filtering and Searching
Use the filters at the top of the sources table to narrow your view:
* **Search bar** -- Search by title or URL.
* **All Statuses** -- Filter by Active or Inactive status.
* **All Types** -- Filter by Web Page or Document.
* **All Labels** -- Filter by label tags.
### Activating and Deactivating Sources
Click the **Deactivate** button next to any source to temporarily remove it from your agent's knowledge without deleting it. You can reactivate it later to make it available again.
### Pending Approval
If you have enabled the "Require approval before indexing" option on a crawler, newly discovered pages will appear under the **Pending Approval** tab. You can review and approve them before they become available to your agents.
## Website Crawlers
For websites with many pages, manually adding each URL is impractical. Website crawlers automatically discover and index pages across an entire domain.
### Viewing Crawlers
Navigate to **Knowledge Base > Website Crawlers** in the left sidebar to see all configured crawlers.
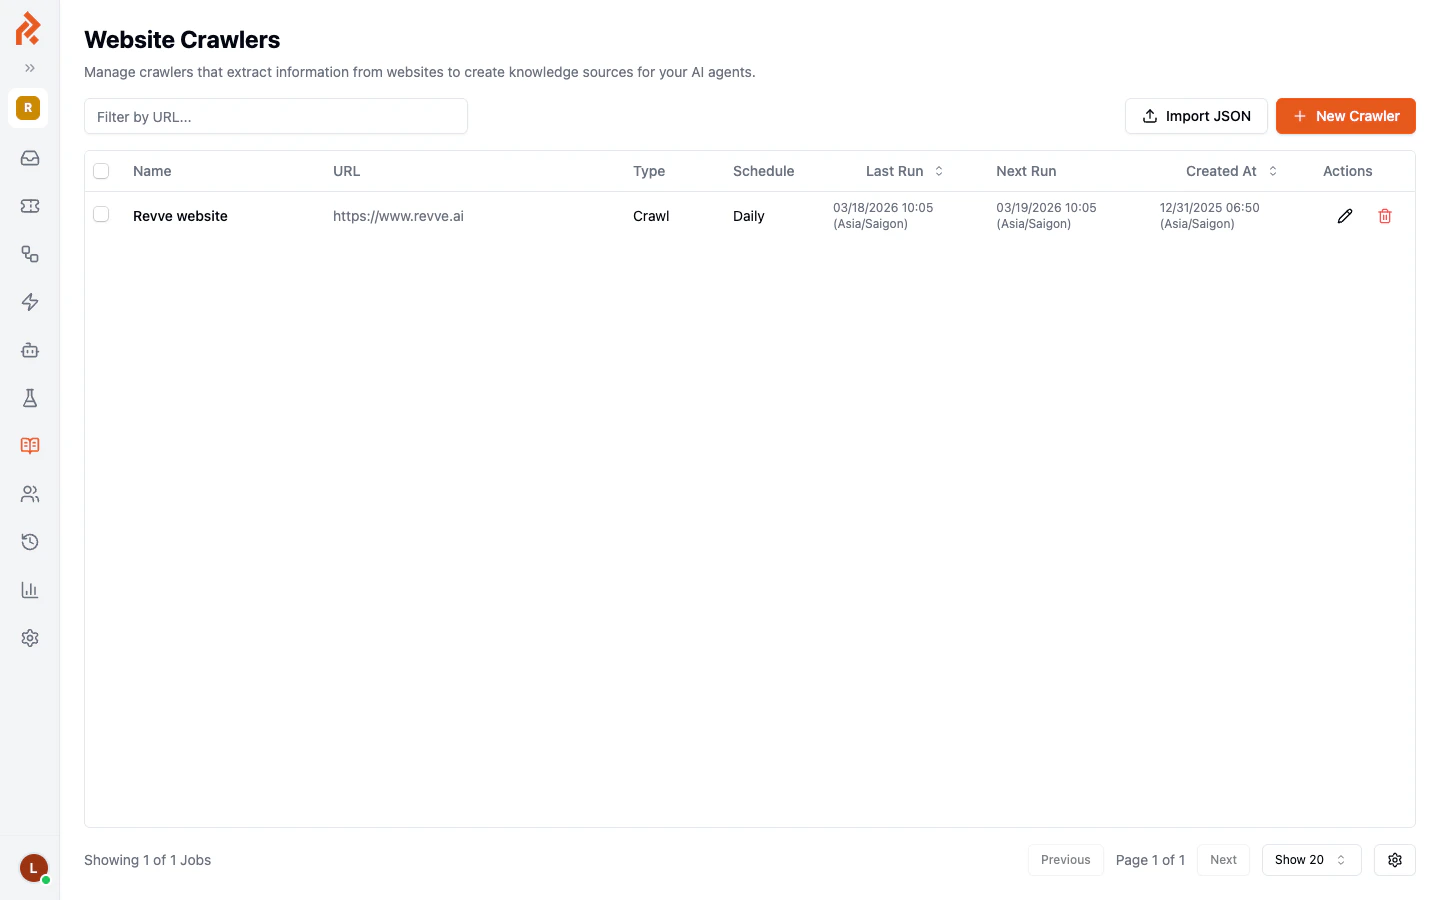 Each crawler shows:
| Column | Description |
| ------------ | -------------------------------------------------------------- |
| **Name** | A descriptive name for the crawler. |
| **URL** | The starting URL for the crawl. |
| **Type** | `Crawl` for full-site crawling, or `Scrape` for a single page. |
| **Schedule** | How often the crawler runs (Daily, Weekly, etc.). |
| **Last Run** | When the crawler last ran. |
| **Next Run** | When the next scheduled run will occur. |
### Creating a New Crawler
1. Click the **New Crawler** button.
2. Fill in the configuration:
Each crawler shows:
| Column | Description |
| ------------ | -------------------------------------------------------------- |
| **Name** | A descriptive name for the crawler. |
| **URL** | The starting URL for the crawl. |
| **Type** | `Crawl` for full-site crawling, or `Scrape` for a single page. |
| **Schedule** | How often the crawler runs (Daily, Weekly, etc.). |
| **Last Run** | When the crawler last ran. |
| **Next Run** | When the next scheduled run will occur. |
### Creating a New Crawler
1. Click the **New Crawler** button.
2. Fill in the configuration:
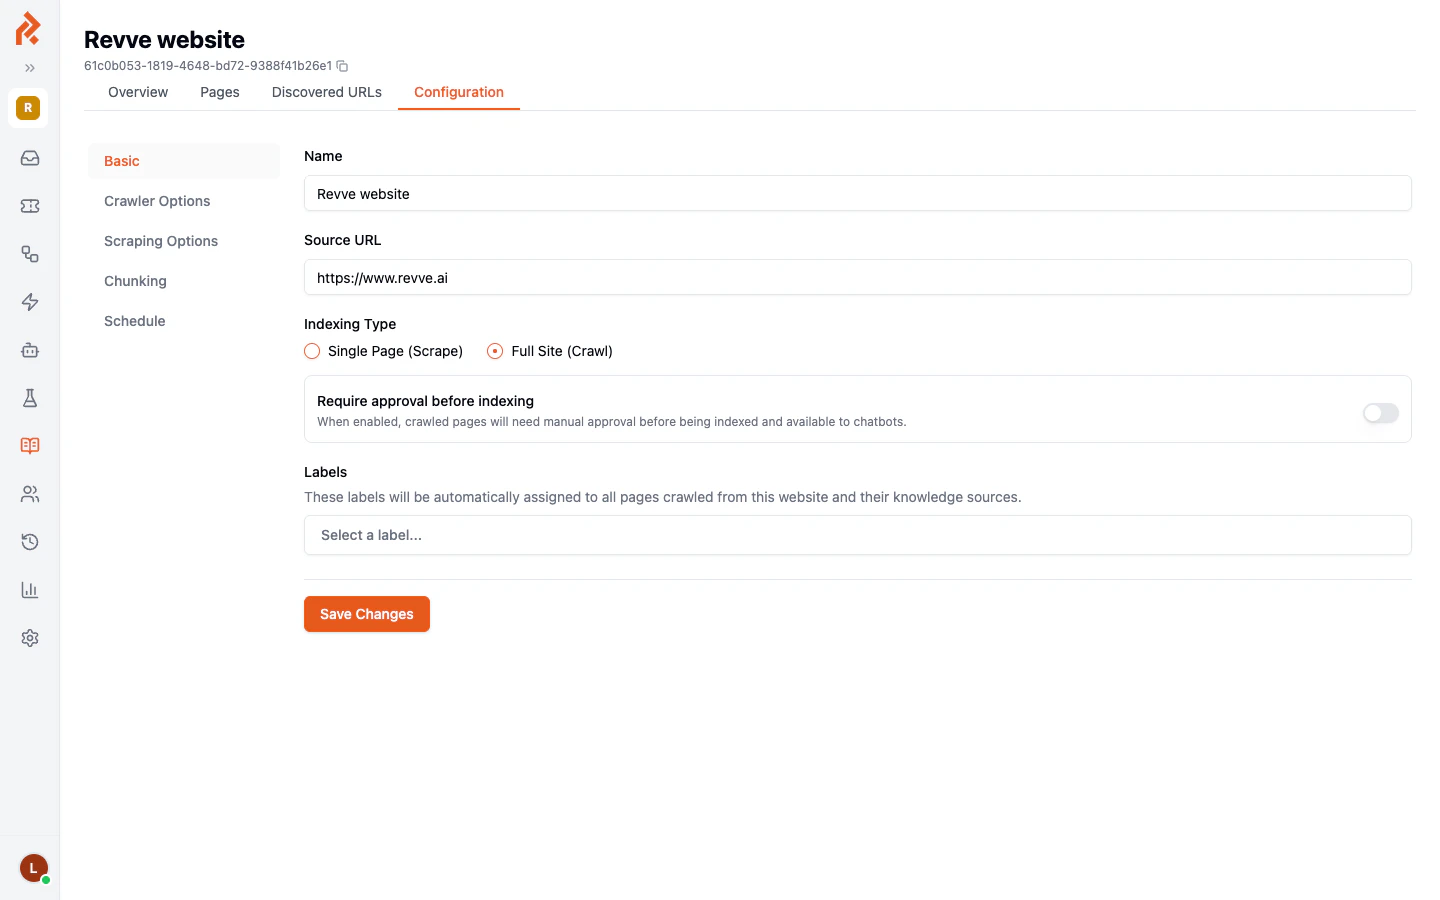 | Setting | Description |
| ------------------------------------ | ------------------------------------------------------------------------------------------------------------------------------------------------------------------------------------------------- |
| **Name** | Give your crawler a descriptive name (e.g., "Company Website"). |
| **Source URL** | The root URL to start crawling from (e.g., `https://yourcompany.com`). |
| **Indexing Type** | Choose **Single Page (Scrape)** to index only the specified URL, or **Full Site (Crawl)** to discover and index all linked pages. |
| **Require approval before indexing** | When enabled, newly discovered pages must be manually approved before they are added to the knowledge base. This is useful for large sites where you want to control which pages your agent uses. |
| **Labels** | Assign labels that will be automatically applied to all pages discovered by this crawler. |
### Crawler Schedules
Crawlers have two independent schedules:
| Setting | Description |
| ------------------------------------ | ------------------------------------------------------------------------------------------------------------------------------------------------------------------------------------------------- |
| **Name** | Give your crawler a descriptive name (e.g., "Company Website"). |
| **Source URL** | The root URL to start crawling from (e.g., `https://yourcompany.com`). |
| **Indexing Type** | Choose **Single Page (Scrape)** to index only the specified URL, or **Full Site (Crawl)** to discover and index all linked pages. |
| **Require approval before indexing** | When enabled, newly discovered pages must be manually approved before they are added to the knowledge base. This is useful for large sites where you want to control which pages your agent uses. |
| **Labels** | Assign labels that will be automatically applied to all pages discovered by this crawler. |
### Crawler Schedules
Crawlers have two independent schedules:
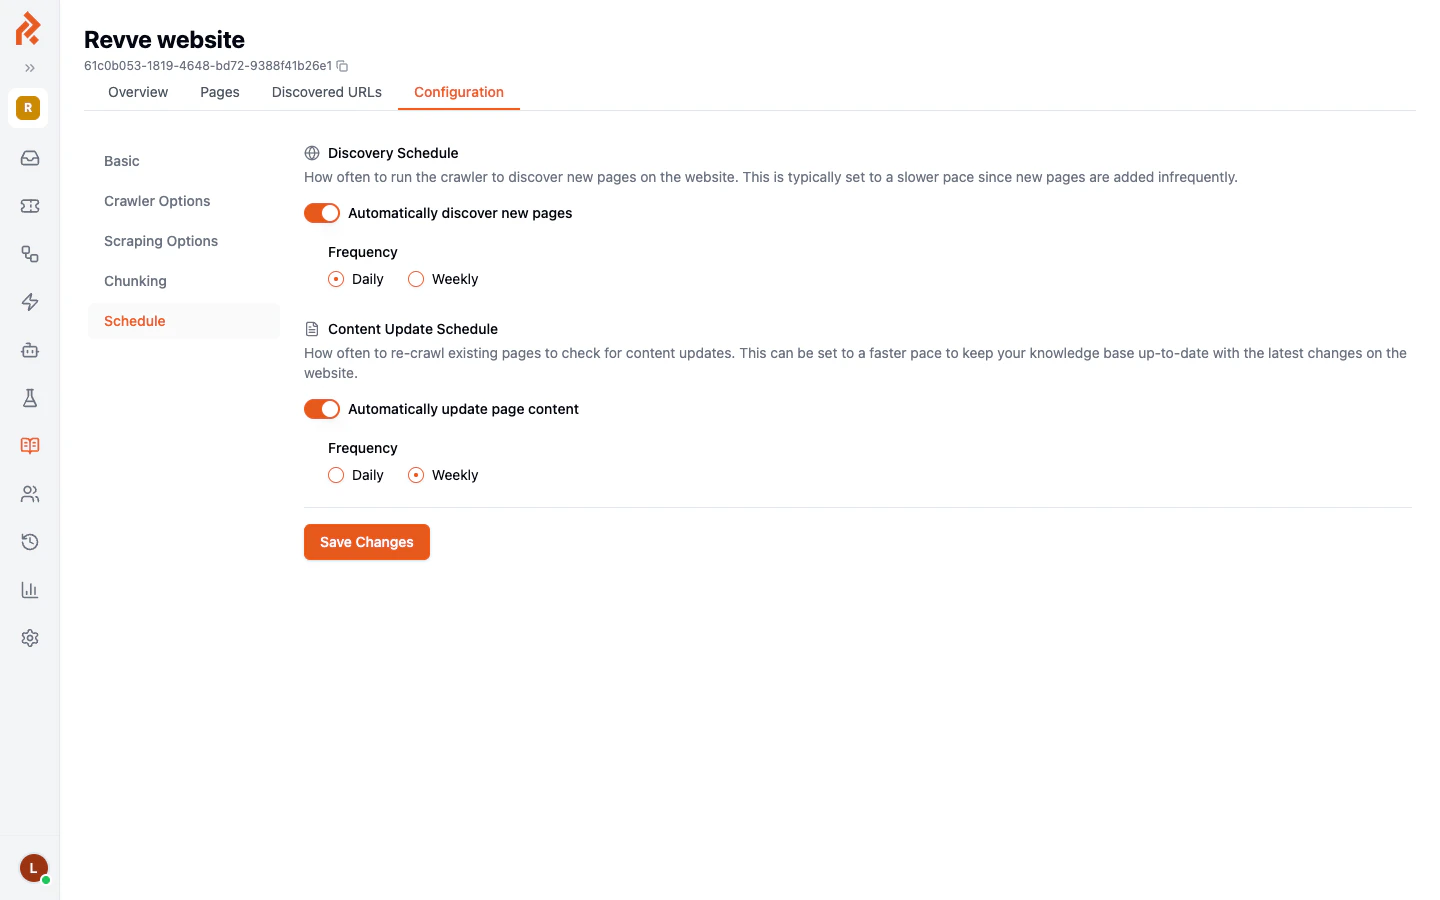 **Discovery Schedule** -- Controls how often the crawler looks for new pages on the website. Set this to a slower pace (e.g., Daily or Weekly) since new pages are typically added infrequently.
**Content Update Schedule** -- Controls how often existing pages are re-crawled to check for content changes. Set this to a faster pace if your website content changes frequently and you need your agent to always have the latest information.
Both schedules can be toggled on or off independently, and each supports **Daily** or **Weekly** frequency.
### Crawler Tabs
Each crawler has additional tabs for deeper management:
| Tab | Description |
| ------------------- | ---------------------------------------------------------- |
| **Overview** | Summary of the crawler's status and recent activity. |
| **Pages** | List of all pages that have been indexed by this crawler. |
| **Discovered URLs** | URLs found during crawling that have not yet been indexed. |
| **Configuration** | Edit the crawler's settings, options, and schedule. |
## Best Practices
* **Use crawlers for websites, manual uploads for documents.** Crawlers are designed for web content. Use the Upload Document option for PDFs, Word files, and other non-web content.
* **Enable approval for large sites.** If your website has hundreds of pages, enable the approval requirement so you can review which pages get indexed.
* **Set up content update schedules.** If your website changes frequently (e.g., a help center with regular updates), configure the Content Update Schedule to re-crawl weekly or daily.
* **Label your sources.** Labels help you organize content by topic, product, or department, making it easier to manage which agents use which content.
* **Check the Last Index date.** If a source has not been re-indexed recently, the agent may be using outdated information. Re-index manually or adjust the crawler schedule.
## Next Steps
* [Managing FAQs](/docs/knowledge-base/managing-faqs) -- Create question-and-answer pairs for common queries.
* [Knowledge Gaps](/docs/knowledge-base/knowledge-gaps) -- See what questions your agent could not answer.
**Discovery Schedule** -- Controls how often the crawler looks for new pages on the website. Set this to a slower pace (e.g., Daily or Weekly) since new pages are typically added infrequently.
**Content Update Schedule** -- Controls how often existing pages are re-crawled to check for content changes. Set this to a faster pace if your website content changes frequently and you need your agent to always have the latest information.
Both schedules can be toggled on or off independently, and each supports **Daily** or **Weekly** frequency.
### Crawler Tabs
Each crawler has additional tabs for deeper management:
| Tab | Description |
| ------------------- | ---------------------------------------------------------- |
| **Overview** | Summary of the crawler's status and recent activity. |
| **Pages** | List of all pages that have been indexed by this crawler. |
| **Discovered URLs** | URLs found during crawling that have not yet been indexed. |
| **Configuration** | Edit the crawler's settings, options, and schedule. |
## Best Practices
* **Use crawlers for websites, manual uploads for documents.** Crawlers are designed for web content. Use the Upload Document option for PDFs, Word files, and other non-web content.
* **Enable approval for large sites.** If your website has hundreds of pages, enable the approval requirement so you can review which pages get indexed.
* **Set up content update schedules.** If your website changes frequently (e.g., a help center with regular updates), configure the Content Update Schedule to re-crawl weekly or daily.
* **Label your sources.** Labels help you organize content by topic, product, or department, making it easier to manage which agents use which content.
* **Check the Last Index date.** If a source has not been re-indexed recently, the agent may be using outdated information. Re-index manually or adjust the crawler schedule.
## Next Steps
* [Managing FAQs](/docs/knowledge-base/managing-faqs) -- Create question-and-answer pairs for common queries.
* [Knowledge Gaps](/docs/knowledge-base/knowledge-gaps) -- See what questions your agent could not answer.