> ## Documentation Index
> Fetch the complete documentation index at: https://www.revve.ai/docs/llms.txt
> Use this file to discover all available pages before exploring further.
# Quickstart: Live Agent in 10 Minutes
> Go from zero to a working AI agent answering real visitors on your website — create, test, publish, and install in about 10 minutes.
By the end of this guide you will have an AI Chat Agent **live on your website**, trained on your own content, answering a real visitor question that you can watch arrive in your Inbox.
You don't need to write any code beyond pasting one snippet, and you don't need to prepare any content — Revve builds the first version of the agent from your website automatically.
**What you need:** a Revve account and the URL of your website. That's it.
## Step 1: Create an agent from your website
From the left sidebar, go to **Agents > Chat Agents** and click **+ New Chat Agent** in the top-right corner. Choose **Auto-Create from Website**, enter your website URL, and click **Create Chatbot**.
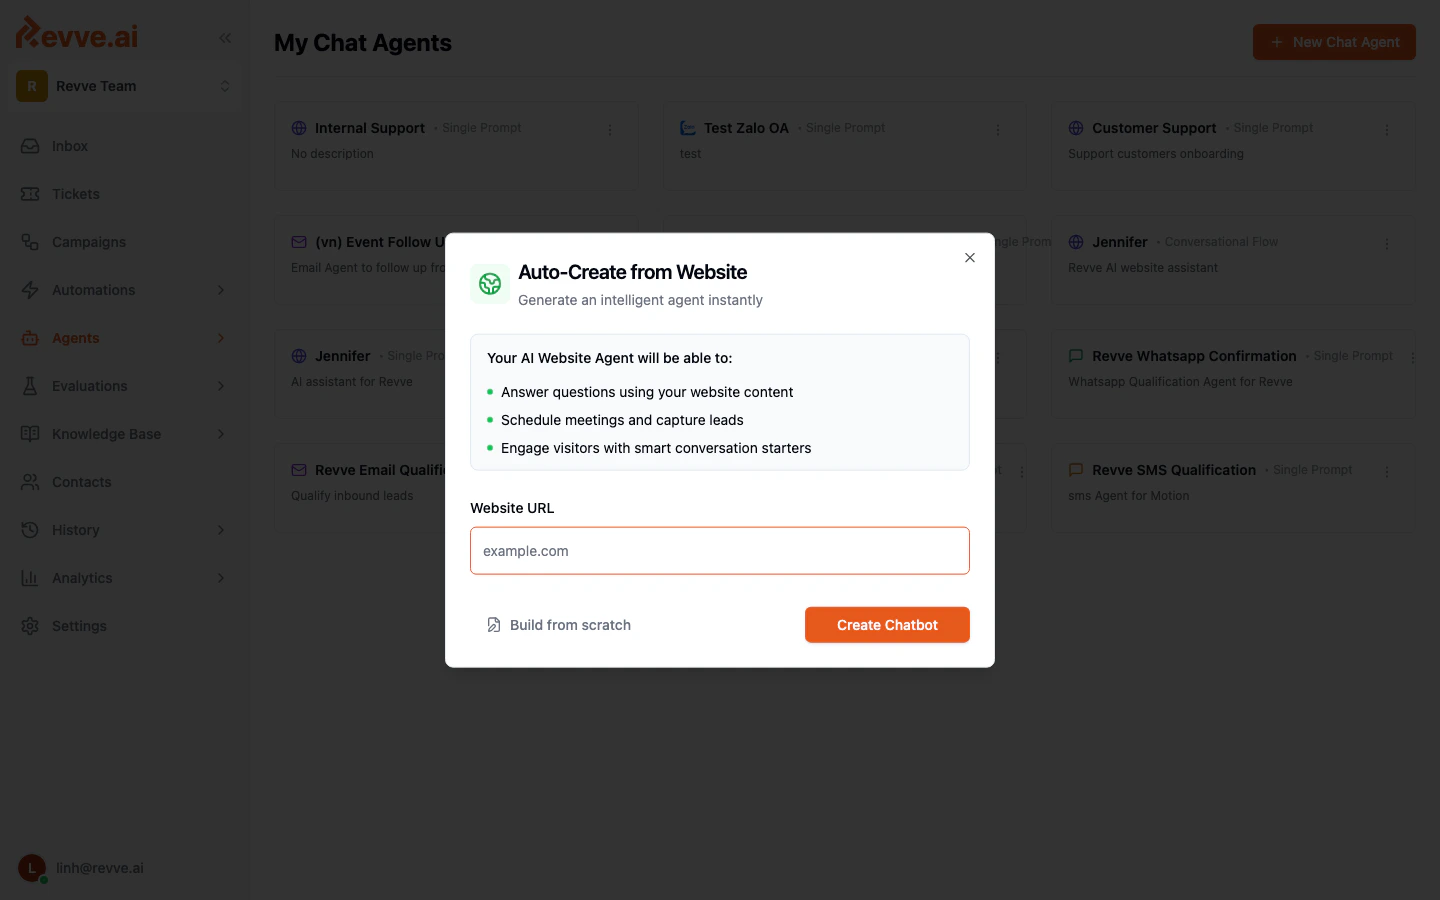 Revve now does the heavy lifting for you:
1. Crawls your website and extracts its content.
2. Writes the agent's instructions based on what your business does.
3. Builds a knowledge base from your web pages, so answers come from *your* content.
4. Generates conversation starters relevant to your visitors.
This takes a minute or two. When it finishes, you land on your new agent's page.
## Step 2: Talk to your agent
Open the **Preview** tab. You get a live, fully working copy of your chat widget — same knowledge, same behavior as the real thing.
Revve now does the heavy lifting for you:
1. Crawls your website and extracts its content.
2. Writes the agent's instructions based on what your business does.
3. Builds a knowledge base from your web pages, so answers come from *your* content.
4. Generates conversation starters relevant to your visitors.
This takes a minute or two. When it finishes, you land on your new agent's page.
## Step 2: Talk to your agent
Open the **Preview** tab. You get a live, fully working copy of your chat widget — same knowledge, same behavior as the real thing.
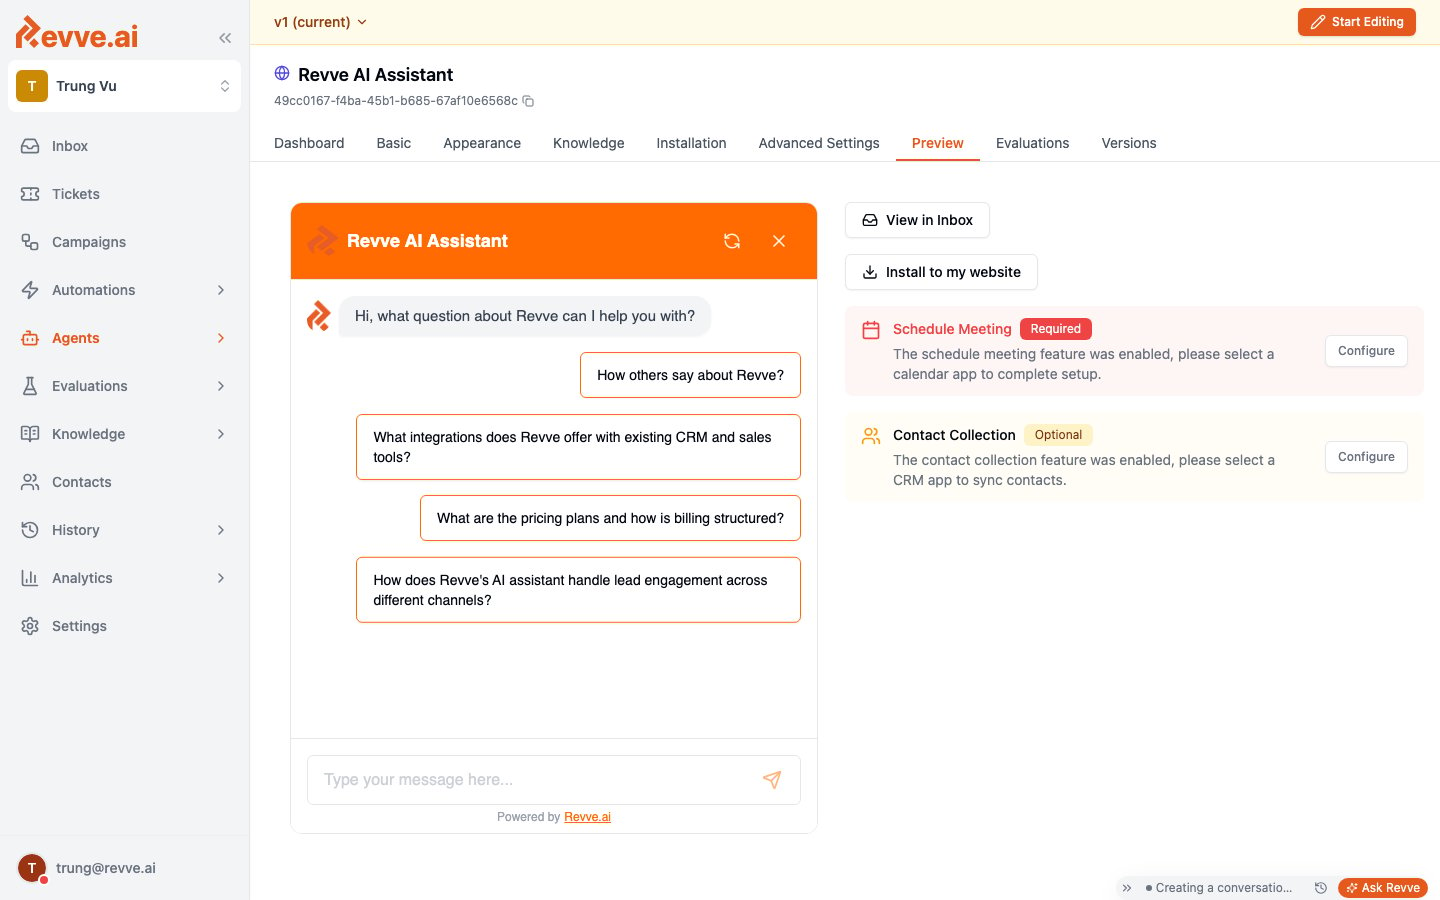 Ask it the questions your customers actually ask:
* A question your website answers — it should respond from your content.
* A question your website *doesn't* answer — it should decline gracefully rather than invent something.
* Click one of the generated conversation starters and see where it leads.
If the Preview panel shows feature cards like **Schedule Meeting** or **Contact Collection** marked "Required", those features were enabled but still need a connected app (for example, a calendar). You can ignore them for now or click **Configure** — the agent works without them.
## Step 3: Adjust the basics (optional)
If an answer felt off, click **Start Editing**, open the **Basic** tab, and tune two fields:
* **Role** — who the agent is ("You're the assistant for Acme, a B2B invoicing platform…").
* **Objectives** — what it should do and what it must never do ("Answer product questions. Never quote custom pricing — offer a demo instead.").
Re-test in **Preview** after each change. Small, specific instructions beat long generic ones.
## Step 4: Publish
Changes live in a draft until you publish. Click **Publish** in the top bar (or open the **Versions** tab), add an optional note, and confirm.
Your agent is now live on Revve's side — the last step is putting it on your site.
## Step 5: Install the widget on your website
Open the **Installation** tab and copy the embed snippet (the Preview tab's **Install to my website** button takes you there too). Paste it into your site's HTML just before the closing `` tag, then publish your site:
```html theme={null}
Ask it the questions your customers actually ask:
* A question your website answers — it should respond from your content.
* A question your website *doesn't* answer — it should decline gracefully rather than invent something.
* Click one of the generated conversation starters and see where it leads.
If the Preview panel shows feature cards like **Schedule Meeting** or **Contact Collection** marked "Required", those features were enabled but still need a connected app (for example, a calendar). You can ignore them for now or click **Configure** — the agent works without them.
## Step 3: Adjust the basics (optional)
If an answer felt off, click **Start Editing**, open the **Basic** tab, and tune two fields:
* **Role** — who the agent is ("You're the assistant for Acme, a B2B invoicing platform…").
* **Objectives** — what it should do and what it must never do ("Answer product questions. Never quote custom pricing — offer a demo instead.").
Re-test in **Preview** after each change. Small, specific instructions beat long generic ones.
## Step 4: Publish
Changes live in a draft until you publish. Click **Publish** in the top bar (or open the **Versions** tab), add an optional note, and confirm.
Your agent is now live on Revve's side — the last step is putting it on your site.
## Step 5: Install the widget on your website
Open the **Installation** tab and copy the embed snippet (the Preview tab's **Install to my website** button takes you there too). Paste it into your site's HTML just before the closing `` tag, then publish your site:
```html theme={null}