> ## Documentation Index
> Fetch the complete documentation index at: https://www.revve.ai/docs/llms.txt
> Use this file to discover all available pages before exploring further.
# Zalo Channel Setup
> Connect your Zalo Official Account to enable your Chat Agent to communicate via Zalo.
> **Setup Required:** This channel requires initial technical setup by your account administrator before you can configure it here. This includes creating a Zalo Official Account and connecting it to Revve via OAuth. Contact your Revve team or administrator to get started.
Once your administrator has completed the initial setup, you can configure the following settings directly from the dashboard:
* Select which connected Zalo Official Account the agent uses
* Configure outbound message templates for campaigns
* Set up the agent's prompt, knowledge base, languages, and communication tone
* Publish the agent to start handling Zalo conversations
Revve AI Chat Agents can communicate through Zalo, Vietnam's leading messaging platform. By connecting your Zalo Official Account (OA), your Chat Agent can automatically respond to messages from customers who reach out through Zalo. This guide covers how to set up and configure your Zalo Chat Agent.
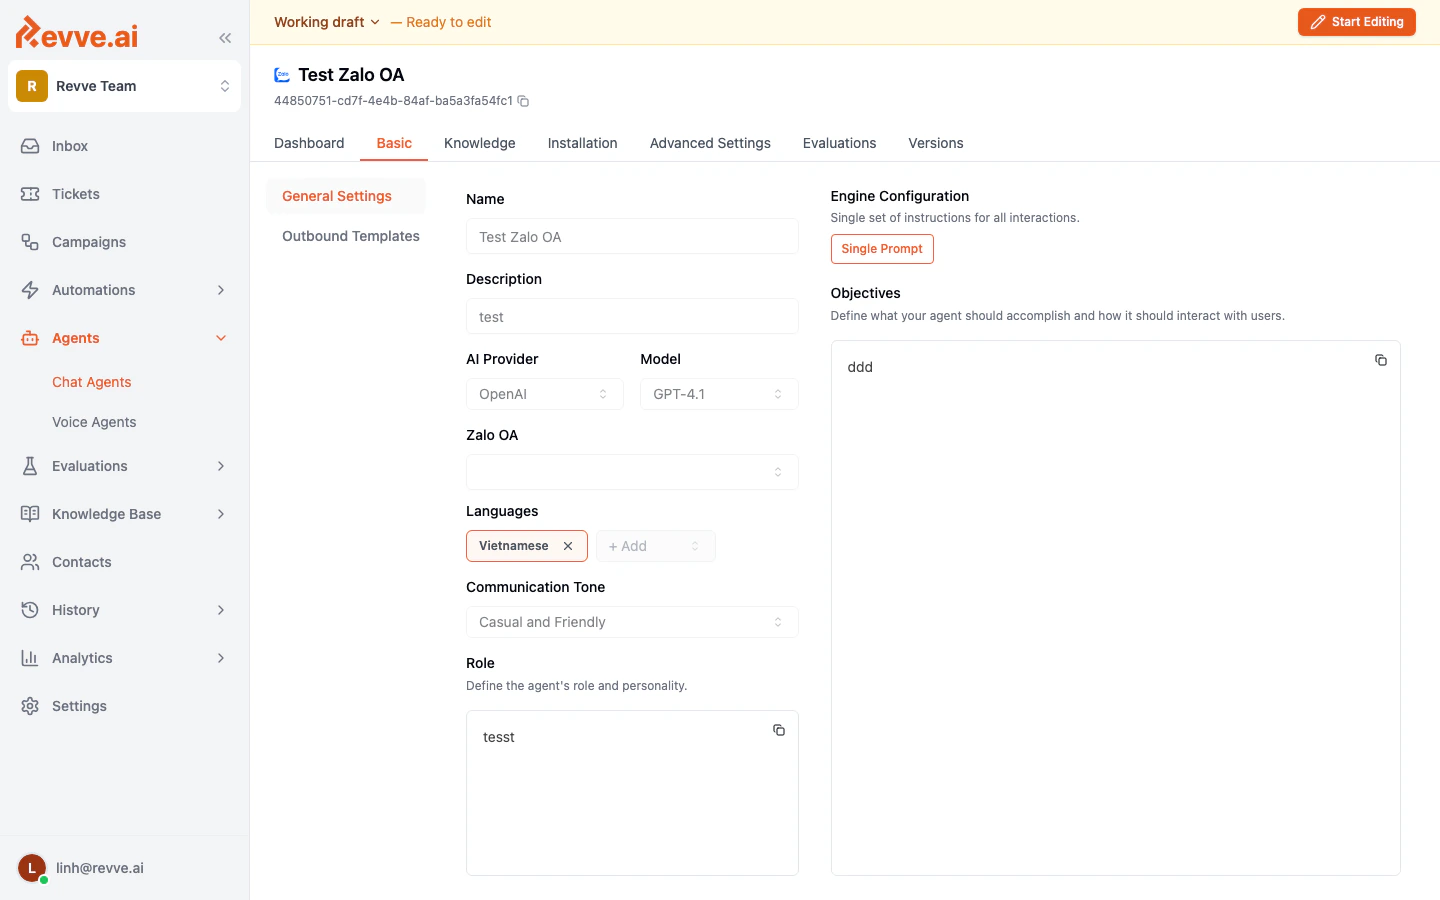
When you create a Chat Agent with the **Zalo** channel type, the Zalo OA connection is configured in the **Basic** tab under General Settings.
***
## Accessing Zalo Configuration
1. Navigate to **Agents > Chat Agents**.
2. Select your Zalo Chat Agent (or create a new one with the Zalo channel type).
3. Click the **Basic** tab.
4. In the General Settings section, locate the **Zalo OA** dropdown.
 ***
## Configuration Fields
The Zalo-specific field in General Settings:
| Setting | Description |
| ----------- | ------------------------------------------------------------------------------------------------------------------------------------------------------------------------------ |
| **Zalo OA** | Select the Zalo Official Account that the agent will use for sending and receiving messages. The dropdown lists all Zalo OAs that have been connected in your team's Settings. |
***
## Setup Steps
### 1. Connect Your Zalo Official Account
Before you can assign a Zalo OA to a Chat Agent, you need to connect it in your team settings.
1. Go to **Settings** in the left sidebar.
2. Navigate to the Zalo integration section.
3. Follow the prompts to authenticate and connect your Zalo Official Account.
4. Once connected, your Zalo OA will appear in the integration settings and be available in Chat Agent configuration.
### 2. Create and Configure the Zalo Chat Agent
1. Go to **Agents > Chat Agents** and click **New Chat Agent**.
2. Select **Zalo** as the channel type.
3. In the **Basic** tab, fill in the general settings:
* **Name** and **Description** for the agent.
* **AI Provider** and **Model** to power the agent.
* **Zalo OA** -- select your connected Zalo Official Account.
* **Languages** -- add Vietnamese or other supported languages.
* **Communication Tone** -- choose the tone that matches your brand.
* **Role** -- define the agent's role and personality.
* **Objectives** -- describe what the agent should accomplish.
### 3. Configure Outbound Templates (Optional)
If your Zalo agent will initiate conversations or send proactive messages, configure outbound templates.
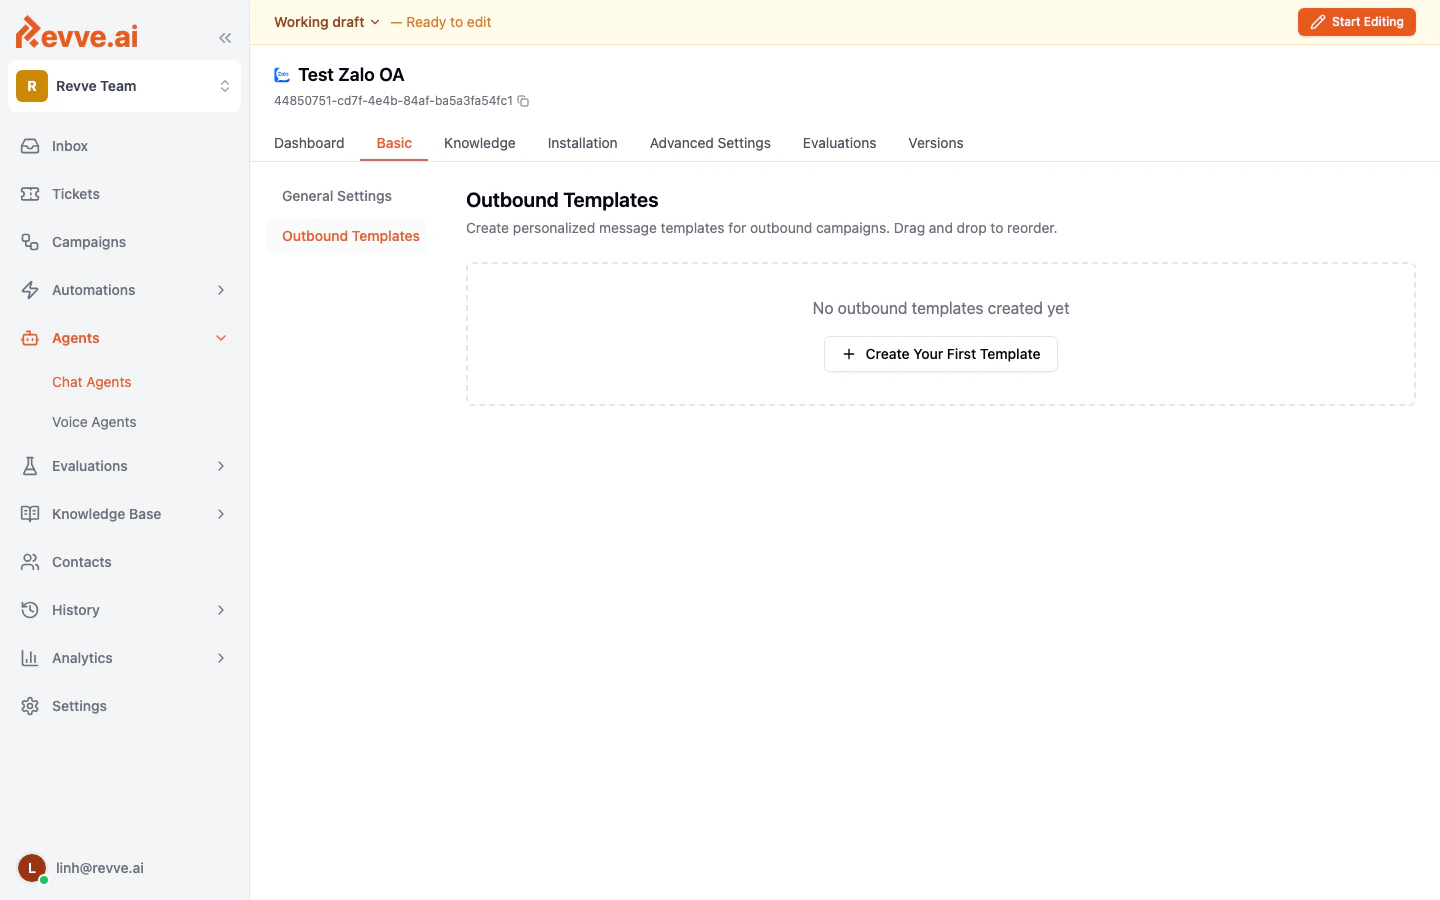
1. In the **Basic** tab, click **Outbound Templates** in the left sidebar.
2. Click **Create Your First Template** to define message templates for outbound campaigns.
3. Templates support personalized messages with drag-and-drop reordering.
***
## Configuration Fields
The Zalo-specific field in General Settings:
| Setting | Description |
| ----------- | ------------------------------------------------------------------------------------------------------------------------------------------------------------------------------ |
| **Zalo OA** | Select the Zalo Official Account that the agent will use for sending and receiving messages. The dropdown lists all Zalo OAs that have been connected in your team's Settings. |
***
## Setup Steps
### 1. Connect Your Zalo Official Account
Before you can assign a Zalo OA to a Chat Agent, you need to connect it in your team settings.
1. Go to **Settings** in the left sidebar.
2. Navigate to the Zalo integration section.
3. Follow the prompts to authenticate and connect your Zalo Official Account.
4. Once connected, your Zalo OA will appear in the integration settings and be available in Chat Agent configuration.
### 2. Create and Configure the Zalo Chat Agent
1. Go to **Agents > Chat Agents** and click **New Chat Agent**.
2. Select **Zalo** as the channel type.
3. In the **Basic** tab, fill in the general settings:
* **Name** and **Description** for the agent.
* **AI Provider** and **Model** to power the agent.
* **Zalo OA** -- select your connected Zalo Official Account.
* **Languages** -- add Vietnamese or other supported languages.
* **Communication Tone** -- choose the tone that matches your brand.
* **Role** -- define the agent's role and personality.
* **Objectives** -- describe what the agent should accomplish.
### 3. Configure Outbound Templates (Optional)
If your Zalo agent will initiate conversations or send proactive messages, configure outbound templates.
1. In the **Basic** tab, click **Outbound Templates** in the left sidebar.
2. Click **Create Your First Template** to define message templates for outbound campaigns.
3. Templates support personalized messages with drag-and-drop reordering.
 ### 4. Publish the Agent
After configuring all settings, publish the agent to make it live. Incoming Zalo messages to the connected OA will be routed to this agent.
***
## Best Practices
* **Configure Vietnamese as a language.** Since Zalo is primarily used in Vietnam, ensure Vietnamese is added as a supported language for your agent.
* **Match the communication tone.** Consider using "Casual and Friendly" for consumer-facing agents on Zalo, as the platform is typically used for informal communication.
* **Prepare outbound templates.** If you plan to use the agent for outbound campaigns, create and test your message templates before launching.
* **Monitor conversations.** Zalo conversations appear in your team's Inbox alongside conversations from other channels.
***
## Troubleshooting
| Issue | Solution |
| ------------------------------------------- | ---------------------------------------------------------------------------------------------------- |
| No Zalo OA appears in the dropdown | Verify that your Zalo Official Account is connected in Settings. You may need to re-authenticate. |
| Agent does not respond to incoming messages | Check that the agent has been published and that a Zalo OA is selected in the Basic tab. |
| Outbound messages are not delivered | Verify that your Zalo OA is in good standing and has the necessary permissions for sending messages. |
***
## Next Steps
* [Set up Messenger channel](/docs/channel-setup/messenger-channel-setup)
* [Set up WhatsApp channel](/docs/channel-setup/whatsapp-channel-setup)
### 4. Publish the Agent
After configuring all settings, publish the agent to make it live. Incoming Zalo messages to the connected OA will be routed to this agent.
***
## Best Practices
* **Configure Vietnamese as a language.** Since Zalo is primarily used in Vietnam, ensure Vietnamese is added as a supported language for your agent.
* **Match the communication tone.** Consider using "Casual and Friendly" for consumer-facing agents on Zalo, as the platform is typically used for informal communication.
* **Prepare outbound templates.** If you plan to use the agent for outbound campaigns, create and test your message templates before launching.
* **Monitor conversations.** Zalo conversations appear in your team's Inbox alongside conversations from other channels.
***
## Troubleshooting
| Issue | Solution |
| ------------------------------------------- | ---------------------------------------------------------------------------------------------------- |
| No Zalo OA appears in the dropdown | Verify that your Zalo Official Account is connected in Settings. You may need to re-authenticate. |
| Agent does not respond to incoming messages | Check that the agent has been published and that a Zalo OA is selected in the Basic tab. |
| Outbound messages are not delivered | Verify that your Zalo OA is in good standing and has the necessary permissions for sending messages. |
***
## Next Steps
* [Set up Messenger channel](/docs/channel-setup/messenger-channel-setup)
* [Set up WhatsApp channel](/docs/channel-setup/whatsapp-channel-setup)