> ## Documentation Index
> Fetch the complete documentation index at: https://www.revve.ai/docs/llms.txt
> Use this file to discover all available pages before exploring further.
# Website Widget Appearance and Styling
> Customize the look and feel of your website chat widget, including colors, avatar, size, and advanced CSS overrides.
**No external setup needed.** The website channel requires no external account setup. You can configure and deploy your chat widget entirely from the Revve dashboard.
The Appearance tab in your website Chat Agent lets you control how the chat widget looks and behaves on your site. You can customize colors, sizing, position, and even inject custom CSS for complete control over the widget's appearance.
To access these settings, navigate to **Agents > Chat Agents**, select your website Chat Agent, and click the **Appearance** tab.
You must click **Start Editing** to make changes. When finished, click **Stop Editing** and then **Release Lock** so other team members can edit.
***
## Widget Appearance and Behavior
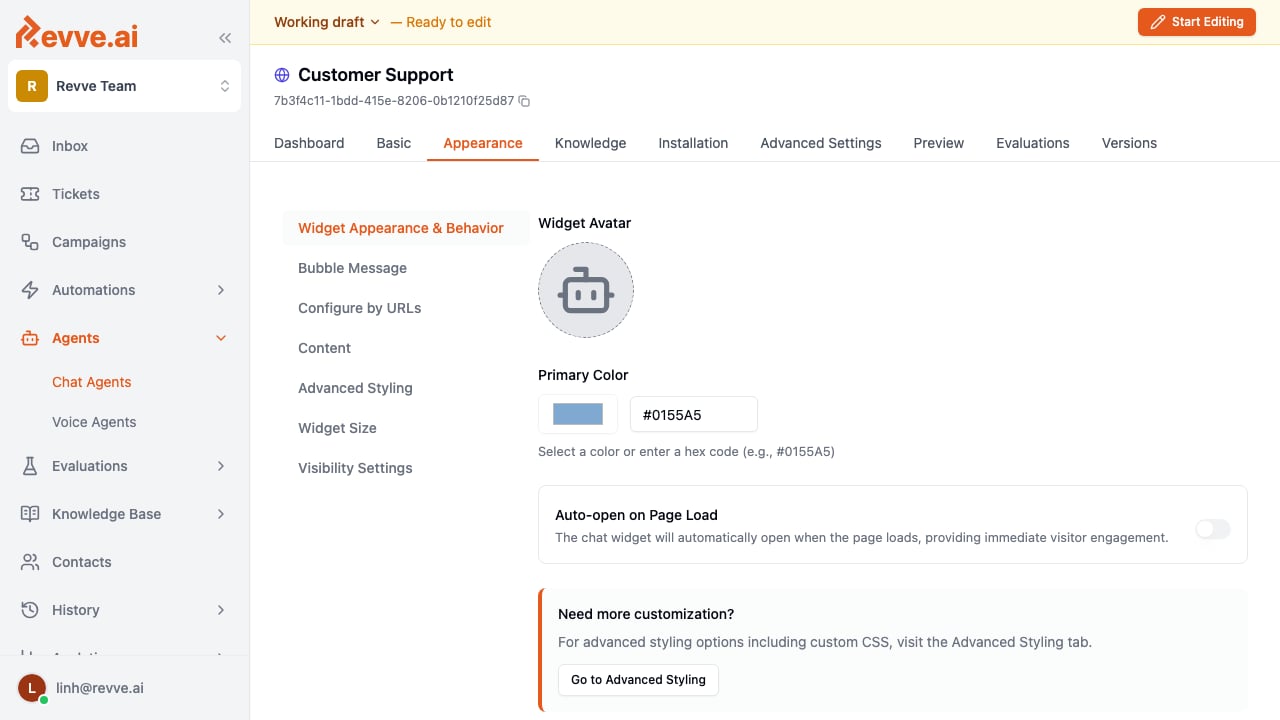
This is the primary section for configuring the widget's visual identity.
 | Setting | Description |
| -------------------------- | ------------------------------------------------------------------------------------------------------------------------------------------------------------------------------- |
| **Widget Avatar** | Upload a custom avatar image that appears on the chat button and in conversations. If not set, a default icon is used. |
| **Primary Color** | Set the main color for the chat widget using a color picker or by entering a hex code (e.g., `#0155A5`). This color is applied to the chat button, header, and message bubbles. |
| **Auto-open on Page Load** | When enabled, the chat widget automatically opens as soon as the page loads, providing immediate visitor engagement without requiring them to click the chat button. |
### Tips
* Choose a primary color that matches your brand and provides good contrast for readability.
* Use the auto-open feature selectively -- it works well on high-intent pages like pricing or contact pages, but may feel intrusive on blog posts or landing pages.
***
## Advanced Styling Options
For teams that need pixel-perfect control, the Advanced Styling section provides two CSS editors.
| Setting | Description |
| -------------------------- | ------------------------------------------------------------------------------------------------------------------------------------------------------------------------------- |
| **Widget Avatar** | Upload a custom avatar image that appears on the chat button and in conversations. If not set, a default icon is used. |
| **Primary Color** | Set the main color for the chat widget using a color picker or by entering a hex code (e.g., `#0155A5`). This color is applied to the chat button, header, and message bubbles. |
| **Auto-open on Page Load** | When enabled, the chat widget automatically opens as soon as the page loads, providing immediate visitor engagement without requiring them to click the chat button. |
### Tips
* Choose a primary color that matches your brand and provides good contrast for readability.
* Use the auto-open feature selectively -- it works well on high-intent pages like pricing or contact pages, but may feel intrusive on blog posts or landing pages.
***
## Advanced Styling Options
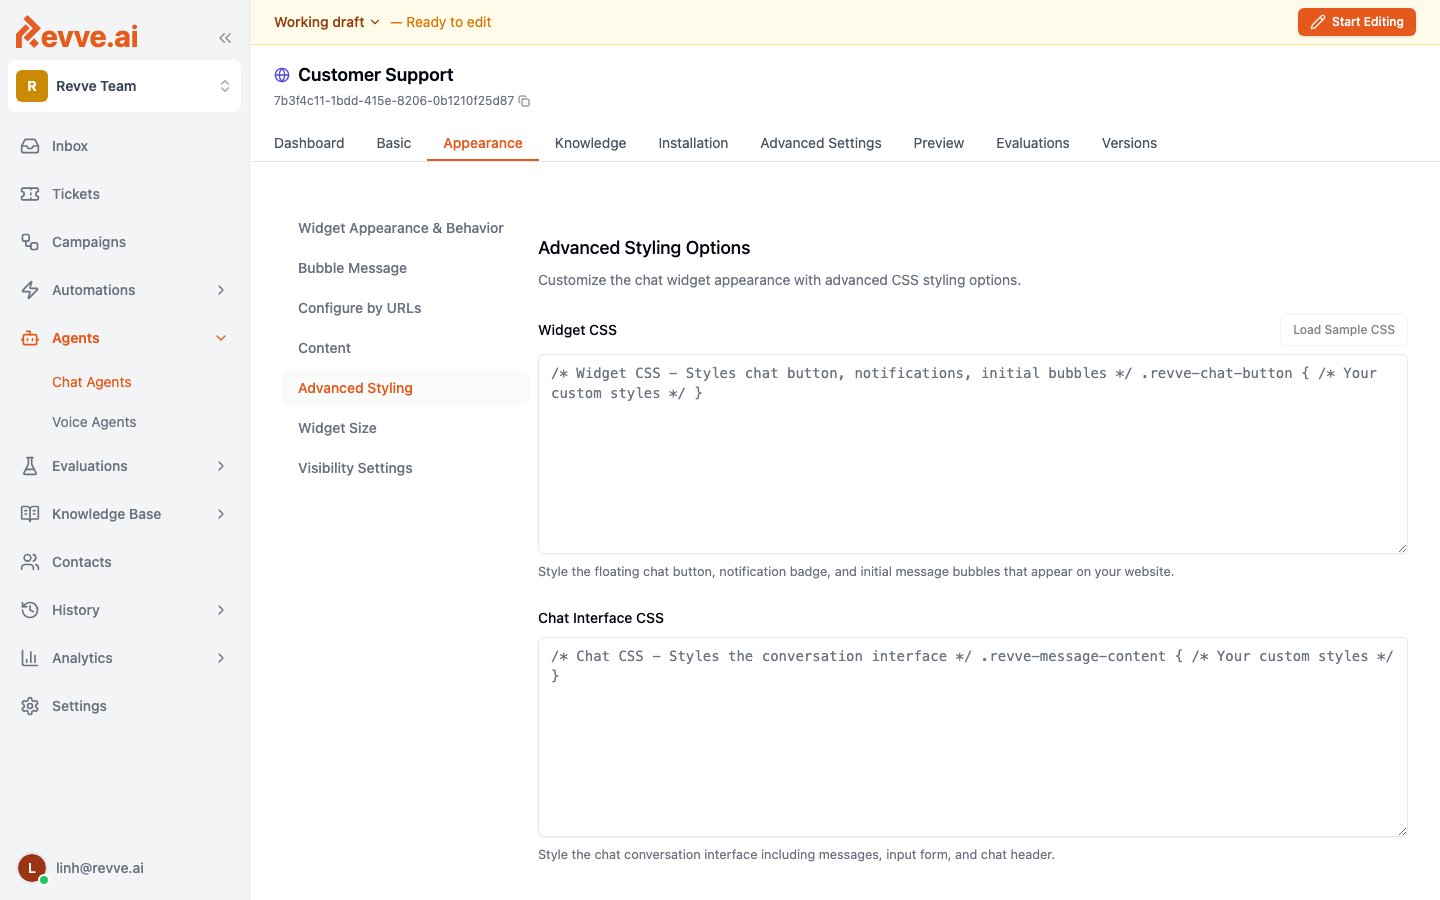
For teams that need pixel-perfect control, the Advanced Styling section provides two CSS editors.
 | Setting | Description |
| ---------------------- | ---------------------------------------------------------------------------------------------------------------------------------------------------------------------------------------- |
| **Widget CSS** | Custom CSS that styles the floating chat button, notification badge, and initial message bubbles that appear on your website. Use the `.revve-chat-button` selector as a starting point. |
| **Chat Interface CSS** | Custom CSS that styles the conversation interface, including messages, the input form, and the chat header. Use the `.revve-message-content` selector as a starting point. |
| **Load Sample CSS** | Click this button to populate the CSS editors with sample code that demonstrates available selectors and properties you can customize. |
### Tips
* Click **Load Sample CSS** to see all available CSS selectors before writing your own styles.
* Test your custom CSS across different screen sizes to ensure it looks good on both desktop and mobile.
* Custom CSS is applied on top of the default styles, so you only need to specify the properties you want to override.
***
## Widget Size Configuration
Control how large the chat widget appears on both desktop and mobile devices.
| Setting | Description |
| ---------------------- | ---------------------------------------------------------------------------------------------------------------------------------------------------------------------------------------- |
| **Widget CSS** | Custom CSS that styles the floating chat button, notification badge, and initial message bubbles that appear on your website. Use the `.revve-chat-button` selector as a starting point. |
| **Chat Interface CSS** | Custom CSS that styles the conversation interface, including messages, the input form, and the chat header. Use the `.revve-message-content` selector as a starting point. |
| **Load Sample CSS** | Click this button to populate the CSS editors with sample code that demonstrates available selectors and properties you can customize. |
### Tips
* Click **Load Sample CSS** to see all available CSS selectors before writing your own styles.
* Test your custom CSS across different screen sizes to ensure it looks good on both desktop and mobile.
* Custom CSS is applied on top of the default styles, so you only need to specify the properties you want to override.
***
## Widget Size Configuration
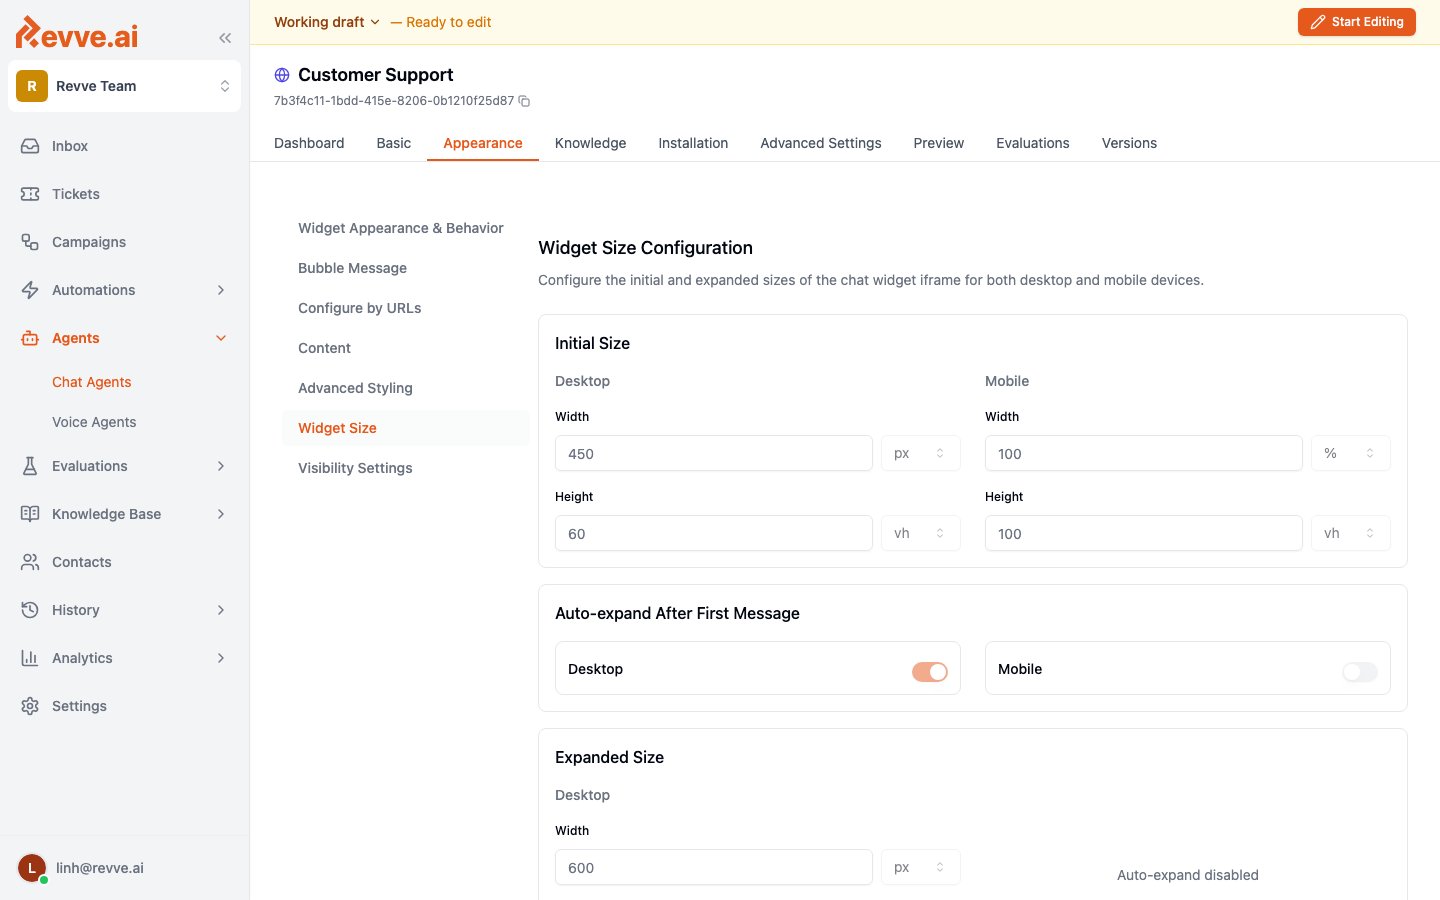
Control how large the chat widget appears on both desktop and mobile devices.
 ### Initial Size
The initial size defines the dimensions of the chat widget when it first appears (before the user interacts with it).
| Setting | Desktop Default | Mobile Default |
| ---------- | --------------- | -------------- |
| **Width** | 450 px | 100 % |
| **Height** | 60 vh | 100 vh |
### Auto-expand After First Message
When enabled, the widget automatically expands to the "Expanded Size" after the first message is sent or received. You can control this separately for desktop and mobile.
| Setting | Description |
| ----------- | ----------------------------------------------------------------------------- |
| **Desktop** | Toggle to auto-expand the widget on desktop browsers after the first message. |
| **Mobile** | Toggle to auto-expand the widget on mobile browsers after the first message. |
### Expanded Size
The expanded size defines the widget dimensions after it auto-expands (if enabled).
| Setting | Desktop Default | Mobile Default |
| ---------- | --------------- | -------------- |
| **Width** | 600 px | 100 % |
| **Height** | 80 vh | 100 vh |
### Tips
* On mobile, using 100% width and 100vh height provides a full-screen chat experience, which is typically the best user experience on small screens.
* The initial size should be compact enough to not obstruct your website content, while the expanded size should be large enough for comfortable conversation reading.
***
## Visibility Settings
Control what percentage of your website visitors will see the chat widget.
### Initial Size
The initial size defines the dimensions of the chat widget when it first appears (before the user interacts with it).
| Setting | Desktop Default | Mobile Default |
| ---------- | --------------- | -------------- |
| **Width** | 450 px | 100 % |
| **Height** | 60 vh | 100 vh |
### Auto-expand After First Message
When enabled, the widget automatically expands to the "Expanded Size" after the first message is sent or received. You can control this separately for desktop and mobile.
| Setting | Description |
| ----------- | ----------------------------------------------------------------------------- |
| **Desktop** | Toggle to auto-expand the widget on desktop browsers after the first message. |
| **Mobile** | Toggle to auto-expand the widget on mobile browsers after the first message. |
### Expanded Size
The expanded size defines the widget dimensions after it auto-expands (if enabled).
| Setting | Desktop Default | Mobile Default |
| ---------- | --------------- | -------------- |
| **Width** | 600 px | 100 % |
| **Height** | 80 vh | 100 vh |
### Tips
* On mobile, using 100% width and 100vh height provides a full-screen chat experience, which is typically the best user experience on small screens.
* The initial size should be compact enough to not obstruct your website content, while the expanded size should be large enough for comfortable conversation reading.
***
## Visibility Settings
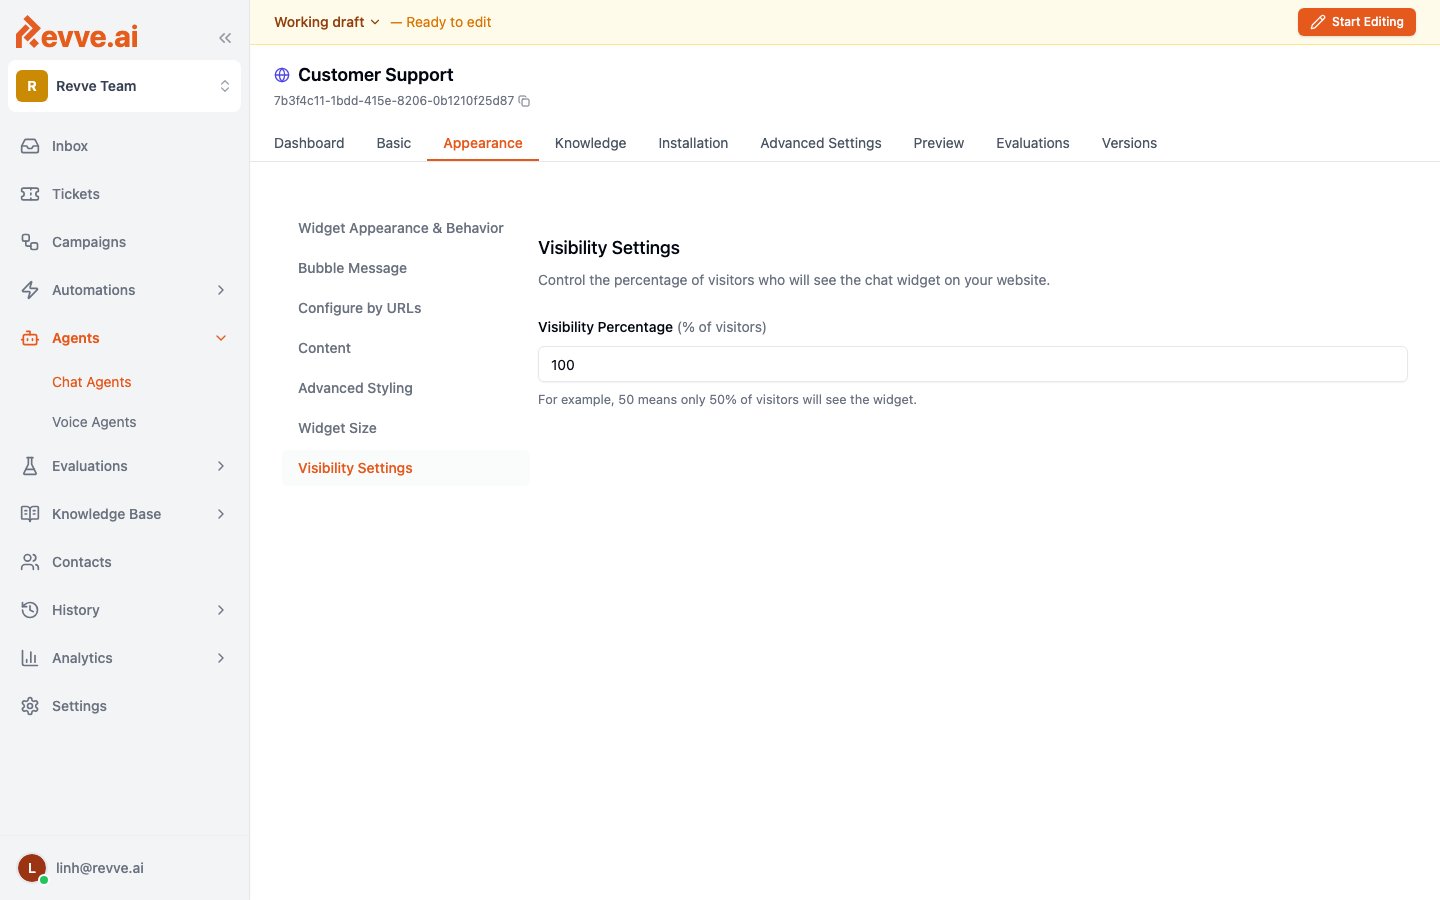
Control what percentage of your website visitors will see the chat widget.
 | Setting | Description |
| ------------------------- | ---------------------------------------------------------------------------------------------------------------------------------------------------------------------------------------------------------------- |
| **Visibility Percentage** | Set a value between 0 and 100 to control what percentage of visitors see the widget. For example, setting this to 50 means only 50% of visitors will see the chat widget. Set to 100 to show it to all visitors. |
### Tips
* Use visibility percentage for A/B testing -- show the widget to a subset of visitors to measure its impact on conversions.
* Set to 0 to temporarily hide the widget without removing the installation code from your website.
* This setting works on a per-visitor basis using randomization, so the same visitor may or may not see the widget across different sessions.
***
## Next Steps
* [Install the widget on your website](/docs/channel-setup/website-installation)
* [Configure bubble messages](/docs/channel-setup/website-bubble-messages)
| Setting | Description |
| ------------------------- | ---------------------------------------------------------------------------------------------------------------------------------------------------------------------------------------------------------------- |
| **Visibility Percentage** | Set a value between 0 and 100 to control what percentage of visitors see the widget. For example, setting this to 50 means only 50% of visitors will see the chat widget. Set to 100 to show it to all visitors. |
### Tips
* Use visibility percentage for A/B testing -- show the widget to a subset of visitors to measure its impact on conversions.
* Set to 0 to temporarily hide the widget without removing the installation code from your website.
* This setting works on a per-visitor basis using randomization, so the same visitor may or may not see the widget across different sessions.
***
## Next Steps
* [Install the widget on your website](/docs/channel-setup/website-installation)
* [Configure bubble messages](/docs/channel-setup/website-bubble-messages)